This is one of the interesting labs that I have done in the program.
Below are a couple of steps to automatically deploy WordPress via Ansible.
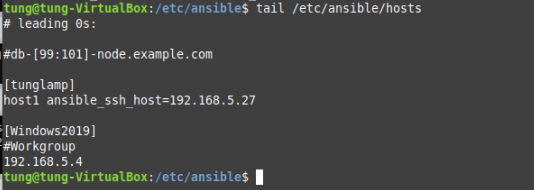
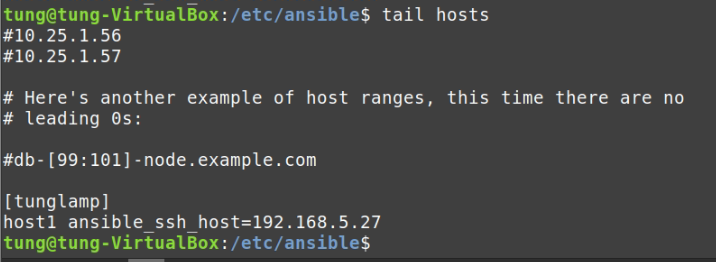
# /etc/ansible/hosts
[tunglamp]
host1 ansible_ssh_host=192.168.5.27
# Create a group_vars (/etc/ansible) and tunglamp file under this directory.
ansible_ssh_user: root
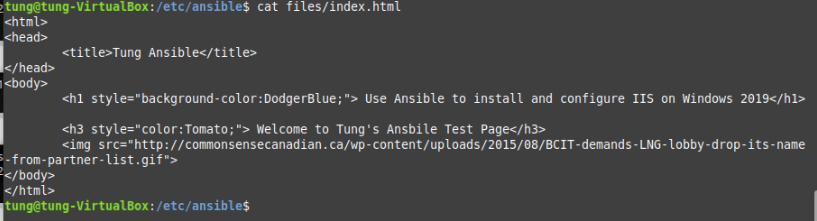
# Create a files (/etc/ansible) directory and index.html.j2 file.
<html>
<head>
<title>{{ firstname}} - {{ lastname }}</title>
</head>
<body>
<h1>{{ firstname }} - {{ lastname }}</h1>
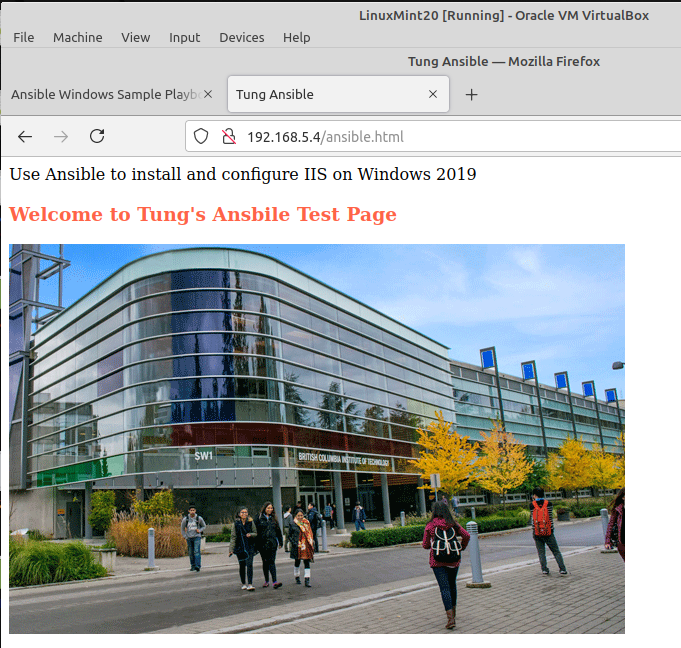
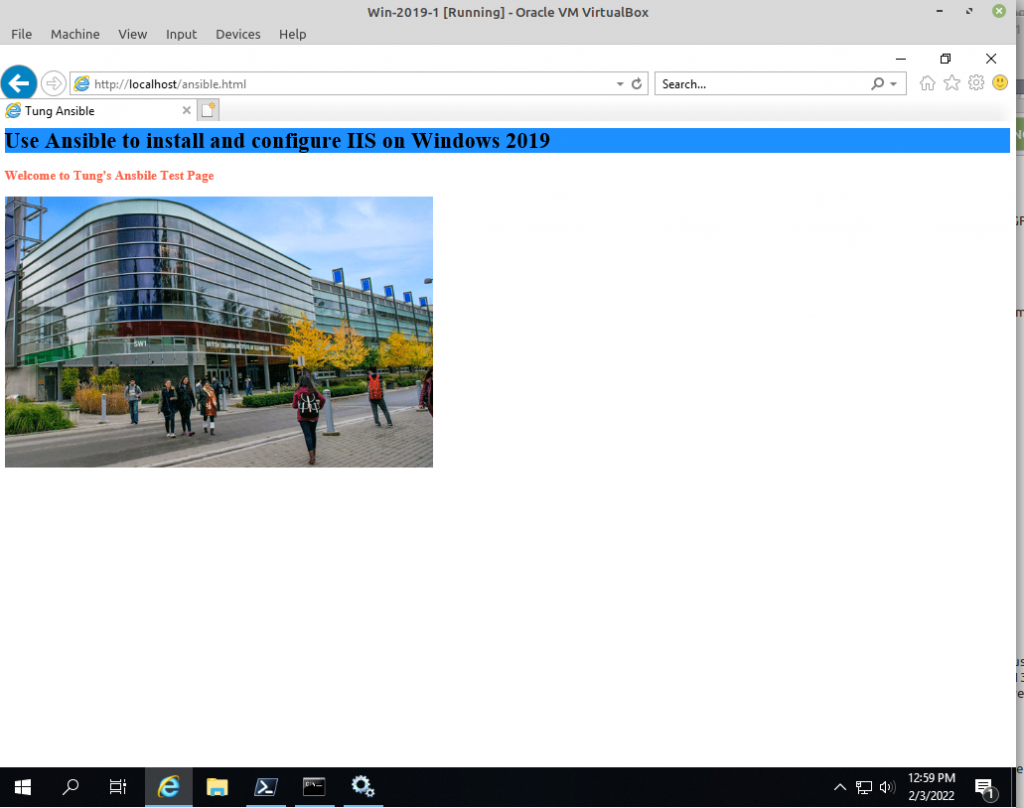
<h3>Welcome to Tung's Ansbile Test Page</h3>
<img src="http://xyz.ca/wp-content/uploads/2015/08/BCIT-demands-LNG-lobby-drop-its-name-from-partner-list.gif">
</body>
</html>
# Create a tungwordpress.yml file.
---
- hosts: tunglamp
become: root
gather_facts: false
# we can put variables here too that work in addition to what is in group_vars
ignore_errors: yes
vars:
firstname: "ABC"
lastname: "XYZ"
#auser: hellothere
ansible_ssh_user: root
wpdbname: tungdbname
wpdbuser: tungdbuser
wpdbpass: tungdbpass
wpdbhost: localhost
wppath: "/var/www/html"
tasks:
- name: Install apache2
apt: name=apache2 state=latest
- name: Install MySQL (really MariaDB now)
apt: name=mariadb-server state=latest
- name: Install MySQL python module
apt: name=python-mysqldb state=latest
- name: Install php
apt: name=php state=latest
- name: "Install php-cli"
apt: name=php-cli state=latest
# - name: "Install php-mcrypt"
# apt: name=php-mcrypt state=latest
- name: "Install php-gd"
apt: name=php-gd state=latest
- name: Install php-fpm
apt: name=php-fpm state=latest
- name: Install php-common
apt: name=php-common state=latest
- name: Install php-mbstring
apt: name=php-mbstring state=latest
- name: Install php-xmlrpc
apt: name=php-xmlrpc state=latest
- name: Install php-xml
apt: name=php-xml state=latest
- name: Install php zip
apt: name=php-zip state=latest
- name: Install php-curl
apt: name=php-curl state=latest
- name: Install apache2 php module
apt: name=libapache2-mod-php state=latest
- name: Install php-mysql
## your php installation appears to be missing the mysql extension if we have used ## apt: name=php-mysql state=latest
apt: name=php7.3-mysql state=latest
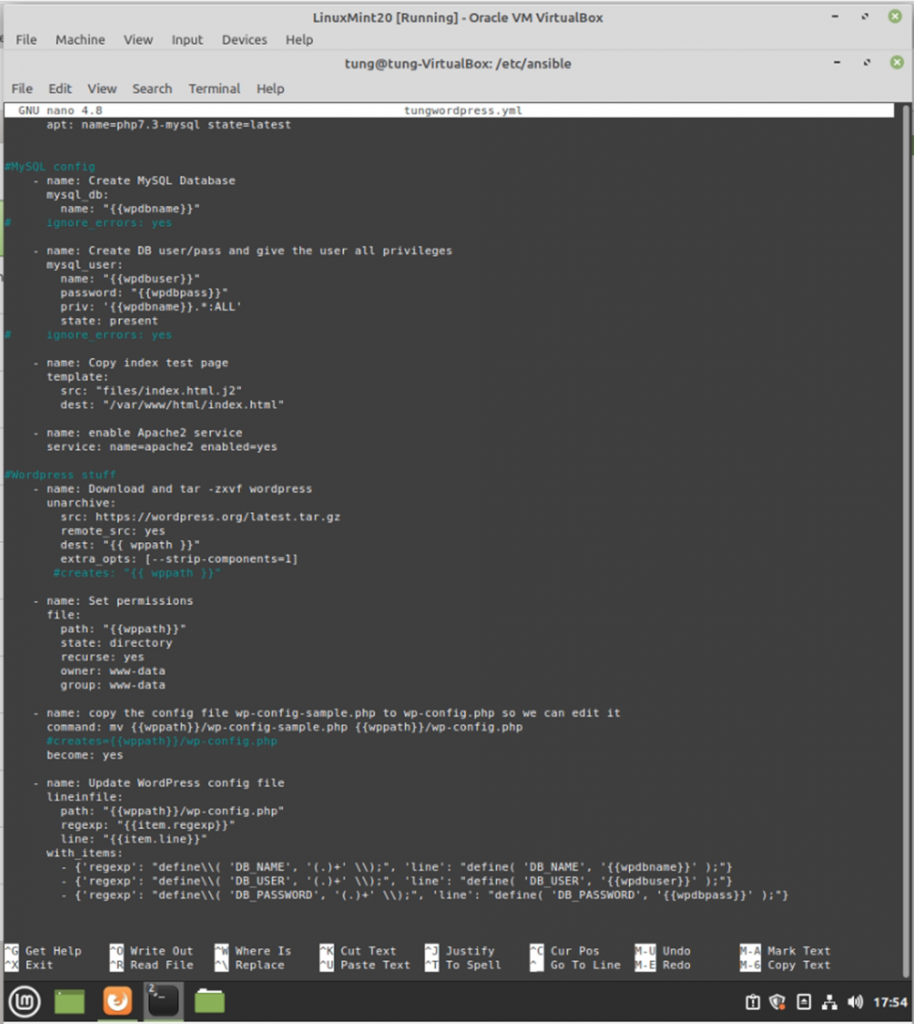
#MySQL config
- name: Create MySQL Database
mysql_db:
name: "{{wpdbname}}"
# ignore_errors: yes
- name: Create DB user/pass and give the user all privileges
mysql_user:
name: "{{wpdbuser}}"
password: "{{wpdbpass}}"
priv: '{{wpdbname}}.*:ALL'
state: present
# ignore_errors: yes
- name: Copy index test page
template:
src: "files/index.html.j2"
dest: "/var/www/html/index.html"
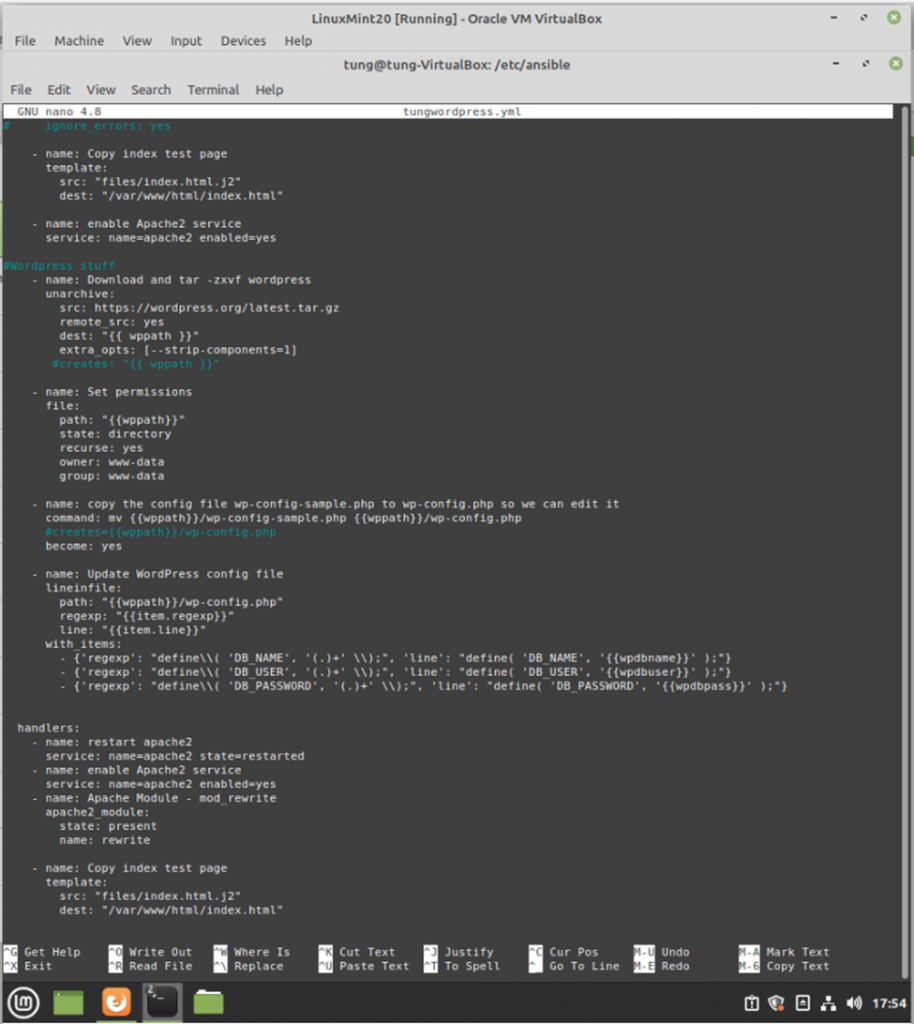
- name: enable Apache2 service
service: name=apache2 enabled=yes
#Wordpress stuff
- name: Download and tar -zxvf wordpress
unarchive:
src: https://wordpress.org/latest.tar.gz
remote_src: yes
dest: "{{ wppath }}"
extra_opts: [--strip-components=1]
#creates: "{{ wppath }}"
- name: Set permissions
file:
path: "{{wppath}}"
state: directory
recurse: yes
owner: www-data
group: www-data
- name: copy the config file wp-config-sample.php to wp-config.php so we can edit it
command: mv {{wppath}}/wp-config-sample.php {{wppath}}/wp-config.php
#creates={{wppath}}/wp-config.php
become: yes
- name: Update WordPress config file
lineinfile:
path: "{{wppath}}/wp-config.php"
regexp: "{{item.regexp}}"
line: "{{item.line}}"
with_items:
- {'regexp': "define\\( 'DB_NAME', '(.)+' \\);", 'line': "define( 'DB_NAME', '{{wpdbname}}' );"}
- {'regexp': "define\\( 'DB_USER', '(.)+' \\);", 'line': "define( 'DB_USER', '{{wpdbuser}}' );"}
- {'regexp': "define\\( 'DB_PASSWORD', '(.)+' \\);", 'line': "define( 'DB_PASSWORD', '{{wpdbpass}}' );"}
handlers:
- name: restart apache2
service: name=apache2 state=restarted
- name: enable Apache2 service
service: name=apache2 enabled=yes
- name: Apache Module - mod_rewrite
apache2_module:
state: present
name: rewrite
- name: Copy index test page
template:
src: "files/index.html.j2"
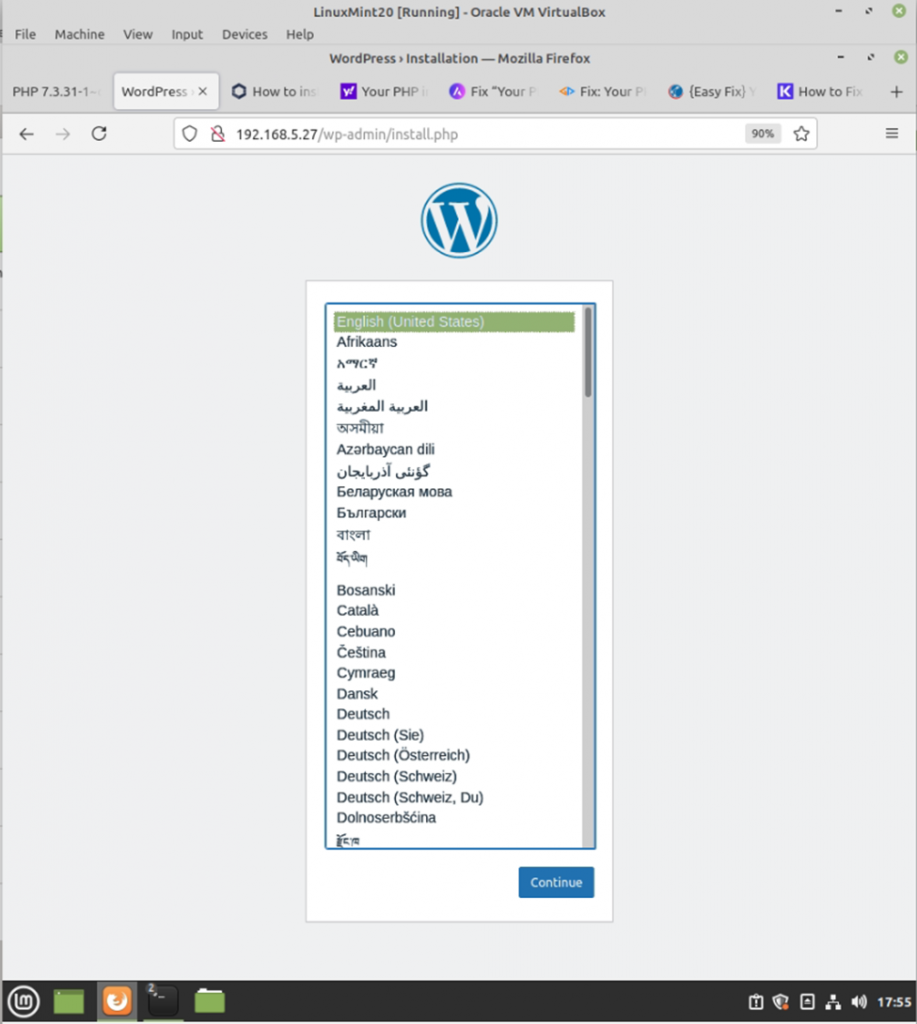
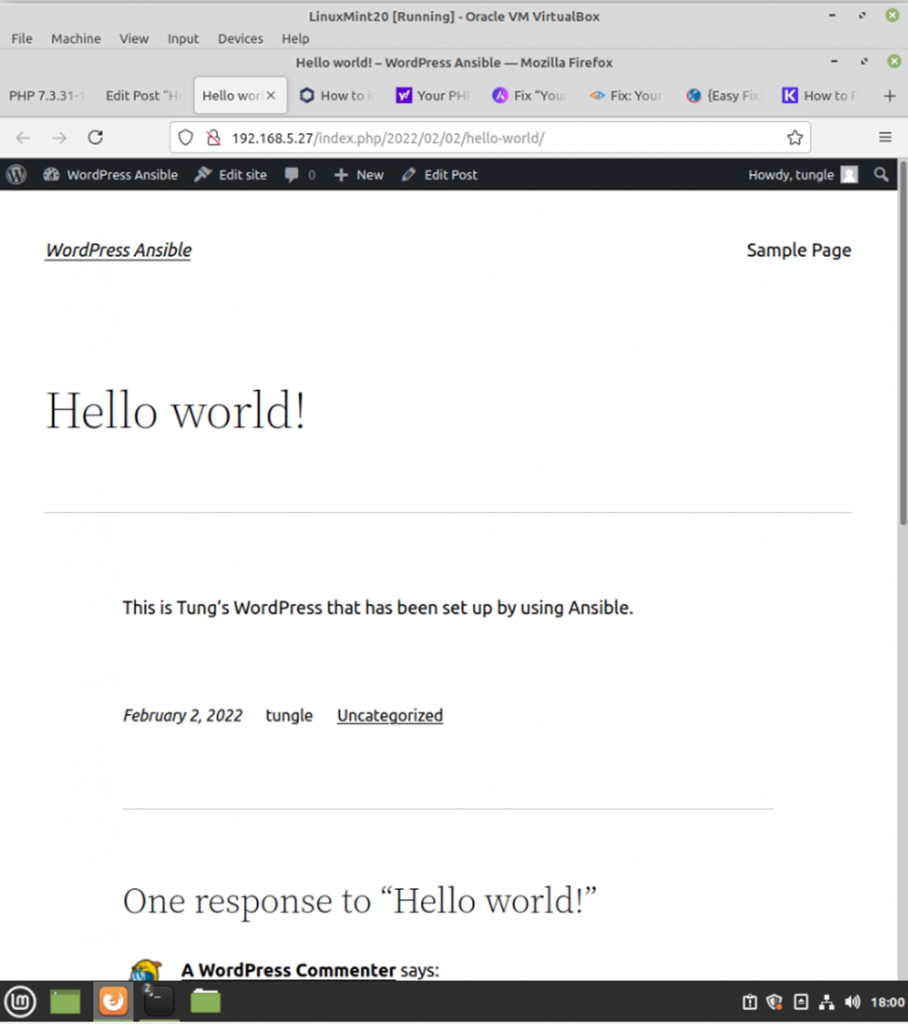
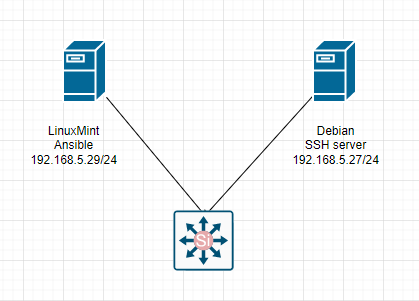
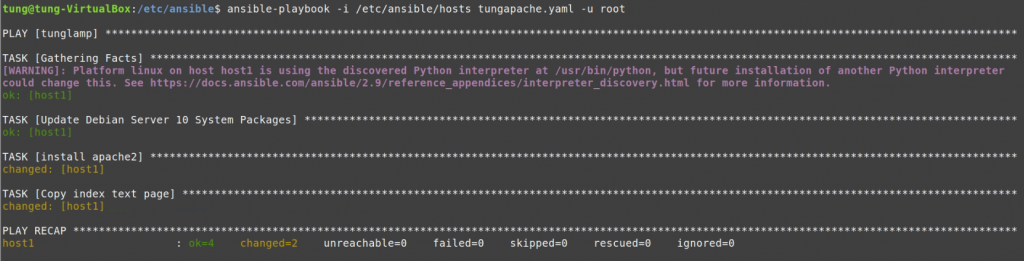
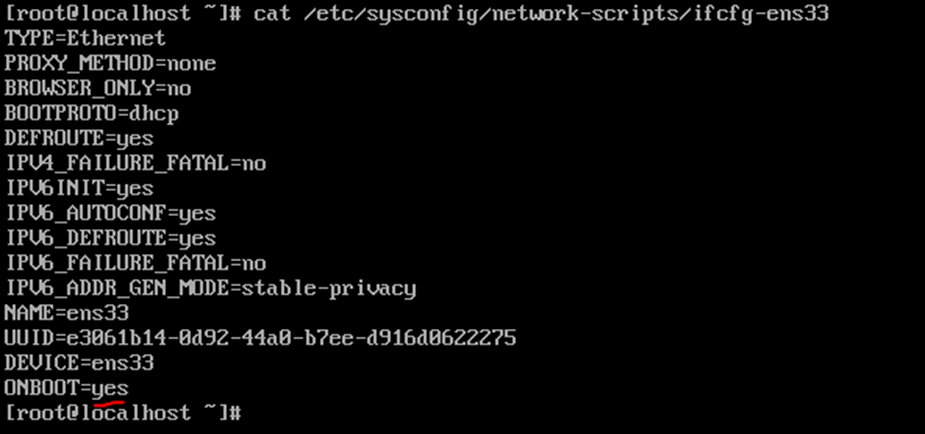
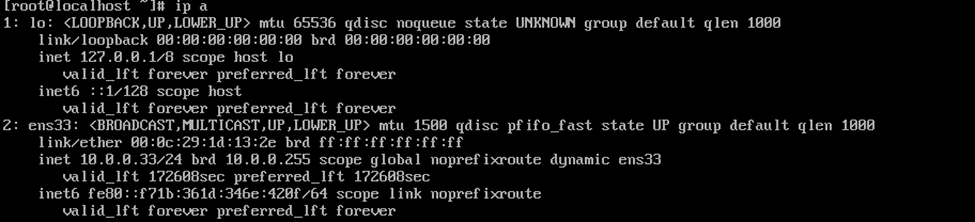
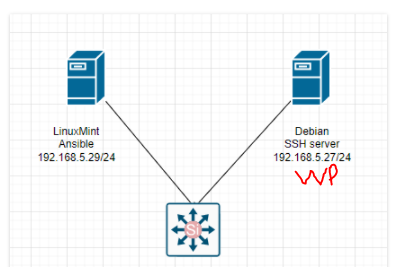
dest: "/var/www/html/index.html" The Debian server is running 192.168.5.27.
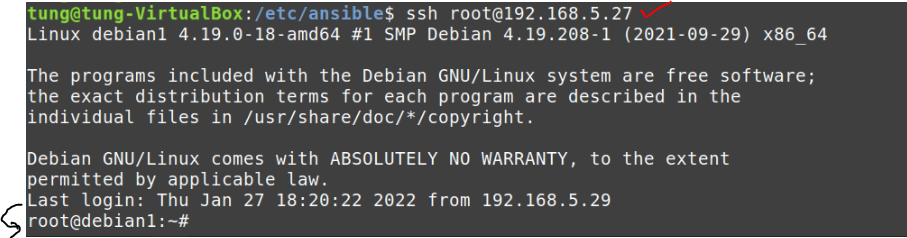
Make sure we can access SSH on the Debian server via public key authentication.
Run ansible-playbook
#/etc/ansible
ansible-playbook -i /etc/ansible/hosts tungwordpress.yml -u root
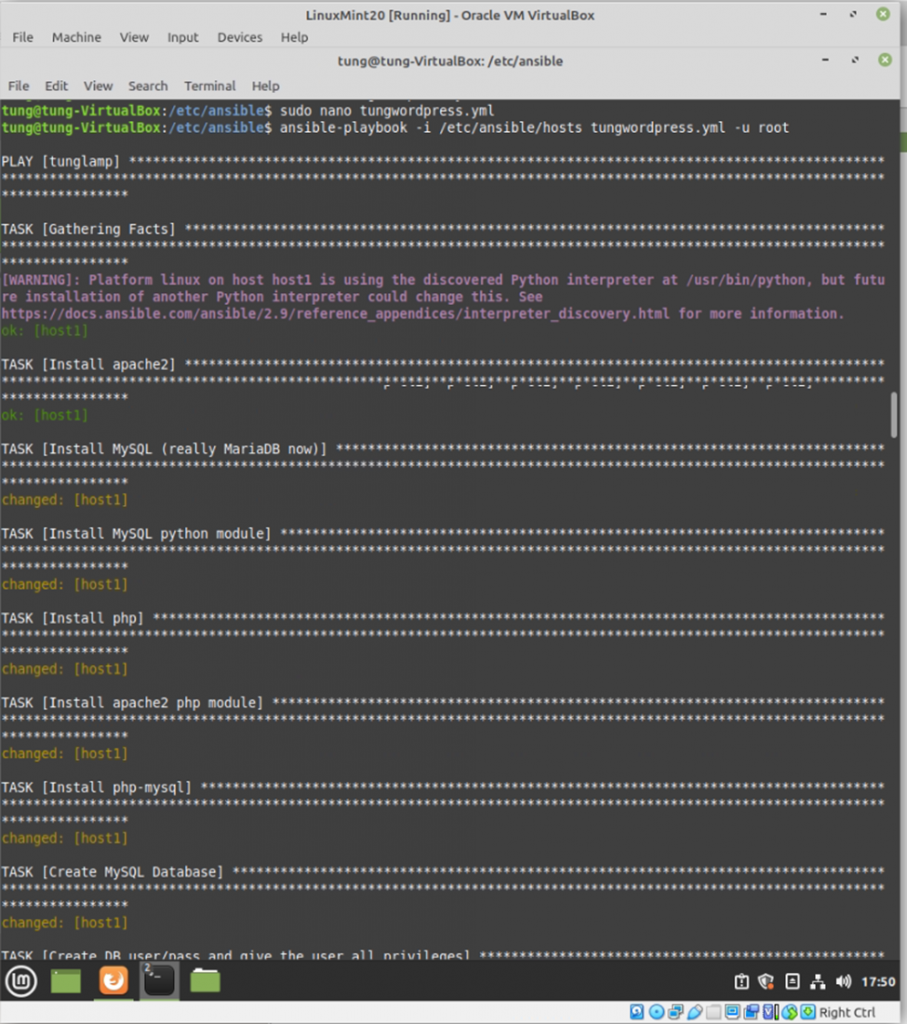
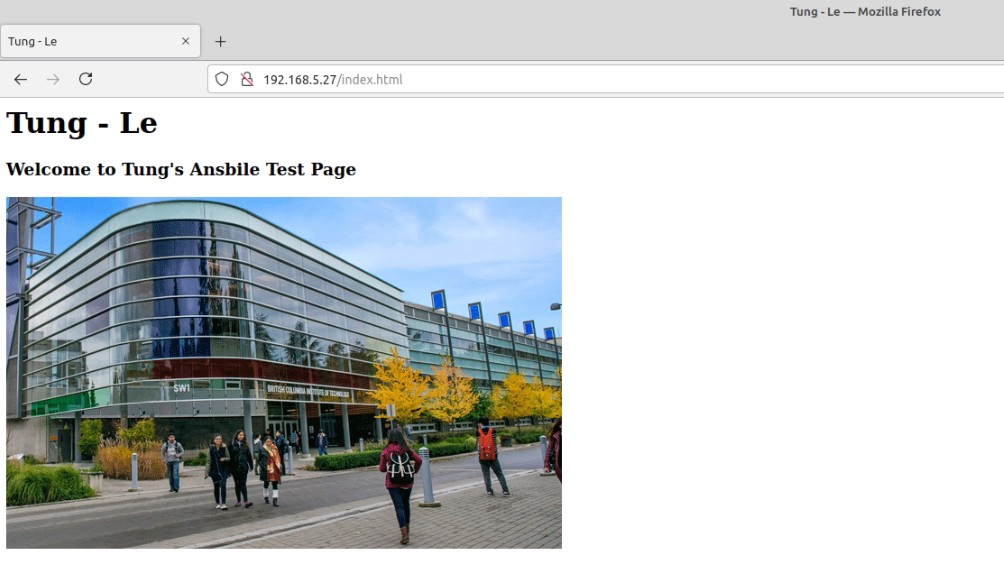
WordPress has been installed automatically via Ansible.