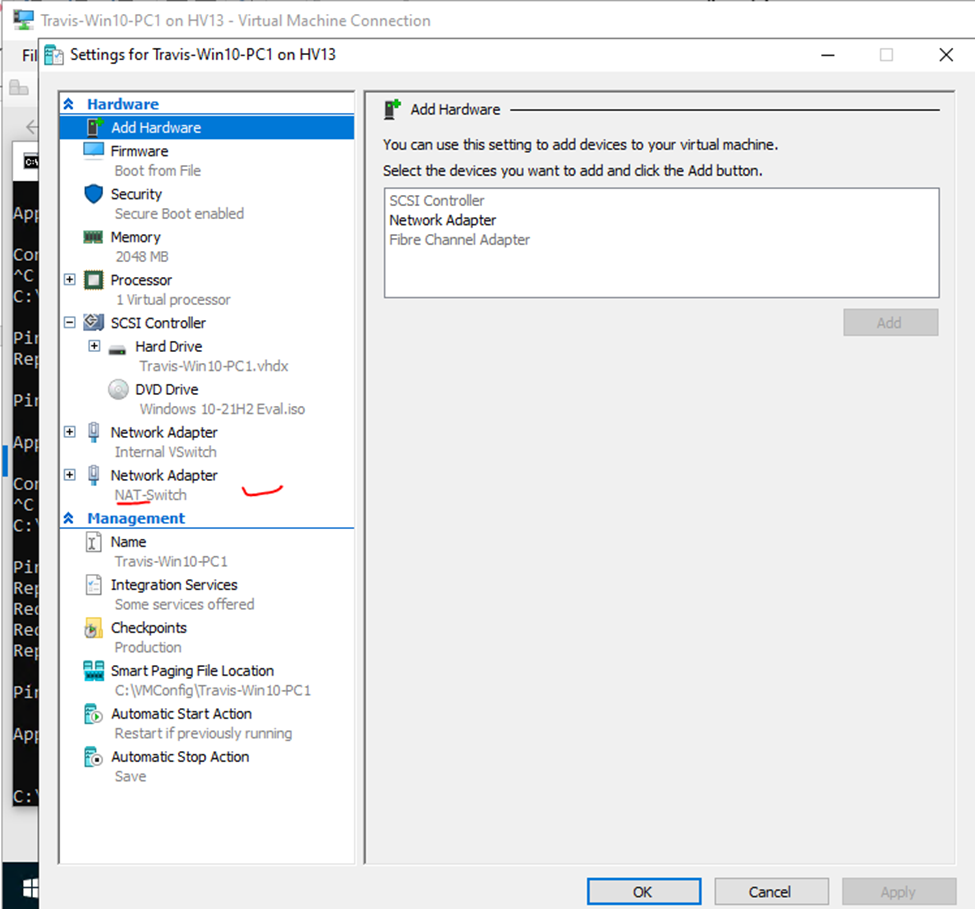
Below is a topology that is used to configure DMVPN over IPSEC. This is one of the most important topics that I have learned on CCNP ENCOR.

HUB Configuration:
int tun 0
ip addr 10.40.1.1 255.255.255.0
ipv6 addr 2001:10:40:1::1/64
ipv6 addr fe80::1 link-local
tu source gig 0/0
tun mode gre multipoint
ip nhrp authentication Cisco123
# Using NHRP to define tunnel destination on remote sites.
ip nhrp network-id 1
ip nhrp map multicast dynamic
ipv6 nhrp network-id 1
ipv6 nhrp map multicast dynamic
SPOKE Configuration:
# Site 1:
int tun 0
ip addr 10.40.1.2 255.255.255.0
ipv6 addr 2001:10:40:1::2/64
ipv6 addr fe80::2 link-local
tu source gig 0/0
tun mode gre multipoint
ip nhrp authentication Cisco123
# Using NHRP to define tunnel destination on remote sites.
ip nhrp network-id 1
ip nhrp nhs 10.40.1.1 nbma 150.40.1.1 multicast
ipv6 nhrp network-id 1
ipv6 nhrp nhs 2001:10:40:1::1 nbma 150.40.1.1 multicast
# Site 2:
int tun 0
ip addr 10.40.1.3 255.255.255.0
ipv6 addr 2001:10:40:1::3/64
ipv6 addr fe80::2 link-local
tu source gig 0/0
tun mode gre multipoint
ip nhrp authentication Cisco123
# Using NHRP to define tunnel destination on remote sites.
ip nhrp network-id 1
ip nhrp nhs 10.40.1.1 nbma 150.40.1.1 multicast
ipv6 nhrp network-id 1
ipv6 nhrp nhs 2001:10:40:1::1 nbma 150.40.1.1 multicast
# Site 3:
int tun 0
ip addr 10.40.1.4 255.255.255.0
ipv6 addr 2001:10:40:1::4/64
ipv6 addr fe80::2 link-local
tu source gig 0/0
tun mode gre multipoint
ip nhrp authentication Cisco123
# Using NHRP to define tunnel destination on remote sites.
ip nhrp network-id 1
ip nhrp nhs 10.40.1.1 nbma 150.40.1.1 multicast
ipv6 nhrp network-id 1
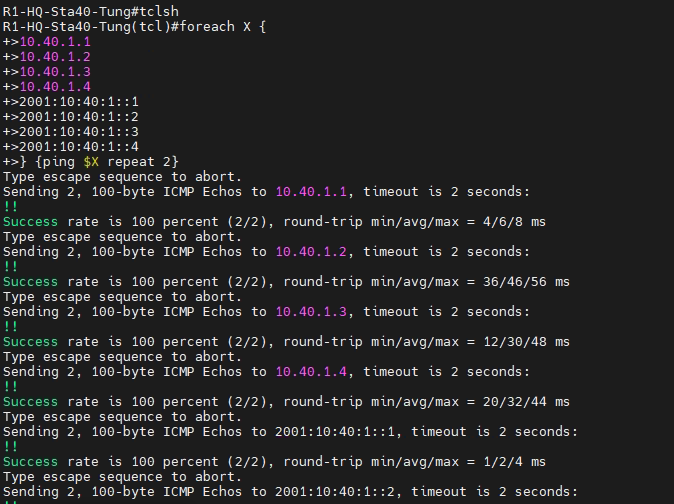
ipv6 nhrp nhs 2001:10:40:1::1 nbma 150.40.1.1 multicastUsing a nice TCLSH script to test connectivity between sites.
tclsh

foreach X {
10.40.1.1
10.40.1.2
10.40.1.3
10.40.1.4
2001:10:40:1::1
2001:10:40:1::2
2001:10:40:1::3
2001:10:40:1::4
} {ping $X repeat 2}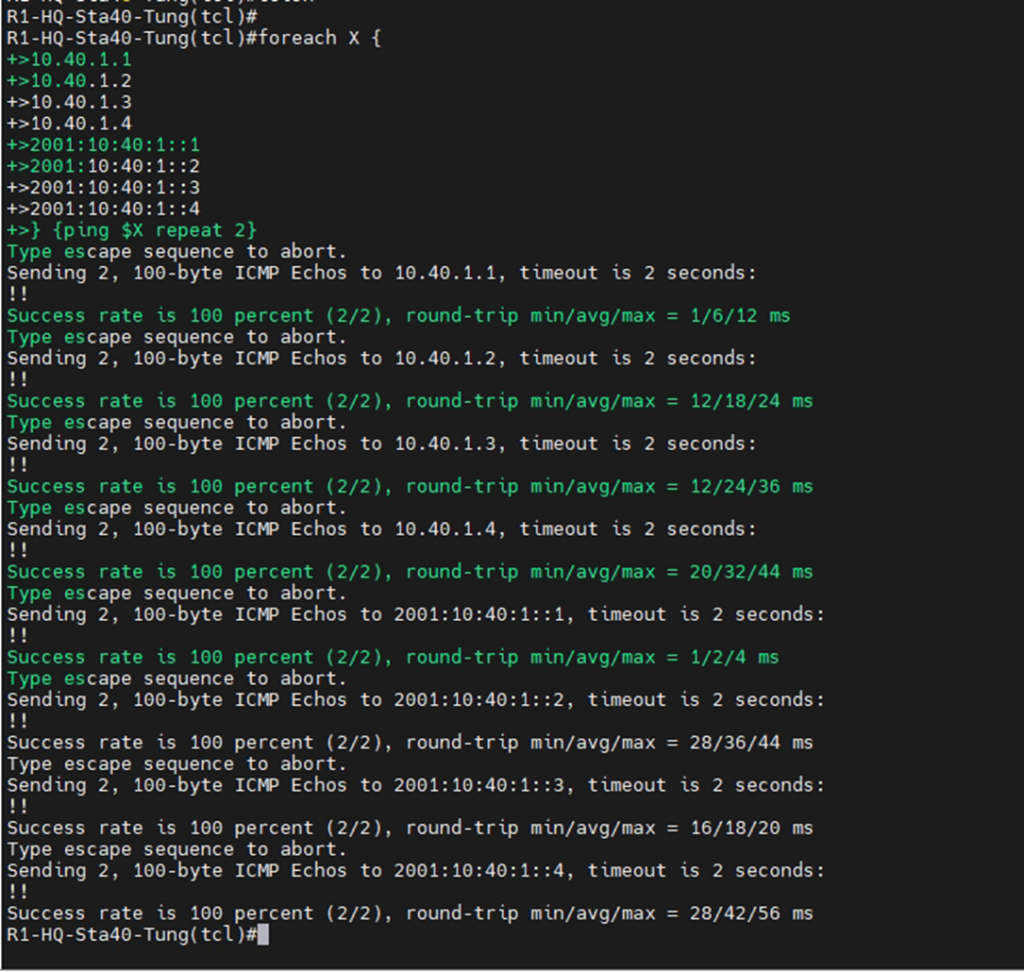
#sh ip nhrp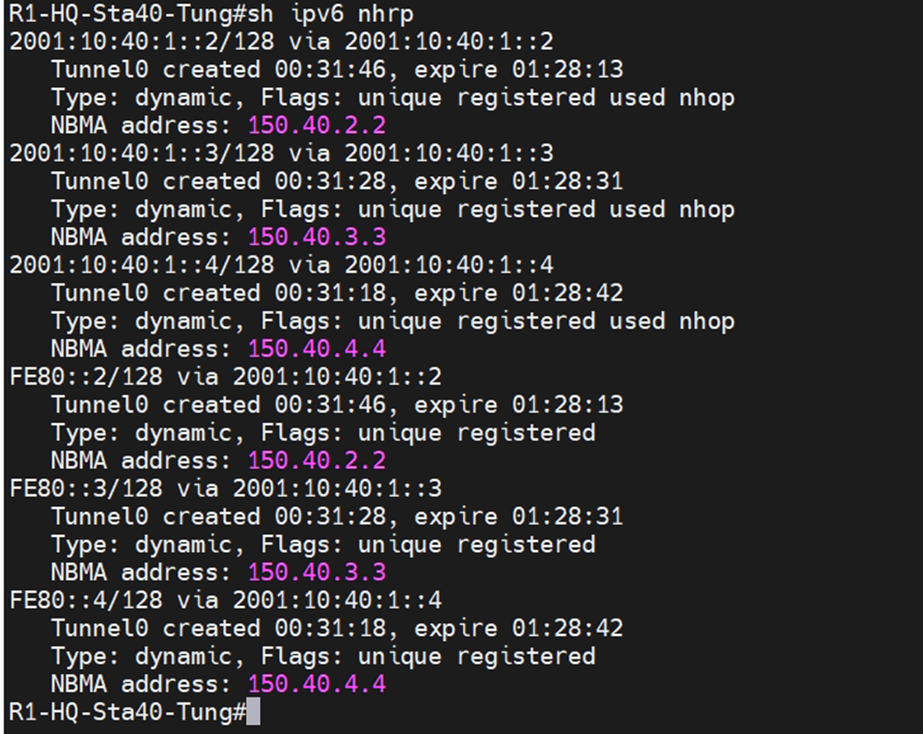
# sh ipv6 nhrp 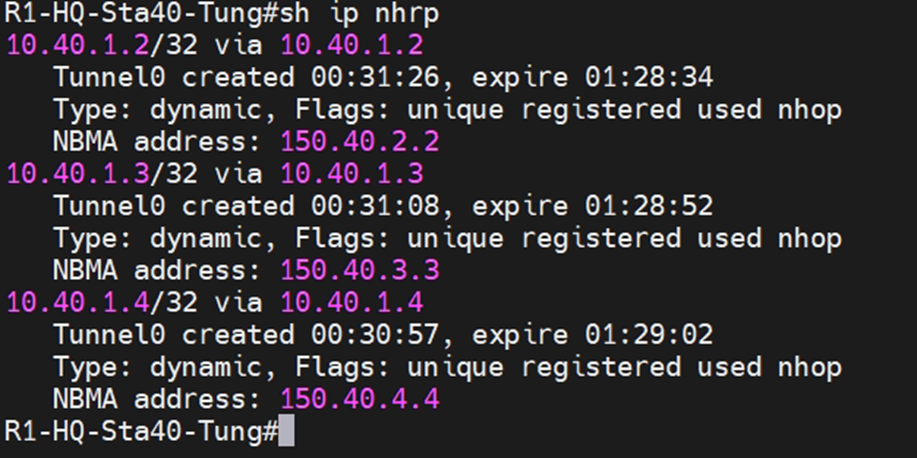
# sh dmvpn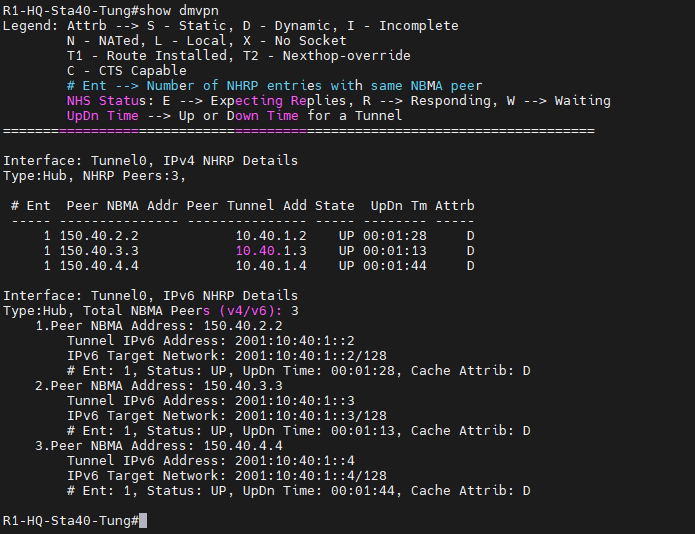
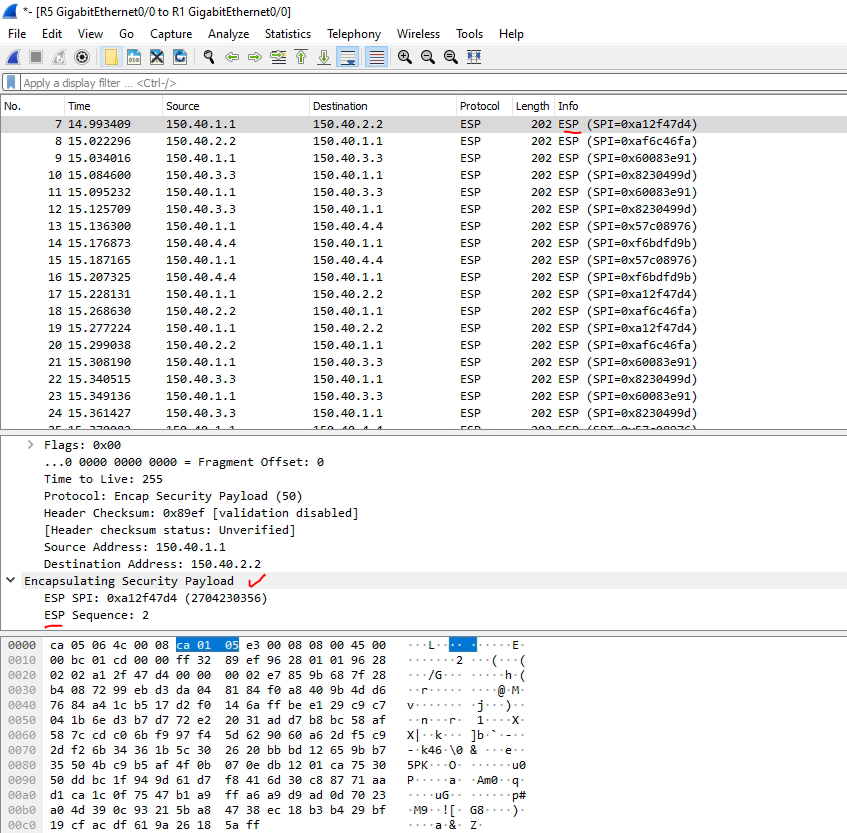
+ Using IPSec tunnel to protect DMVPN traffic.
- IKE Configuration
crypto keyring VPN-BCITCISA
 pre-shared-key address 0.0.0.0 0.0.0.0 key Pa$$w0rd

crypto isakmp enable

crypto isakmp policy 10
 encryption aes 256
 hash sha
 authentication pre-share
 group 5

crypto isakmp profile ISAKMP-Profile
 Keyring VPN-BCITCISA
Match identity address 0.0.0.0- IPsec Configuration
crypto ipsec transform-set IPSEC-TRANSFORM esp-aes 256 esp-sha256-hmac

crypto ipsec profile DMVPN
 set security-association lifetime seconds 120
 set transform-set IPSEC-TRANSFORM
 set isakmp-profile ISAKMP-Profile
set pfs group2- Apply the profile to the interface Tunnel0
Interface Tunnel0
tunnel protection ipsec profile DMVPN
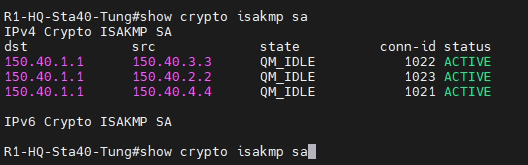
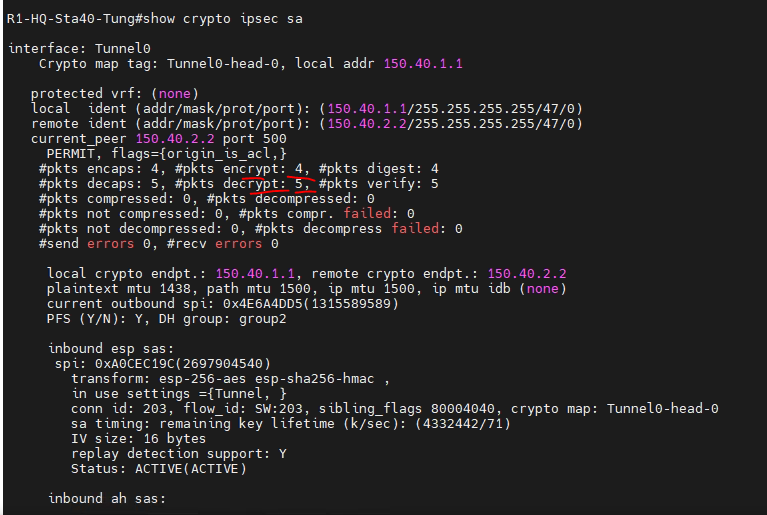
+ Verify DMVPN over IPSEC:
#show dmvpn detail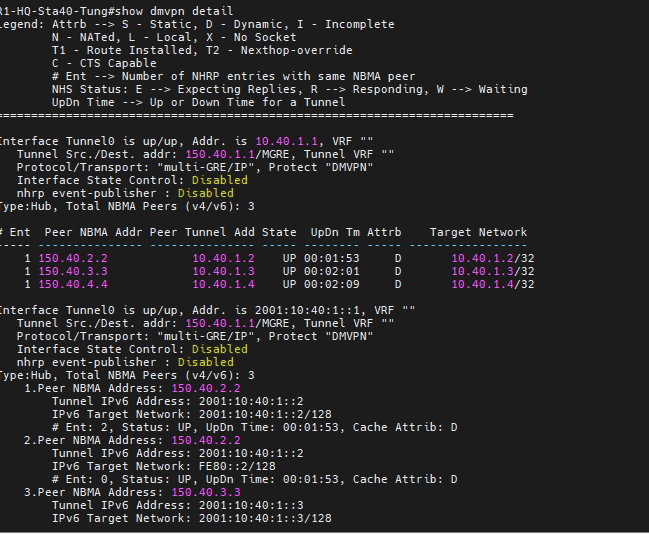
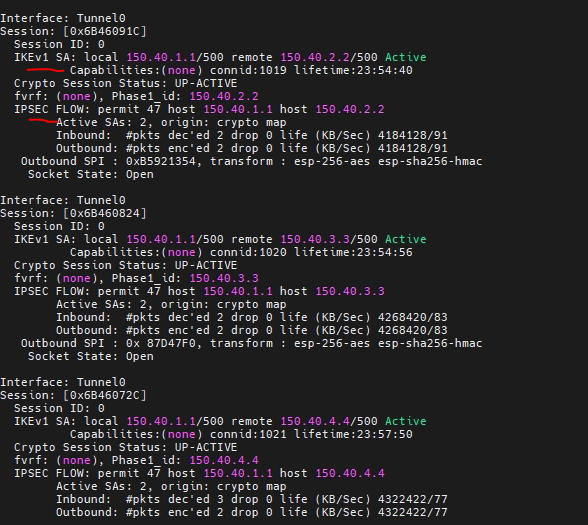
# show crypto isakmp sa