Ceph is an open-source distributed software solution. It is designed to serve block, file, and object workloads for a cluster system. There are a lot of advantages when using Ceph. Ceph supports distributed object storage on multiple cluster nodes, provides redundancy between cluster nodes and is able to scale out cluster storage nodes with Ceph.
Ceph is able to run on commodity hardware without vendor lock-in. Moreover, Ceph is also a unified storage infrastructure that supports storage clusters that may grow or shrink and allows to add and remove hardware while the Ceph cluster is online.
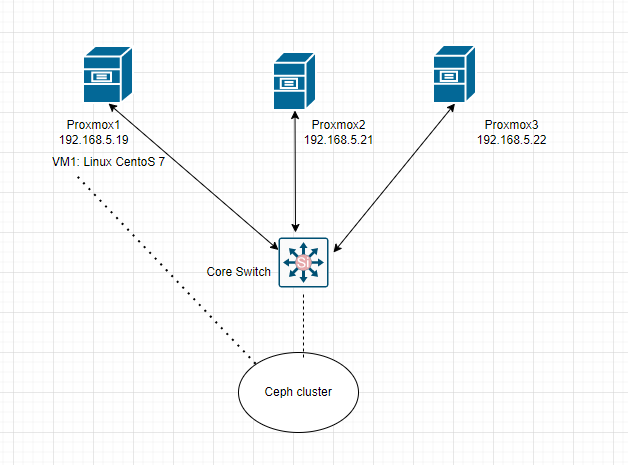
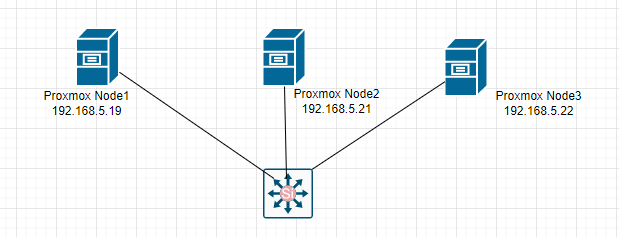
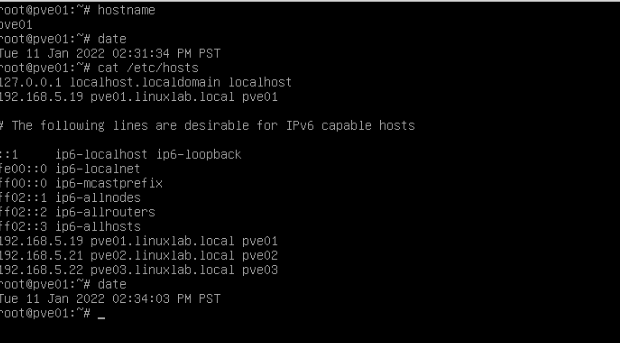
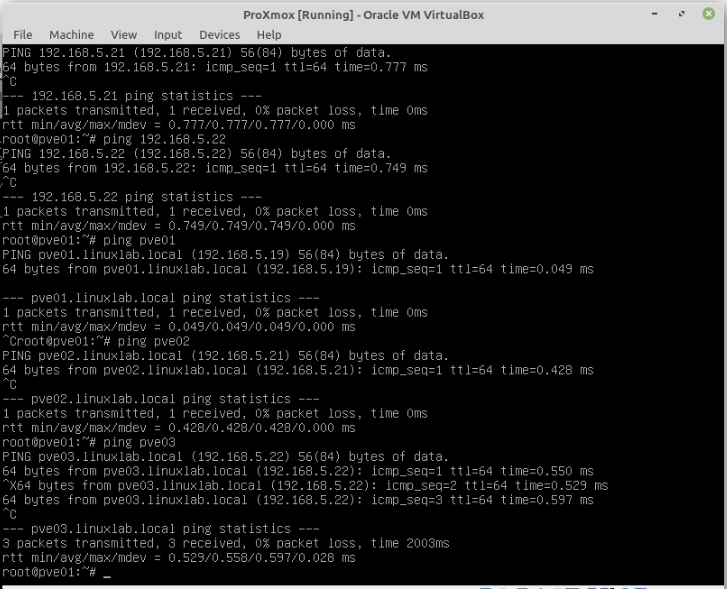
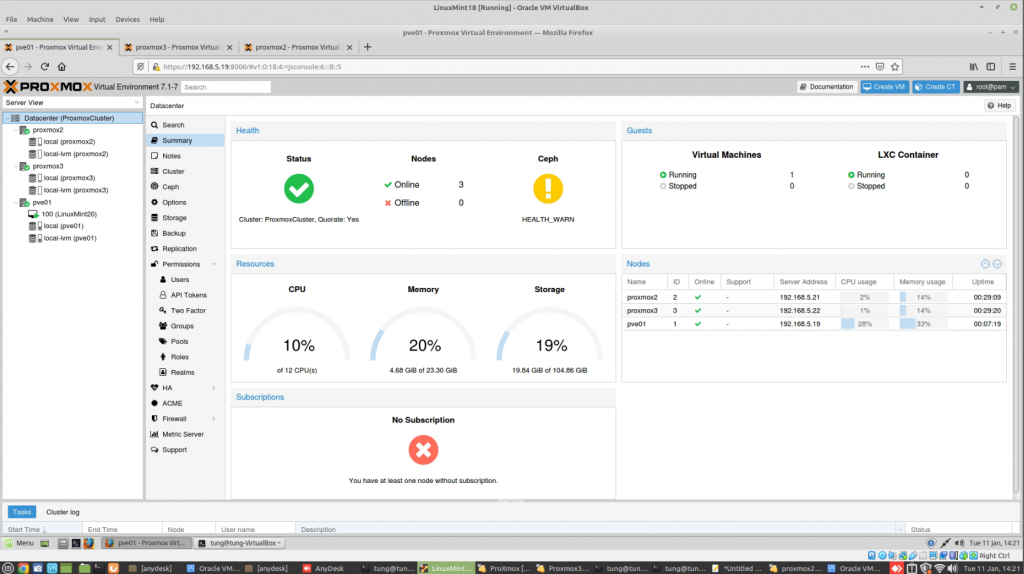
This lab below is used to deploy three Proxmox nodes on the Ceph clsuter.
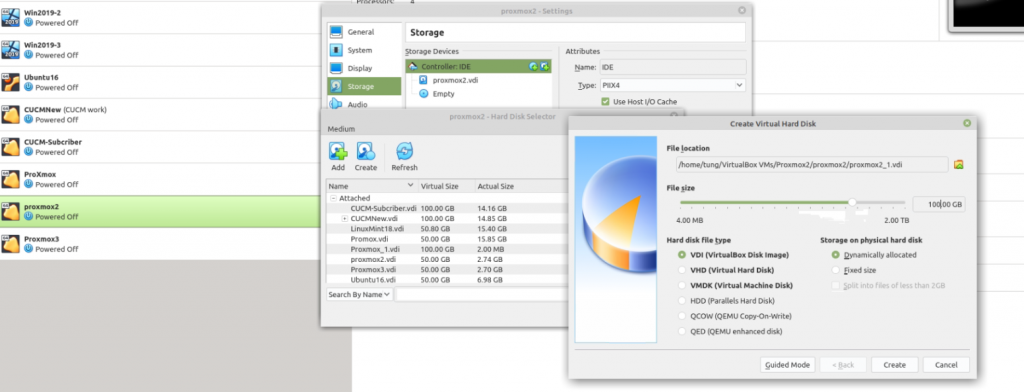
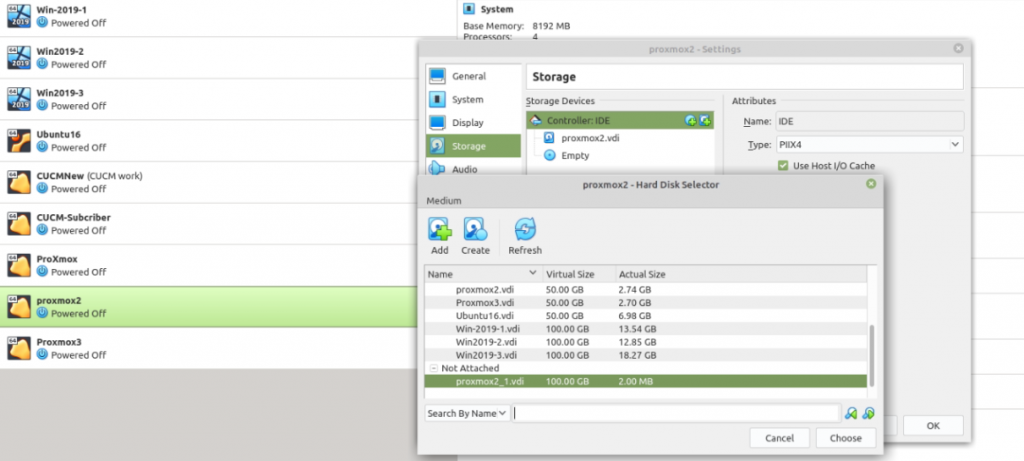
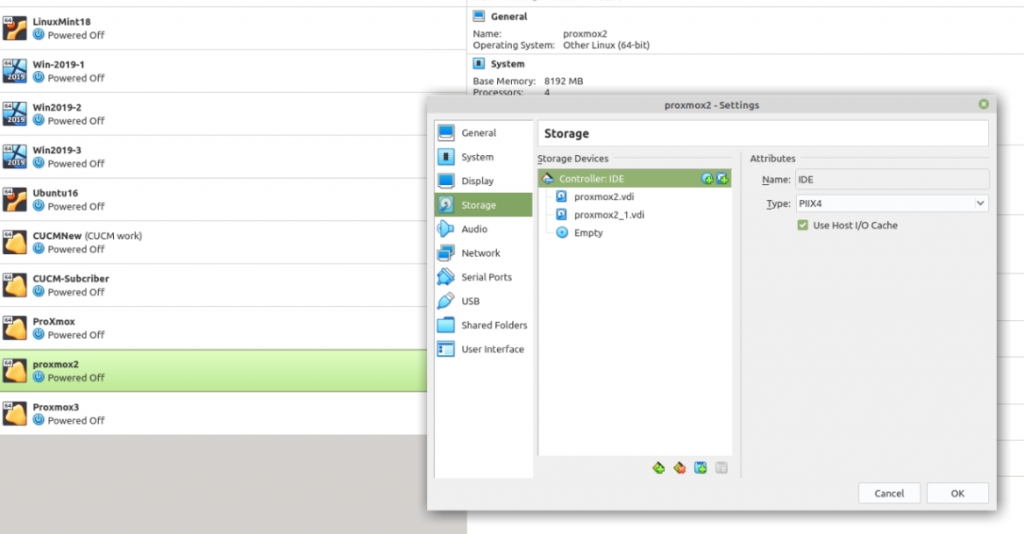
Add a new second hard drive on Proxmox1, Proxmox2, and Proxmox3 nodes.
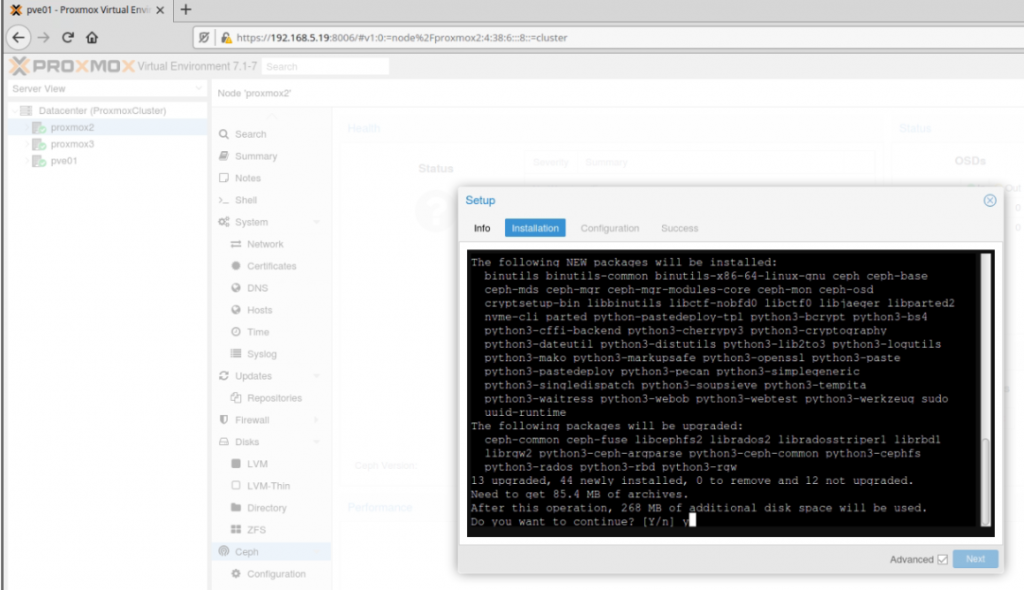
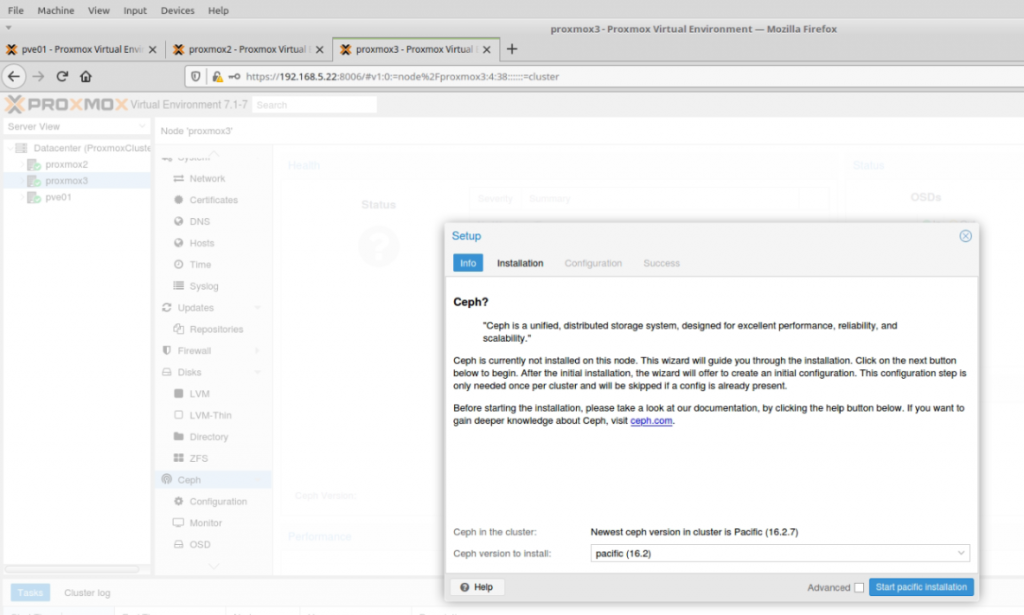
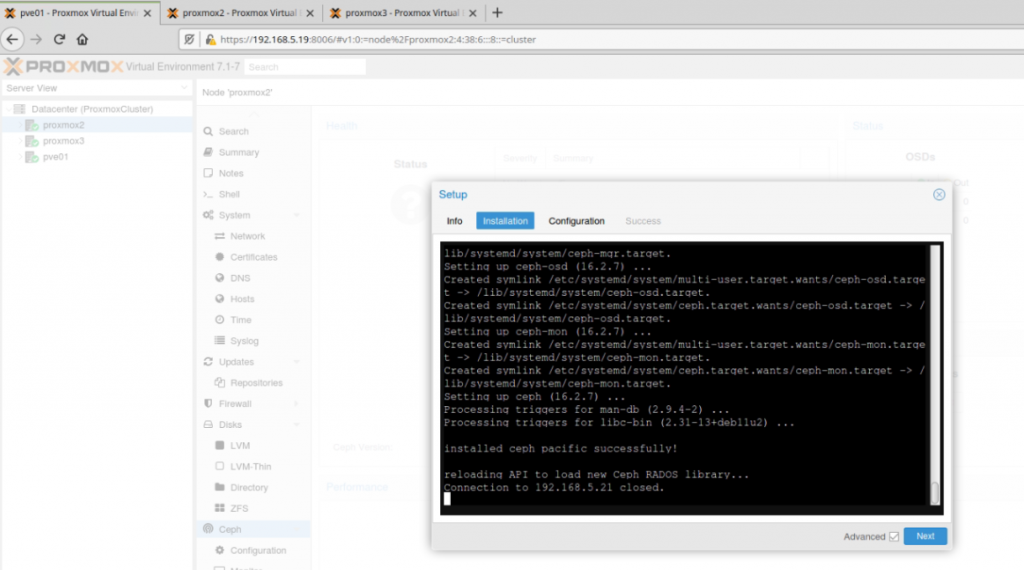
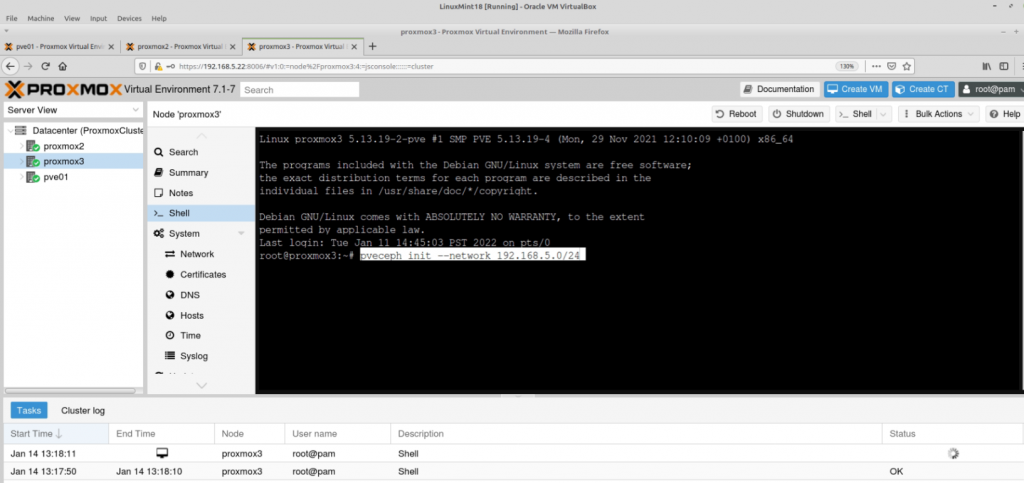
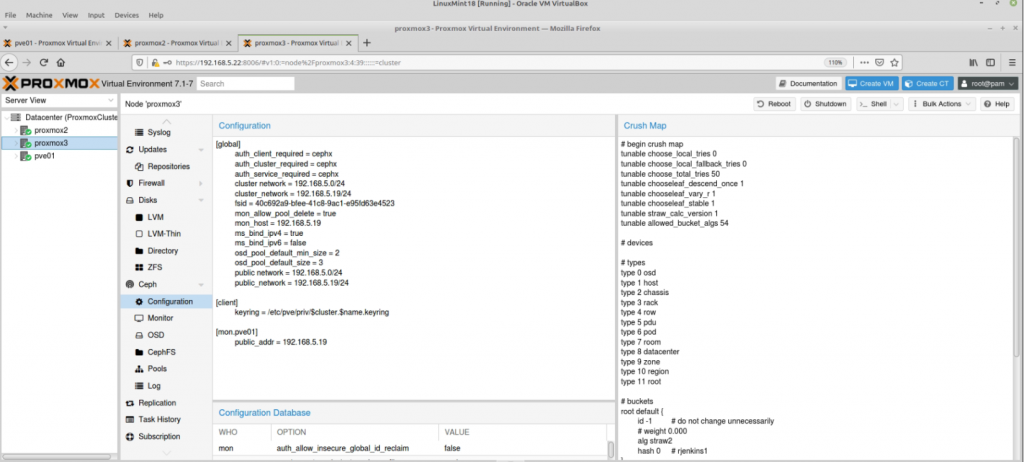
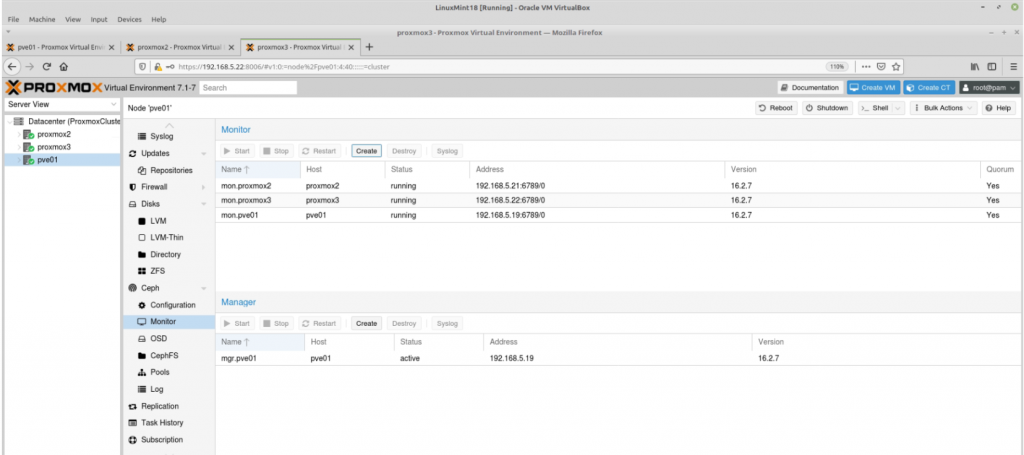
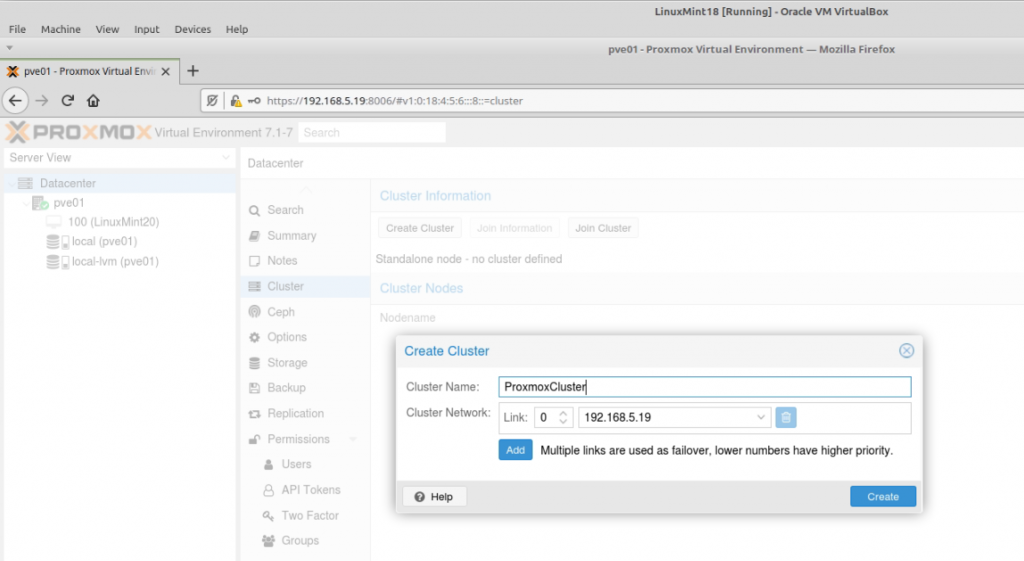
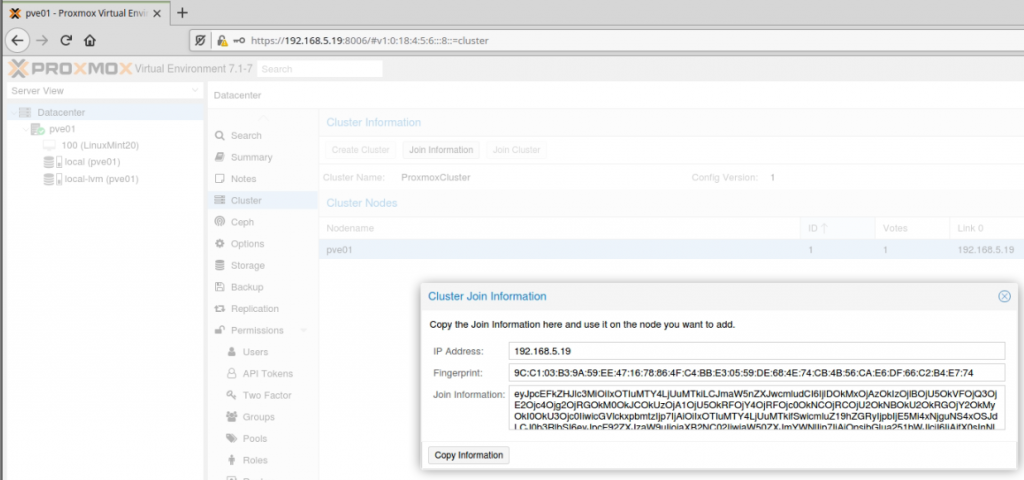
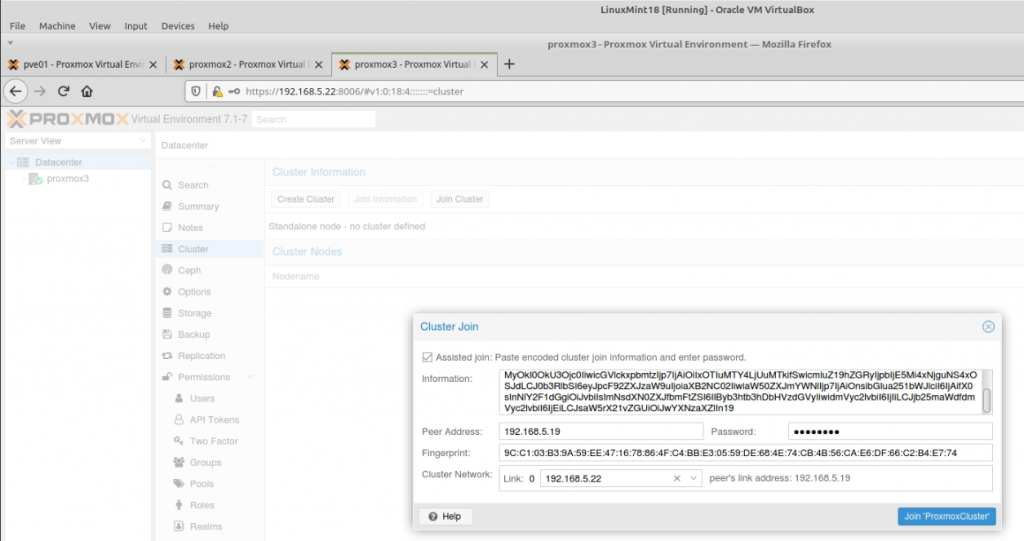
Install Ceph cluster on node 1.
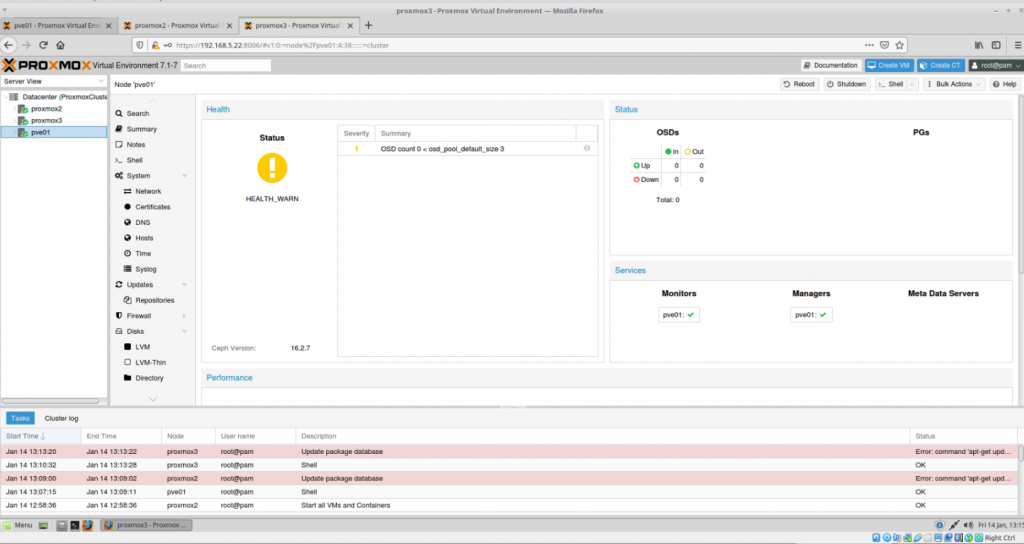
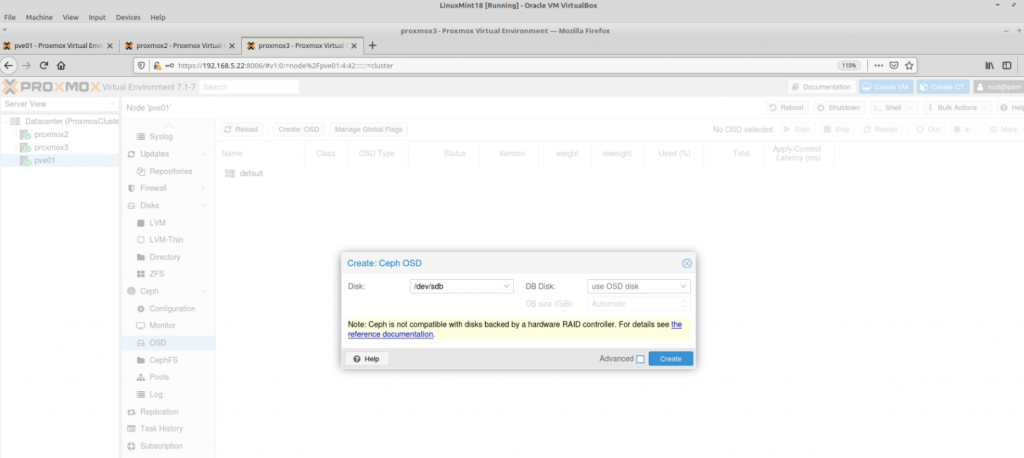
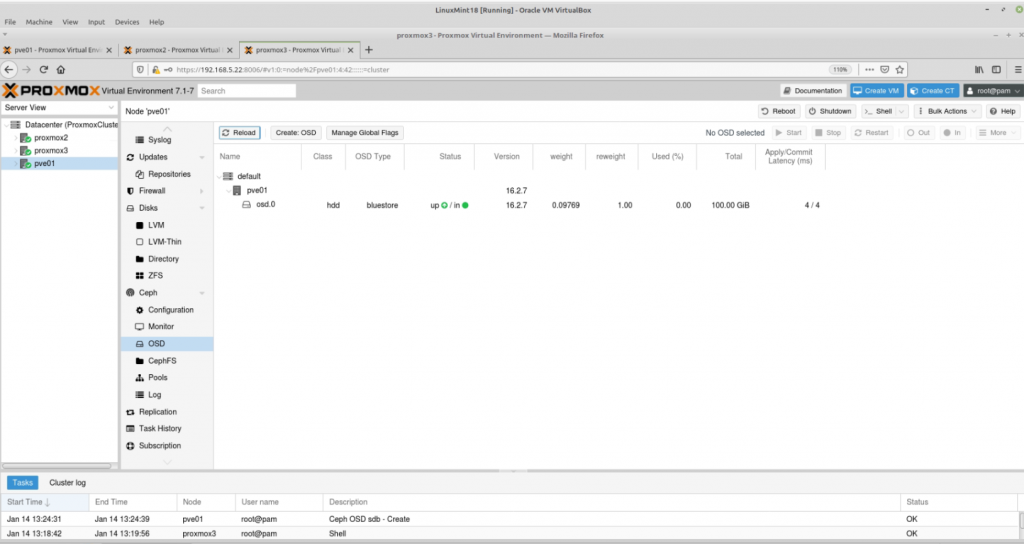
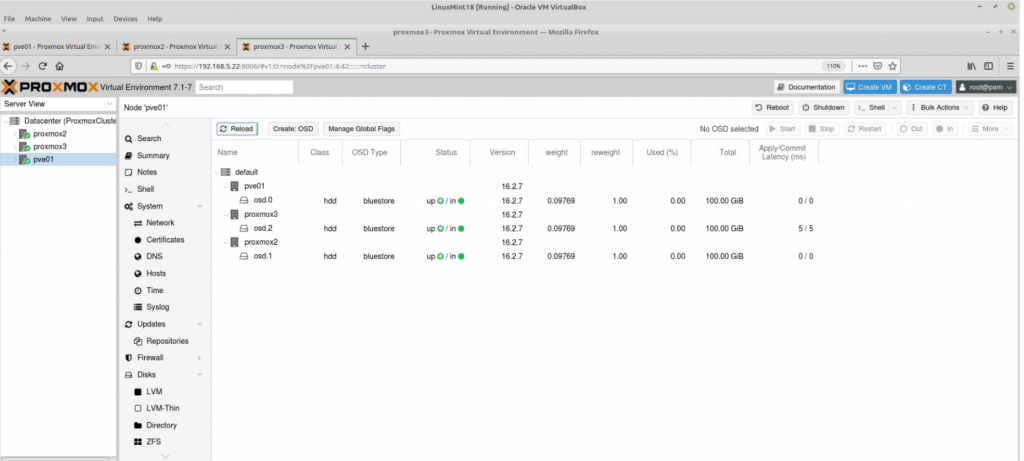
Create an OSD on Proxmox node 1, node 2 and node 3.
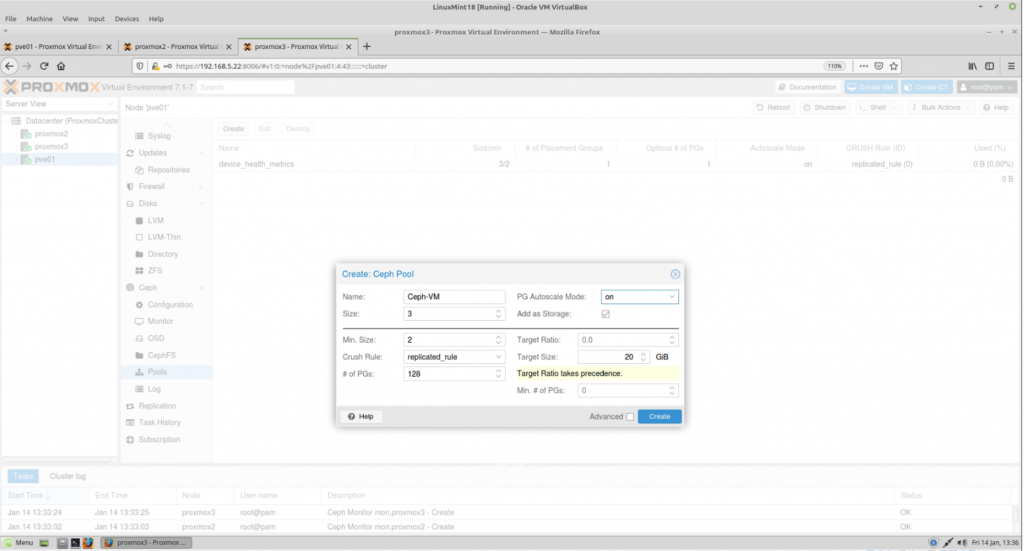
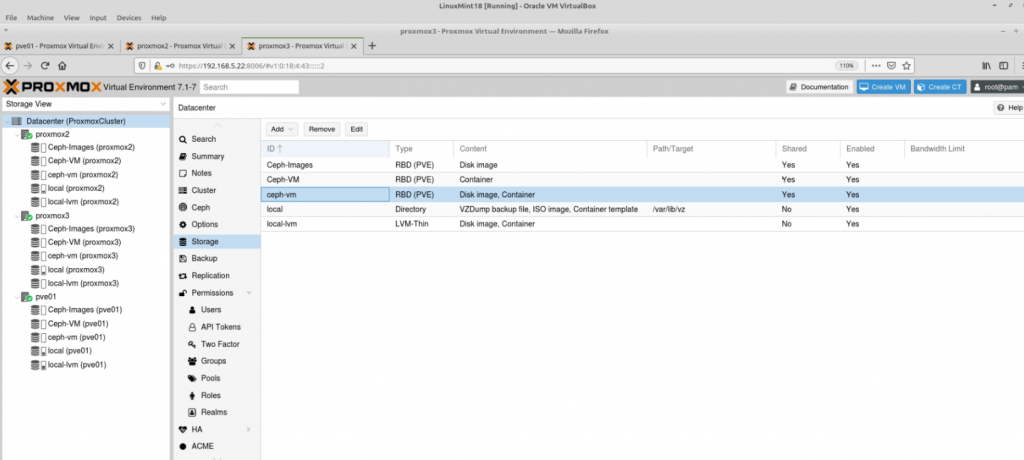
Create Ceph Pool on Ceph storage.
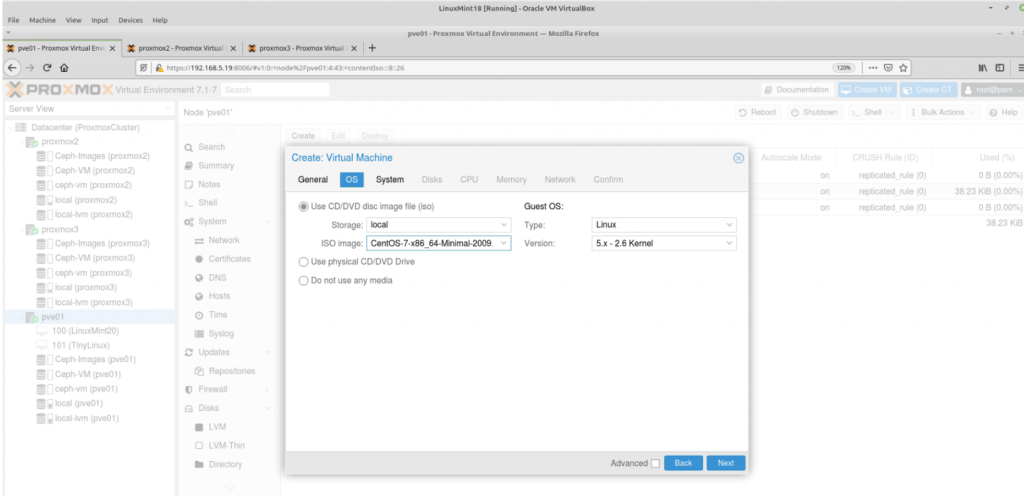
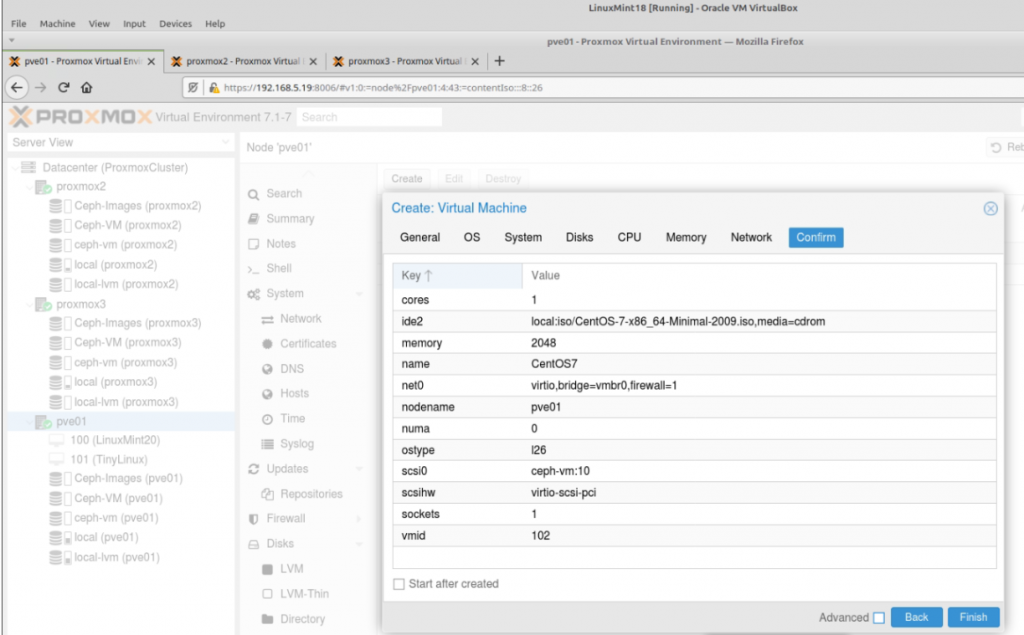
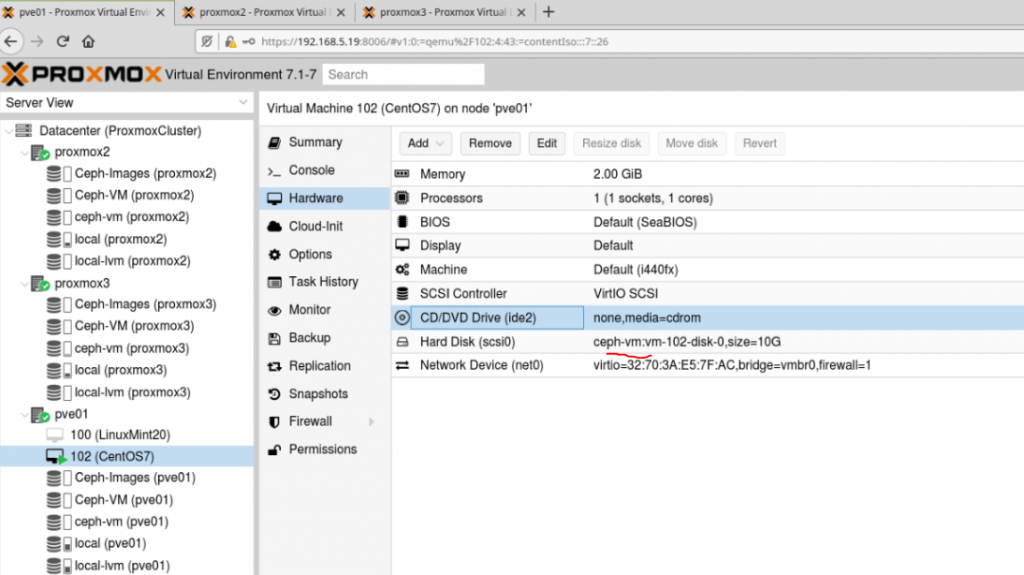
Create a new Linux VM on Ceph.
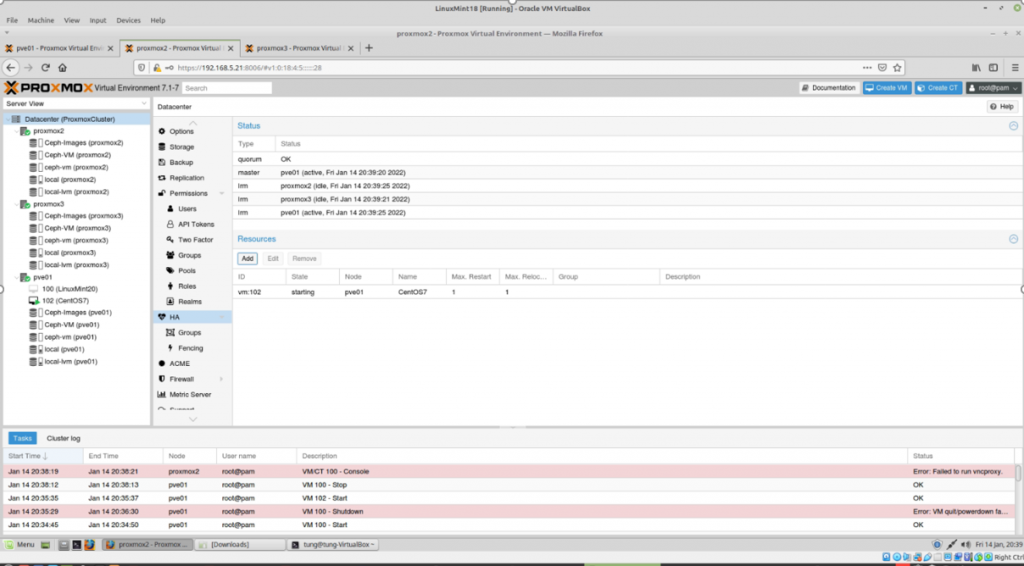
Add this machine to the HA Ceph.
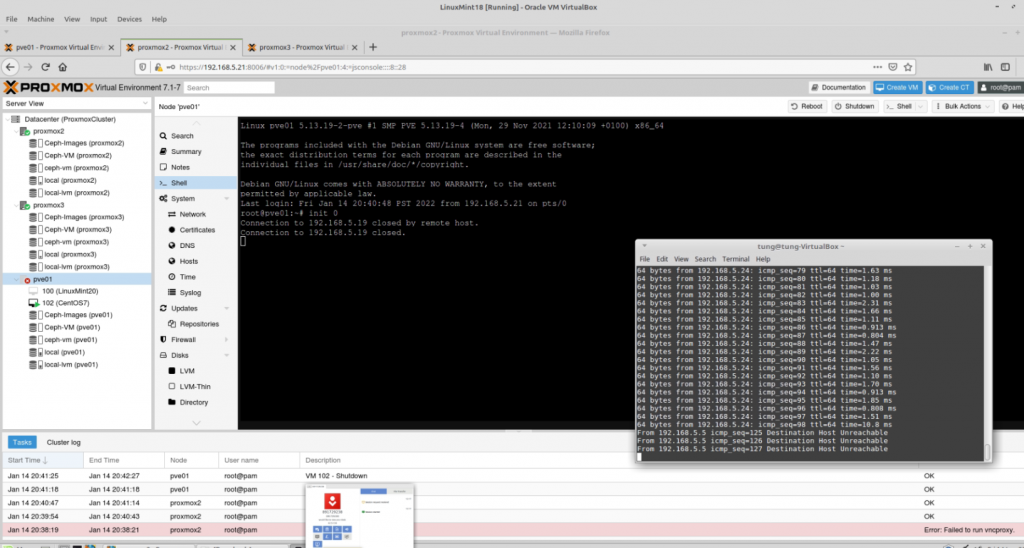
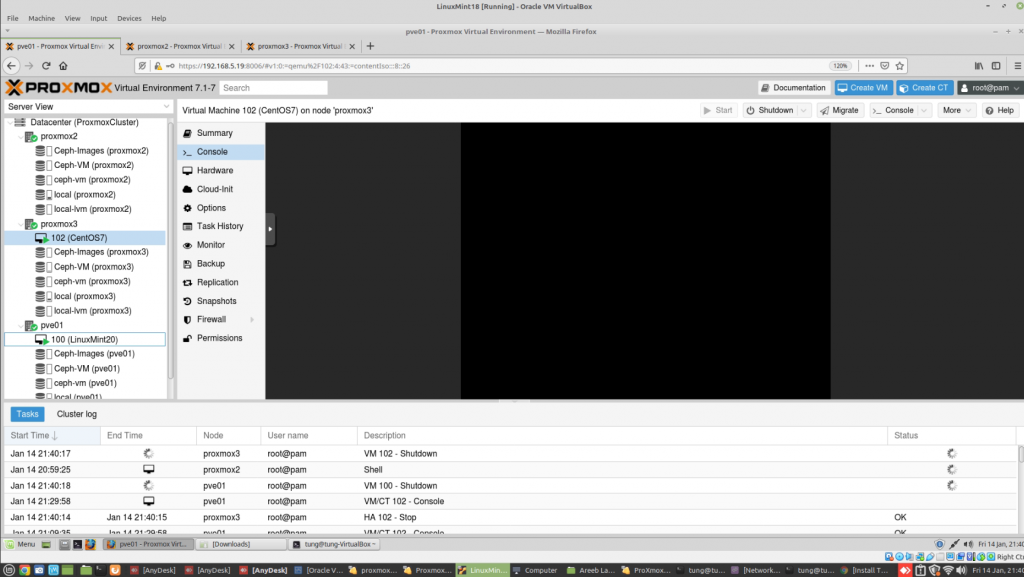
Hard turn off the Proxmox node1.
Linux VM has been migrated to Proxmox node2 with a couple of minutes of downtime.
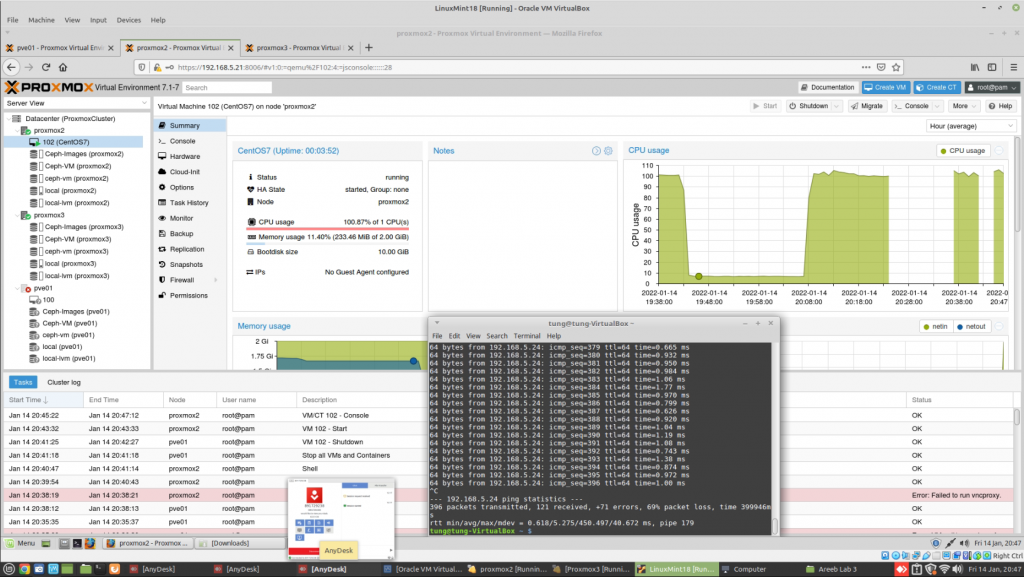
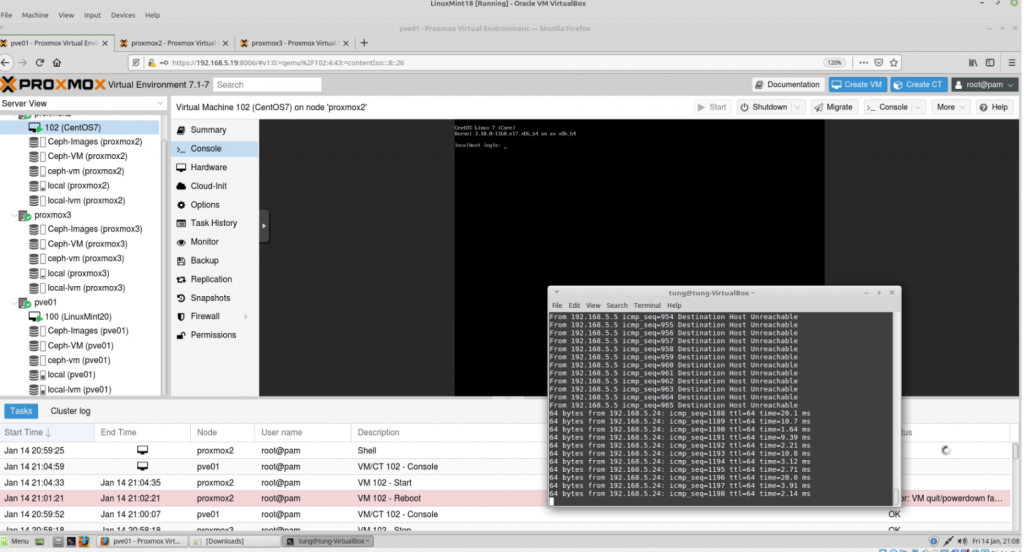
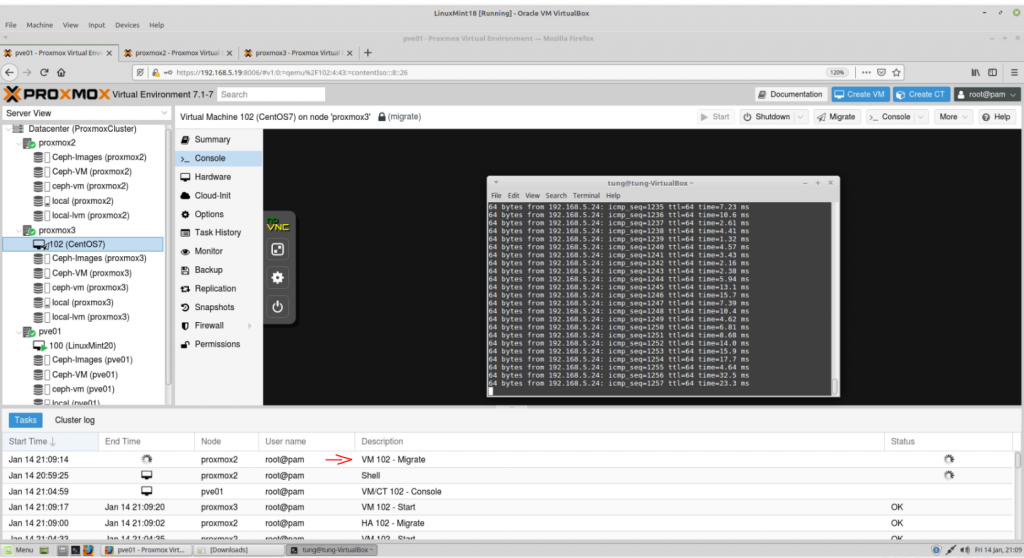
Doing live migration the VM2 on Proxmox node 2 to node 3.
It is interesting to see there is no downtime when doing live migration VM2 on Proxmox node 2 to node 3 in the Ceph cluster.
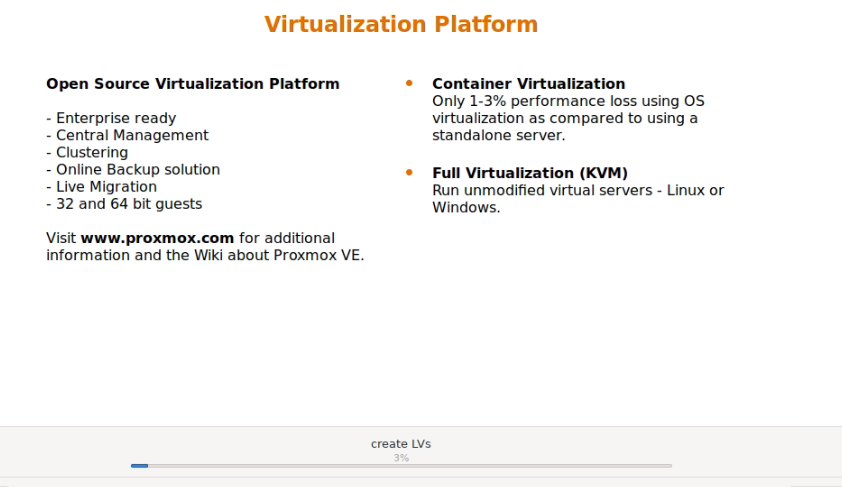
Proxmox Virtual Environment is an open-source server virtualization management solution based on QEMU/KVM and LXC. It is an affordable virtualization solution for small businesses
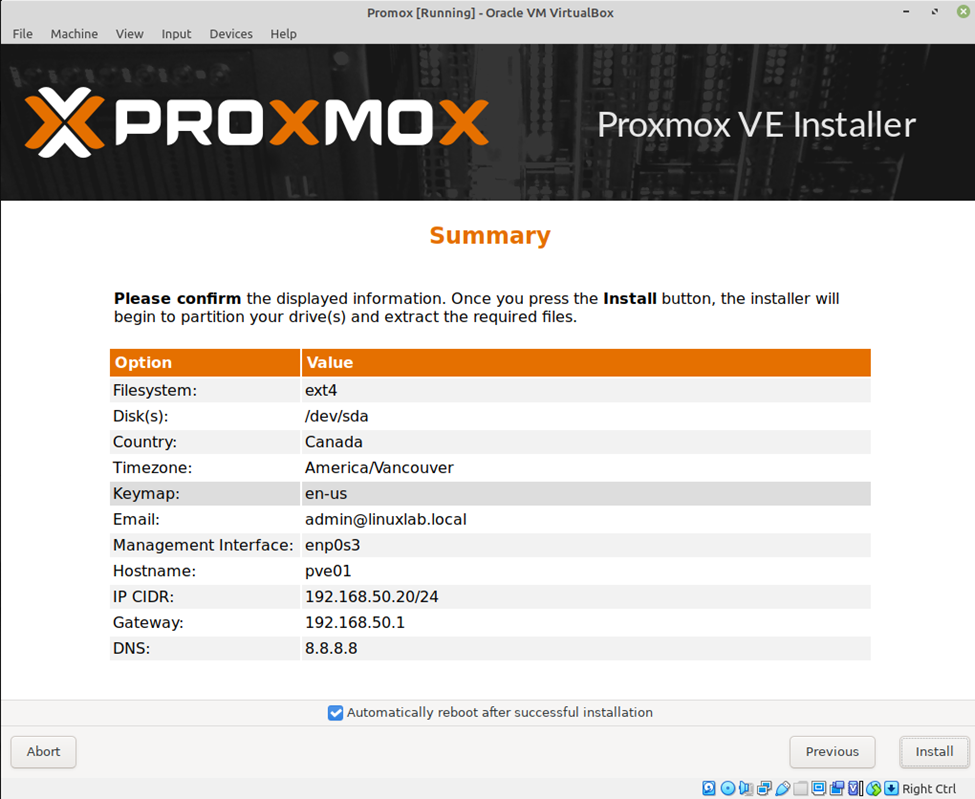
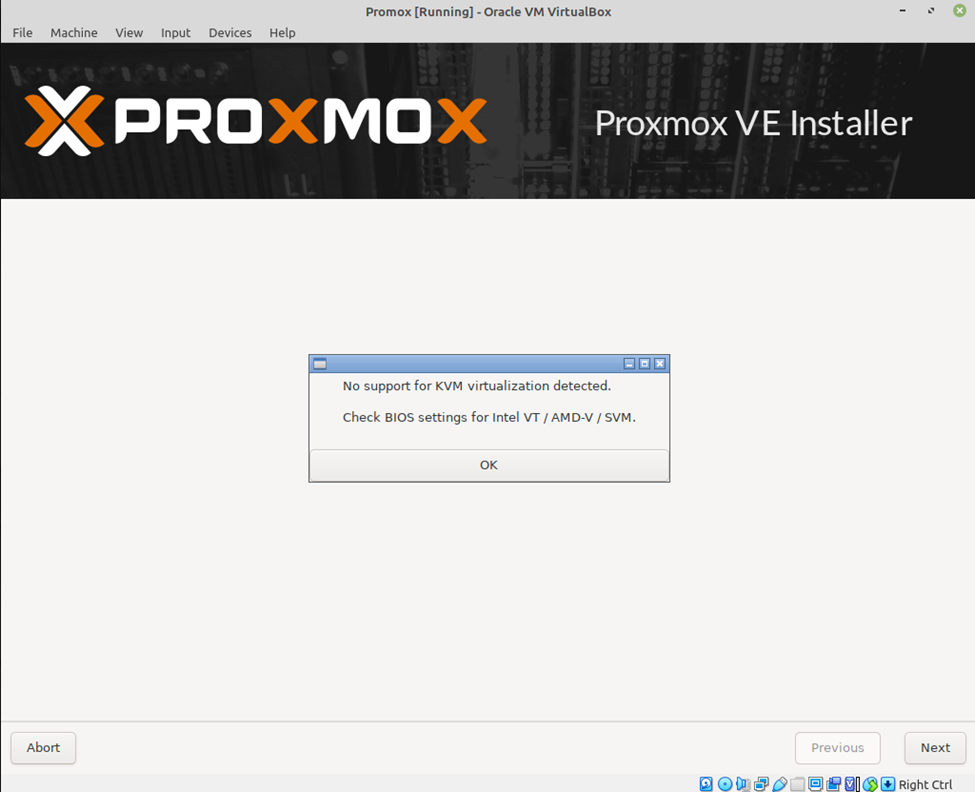
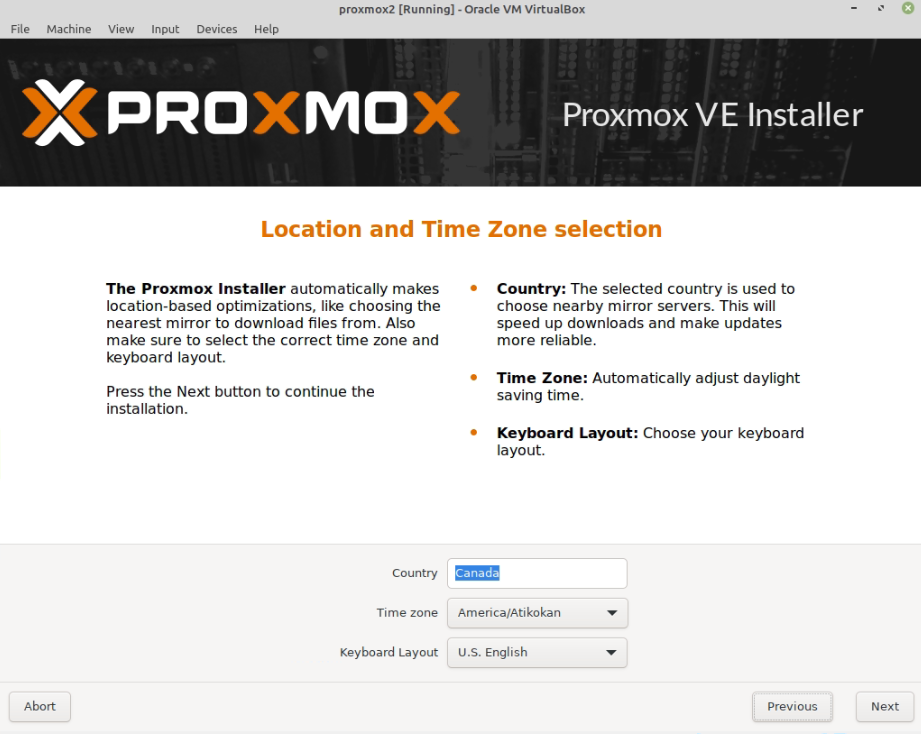
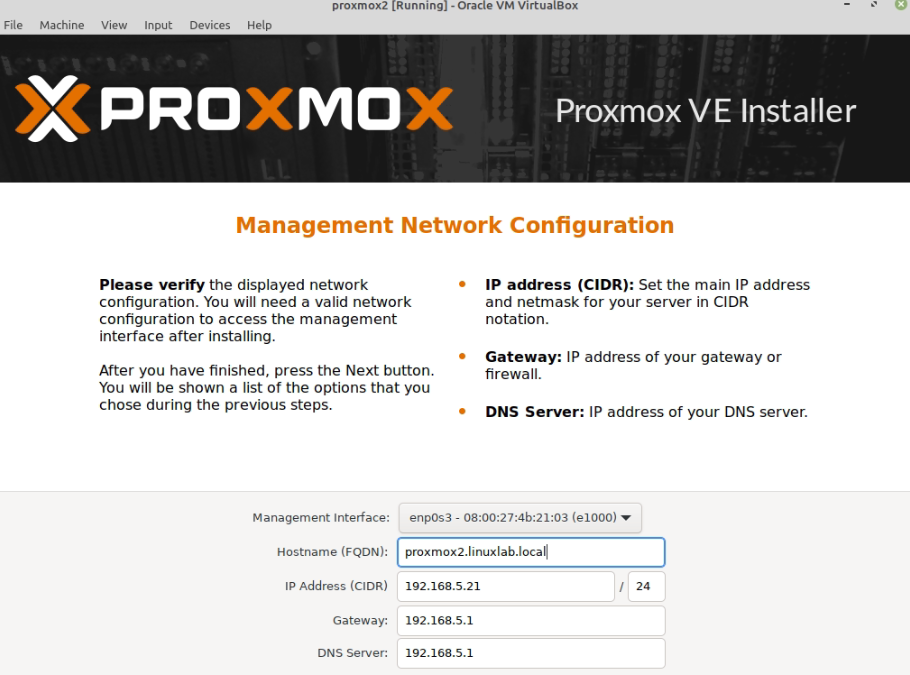
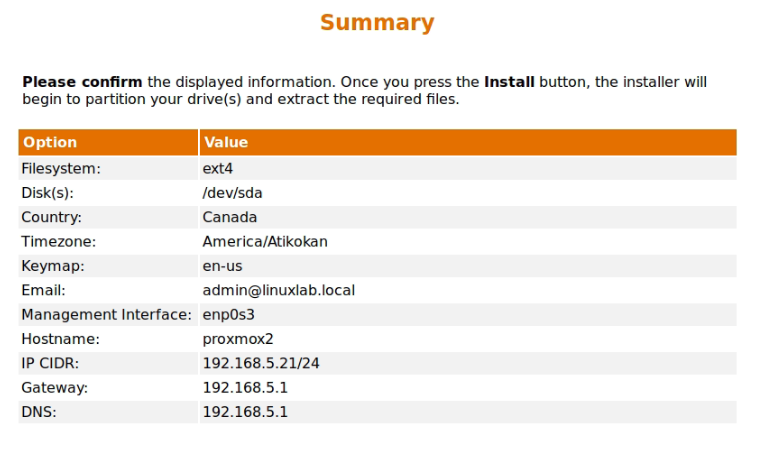
Create a new Linux VM on Virtualbox to install Proxmox. Click the link below to downloadProxmox VE 7.1 ISO Installer, then mount the iso to the VM to install Proxmox.
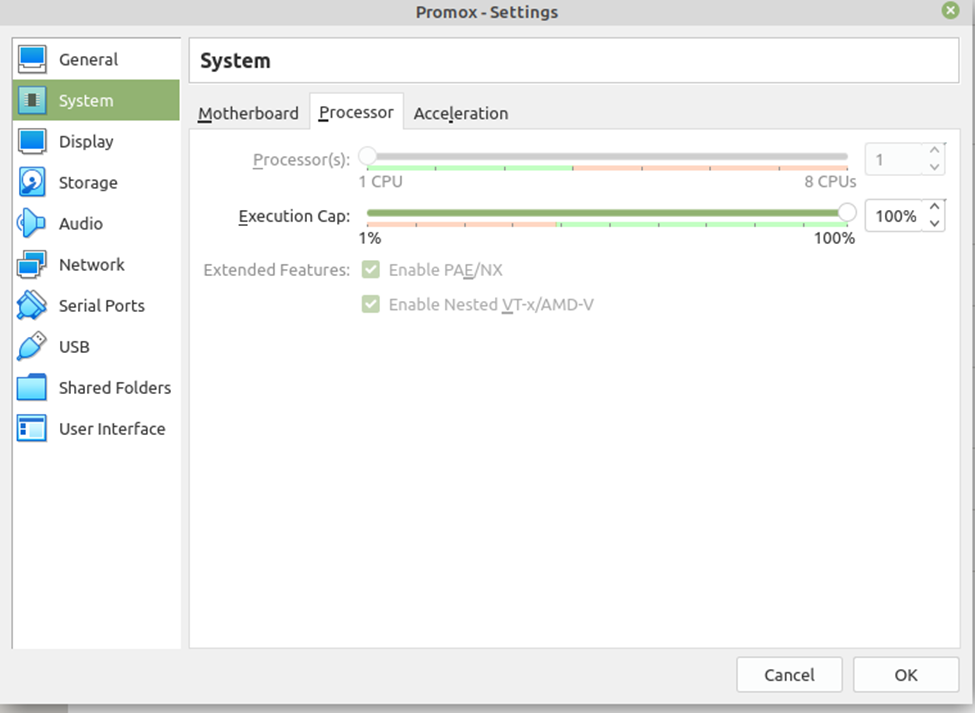
To enable “Nested VT-x/AMD-V” function on Proxmox, open a terminal console and type the command below.
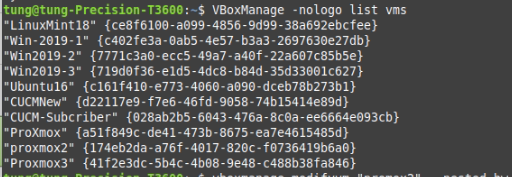
VBoxManage -nologo list vms
vboxmanage modifyvm "Virtual machine name of Proxmox" –nested-hw-virt on
vboxmanage modifyvm "proxmox1" --nested-hw-virt on
vboxmanage modifyvm "proxmox2" --nested-hw-virt on
vboxmanage modifyvm "proxmox3" --nested-hw-virt on
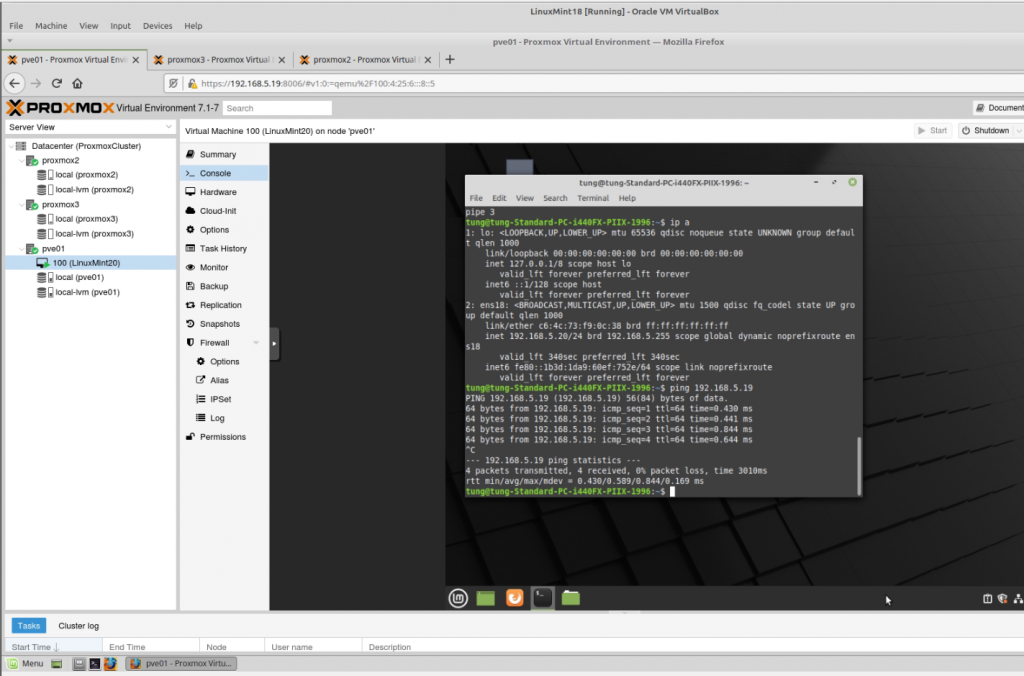
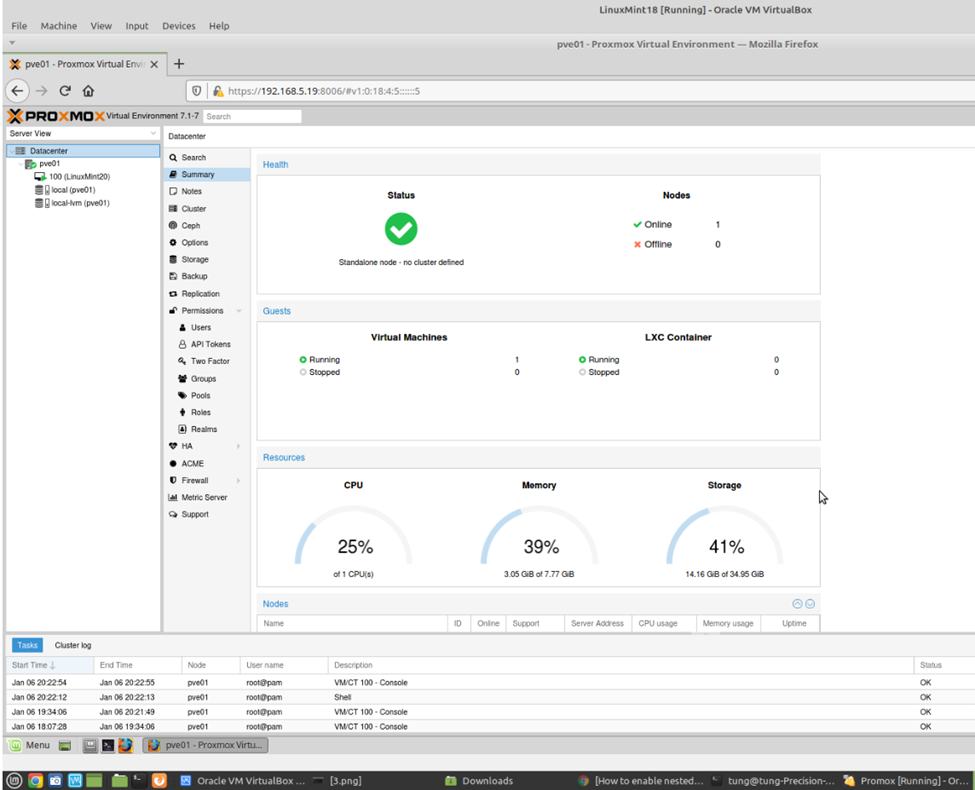
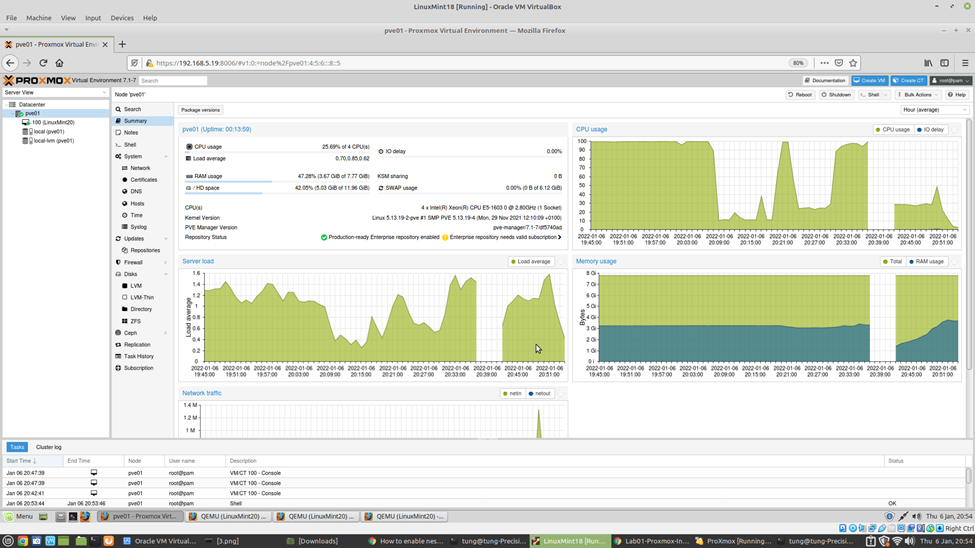
After installing Proxmox, open any web browser (such as Firefox on LinuxMint), access Proxmox web management interface (https://IPaddressofProxmox:8006).
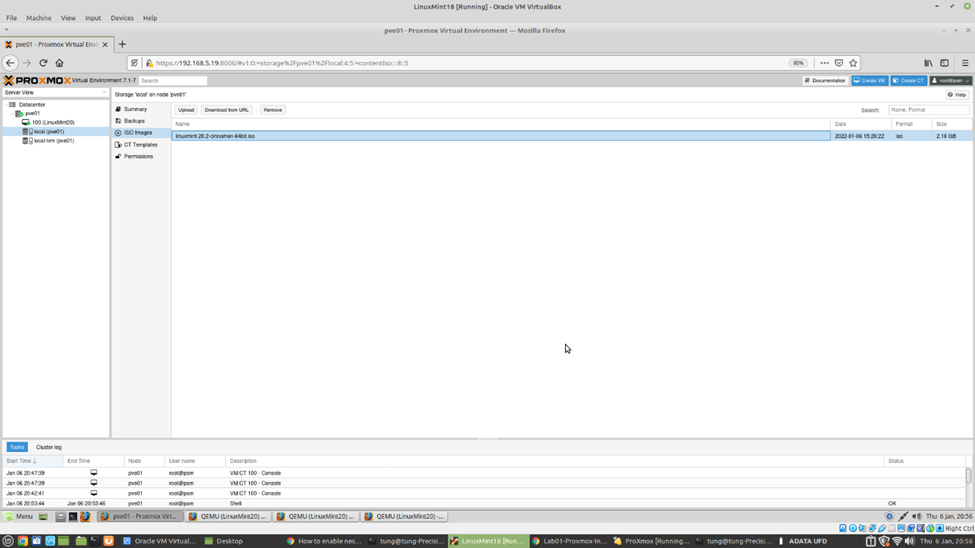
Upload source installation such as LinuxMint, Windows OS iso files to install Linux and MS Windows VMs.
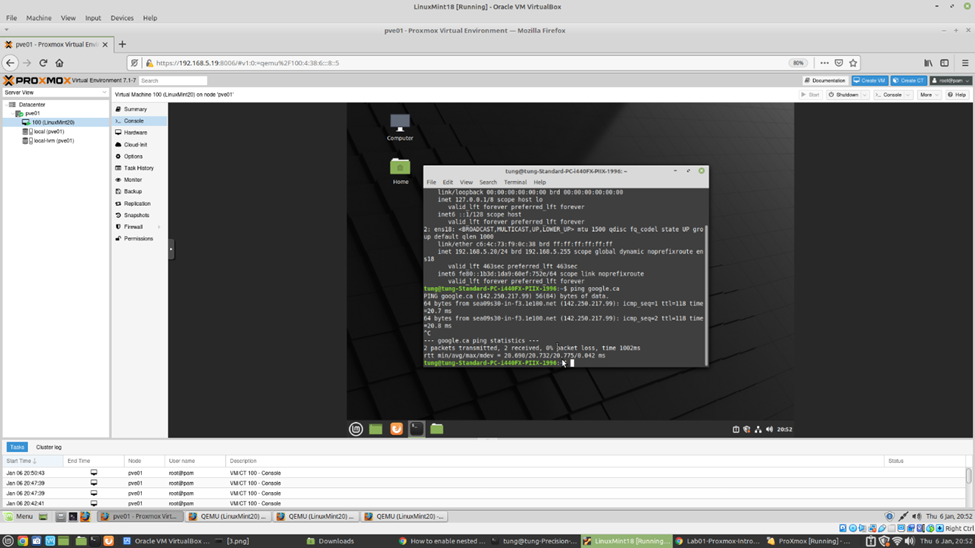
Create and install a Linux machine on Proxmox server.
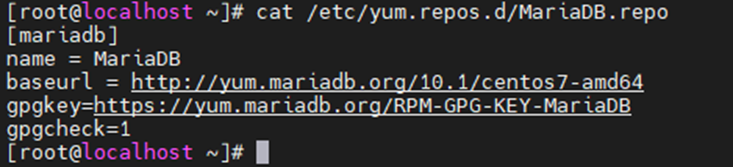
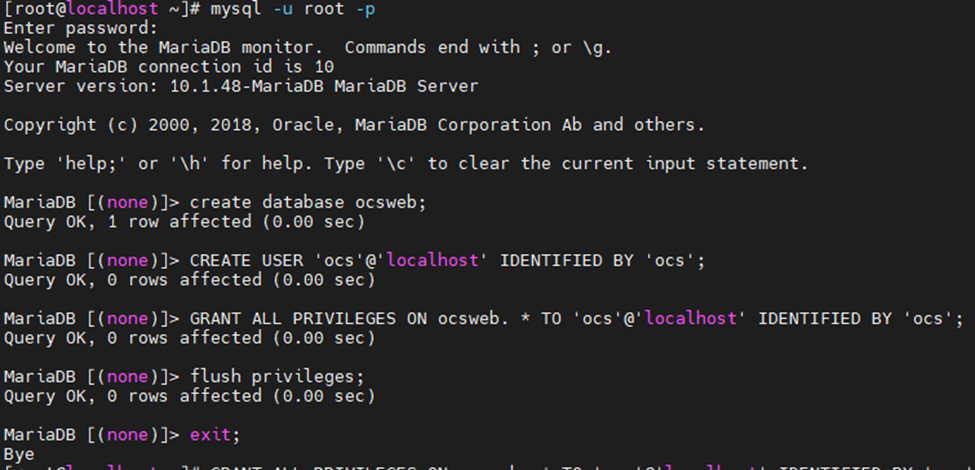
Create a new an ocsweb database and assign permissions for user ocs/ocs.
mysql -u root -p
MariaDB [(none)]> create database ocsweb;
CREATE USER 'ocs'@'localhost' IDENTIFIED BY 'ocs';
GRANT ALL PRIVILEGES ON ocsweb. * TO 'ocs'@'localhost' IDENTIFIED BY 'ocs';
flush privileges;
exit;
# Name of database
PerlSetEnv OCS_DB_NAME ocsweb
PerlSetEnv OCS_DB_LOCAL ocsweb
# User allowed to connect to database
PerlSetEnv OCS_DB_USER ocs
# Password for user
PerlSetVar OCS_DB_PWD ocs
Enables and restarts Apache Web Service.
systemctl enable httpd && systemctl start httpd
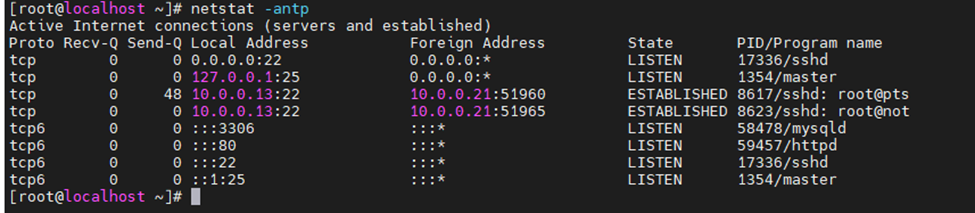
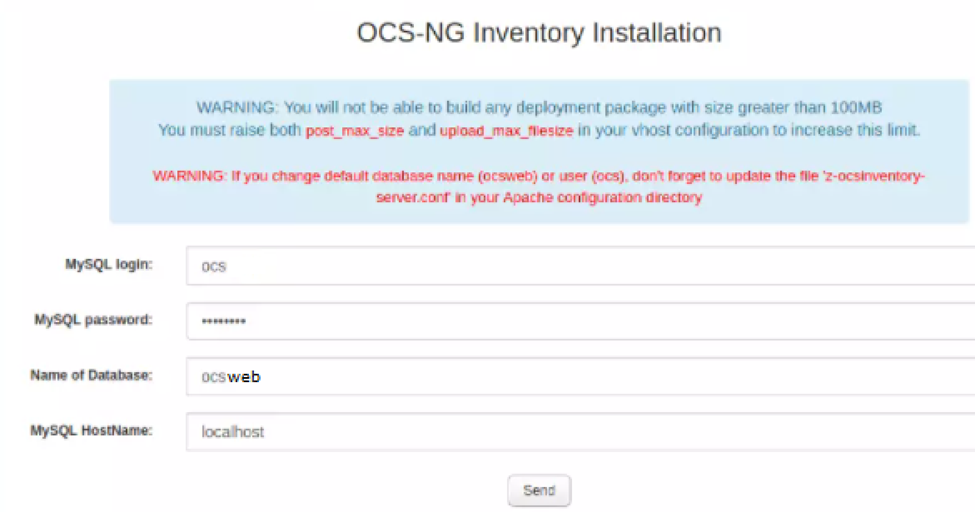
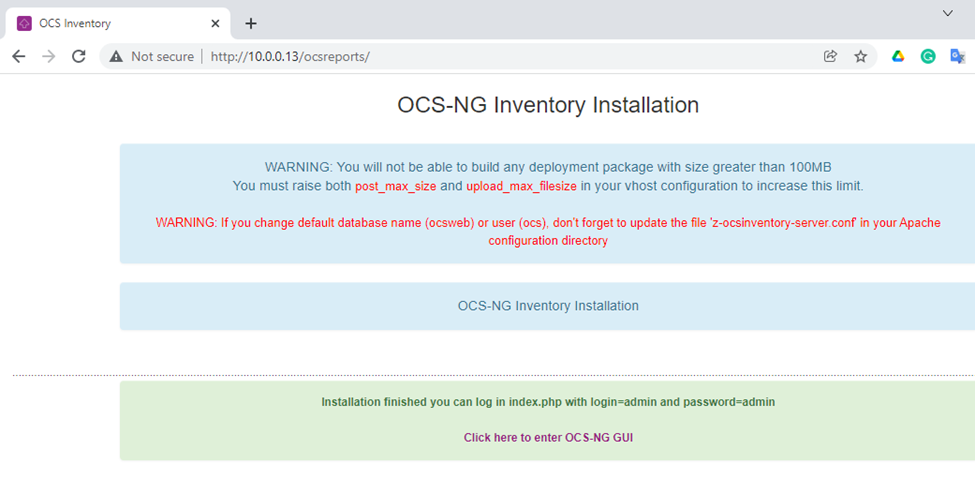
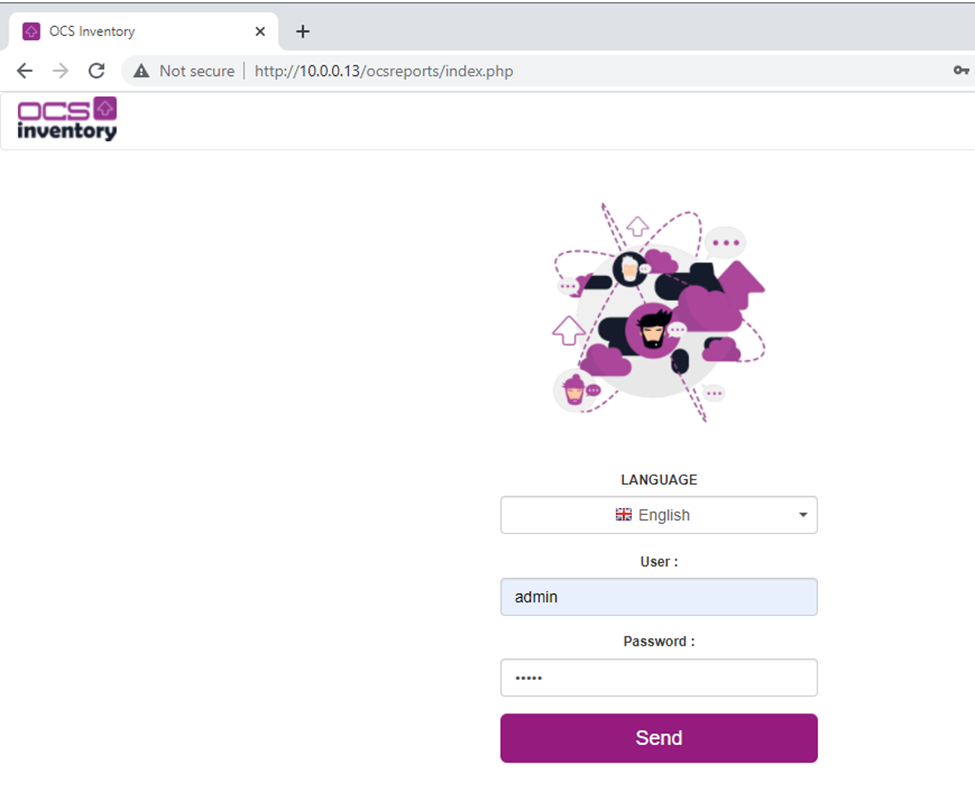
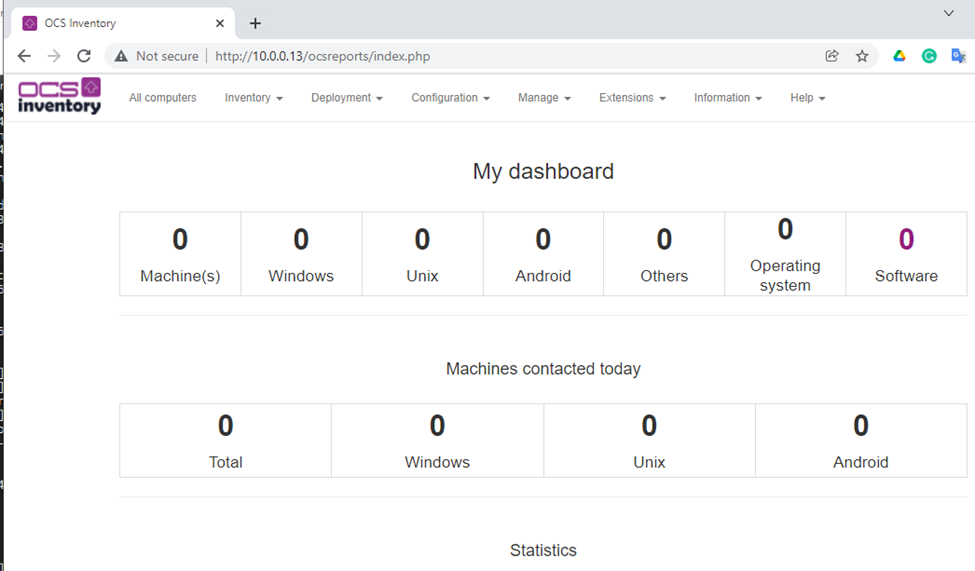
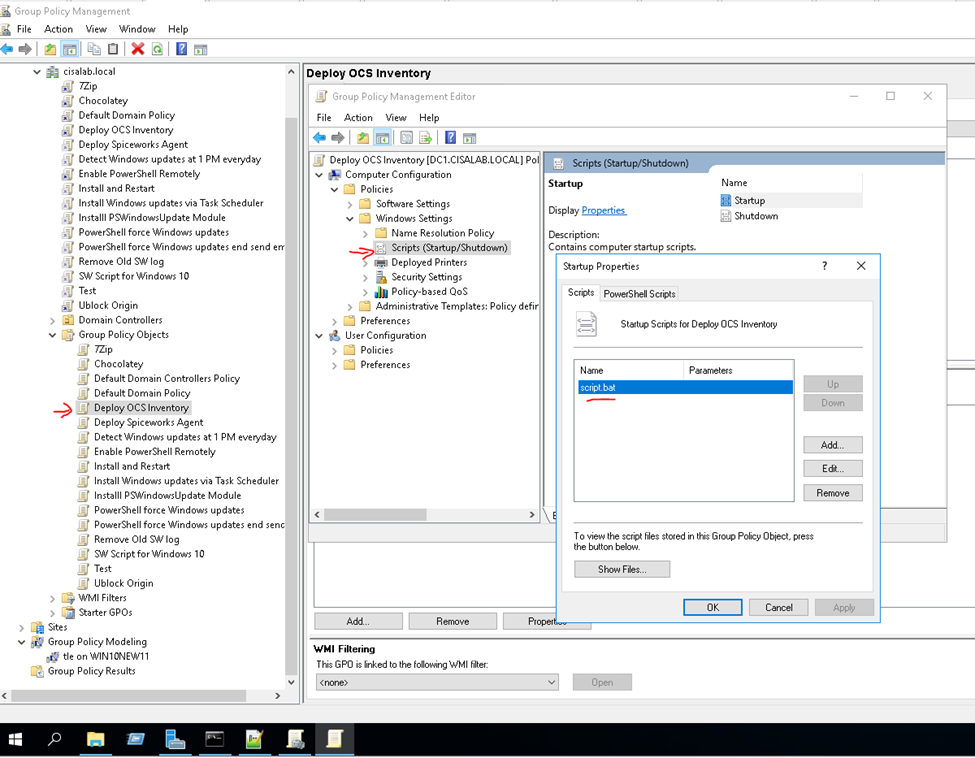
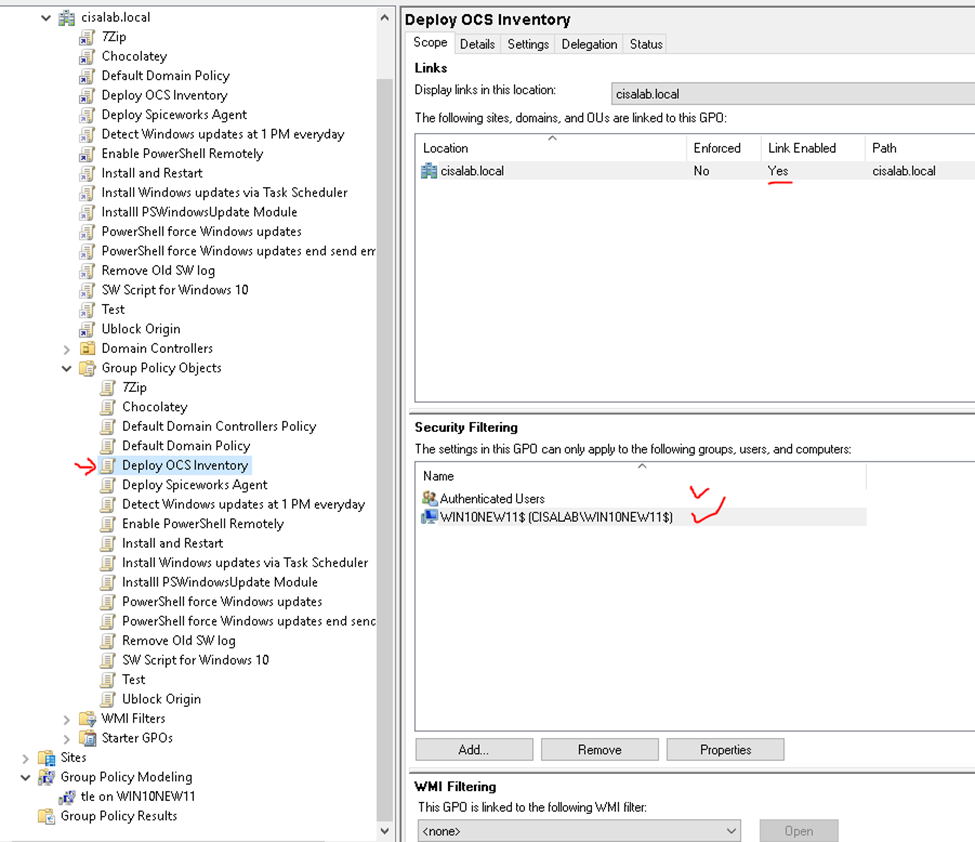
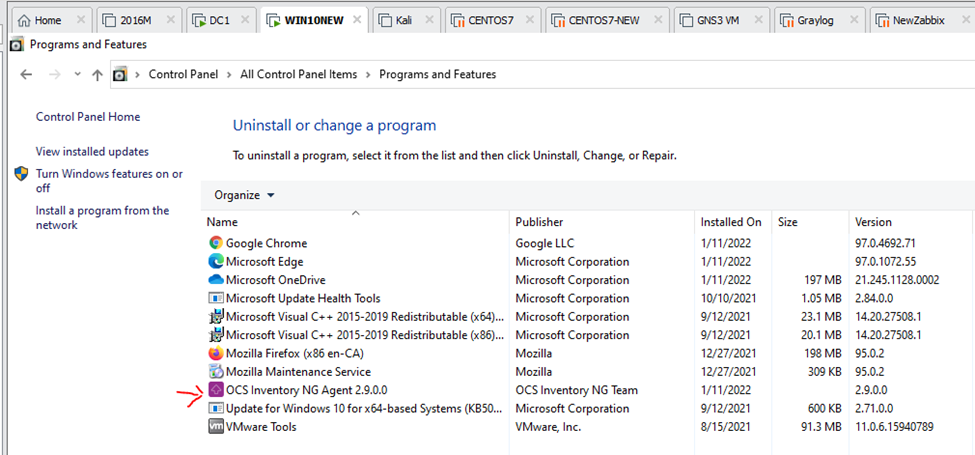
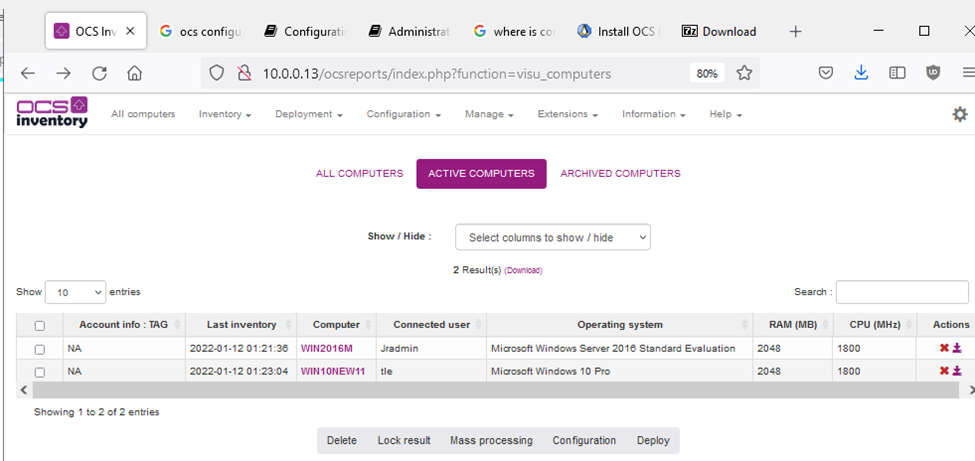
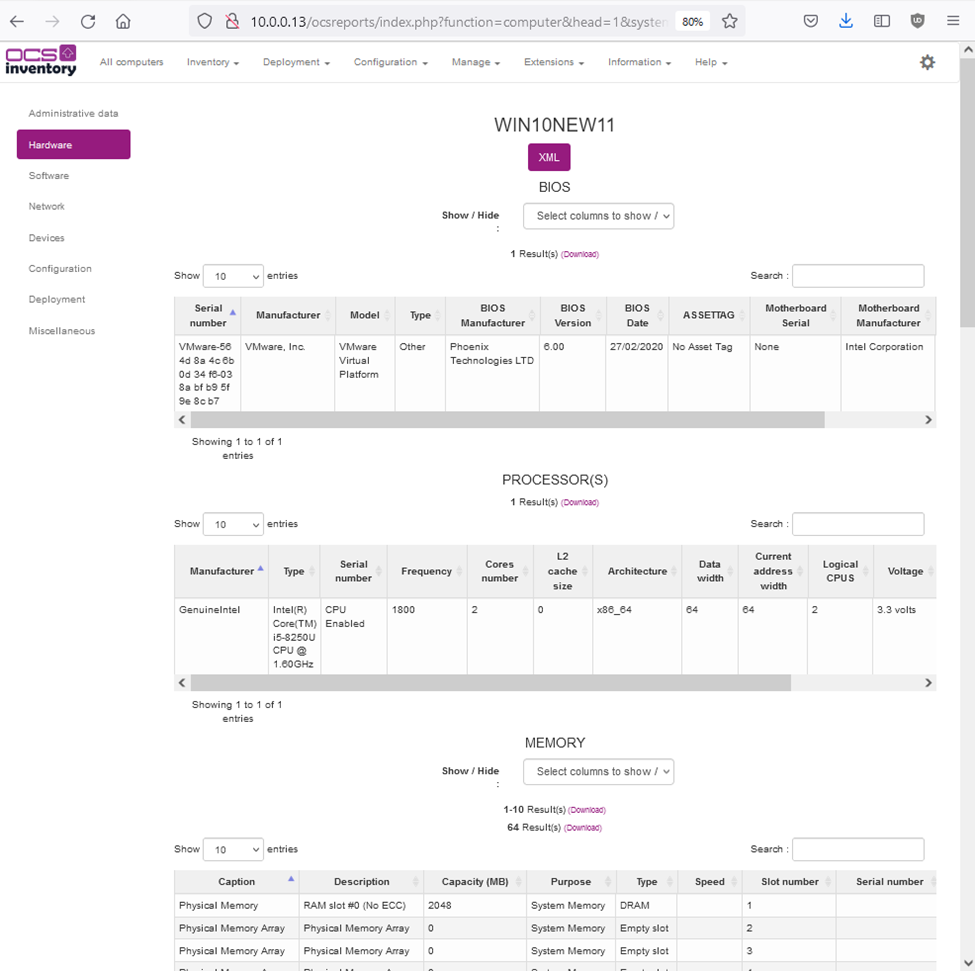
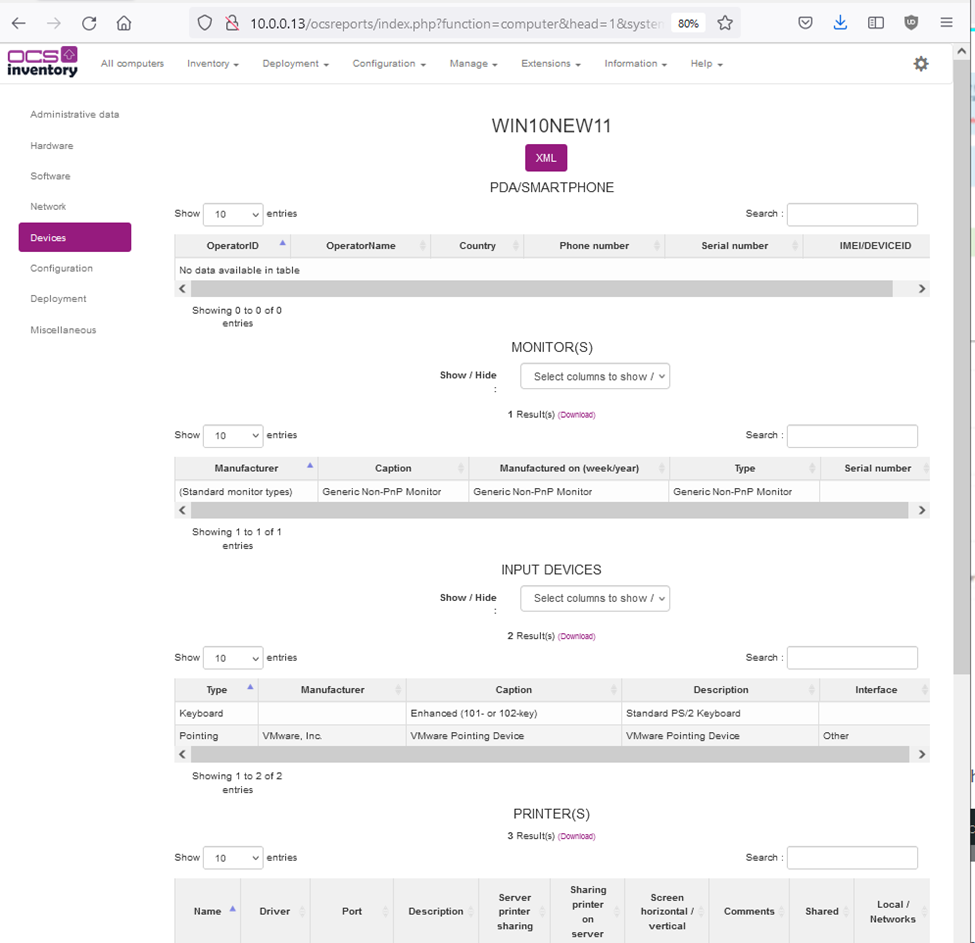
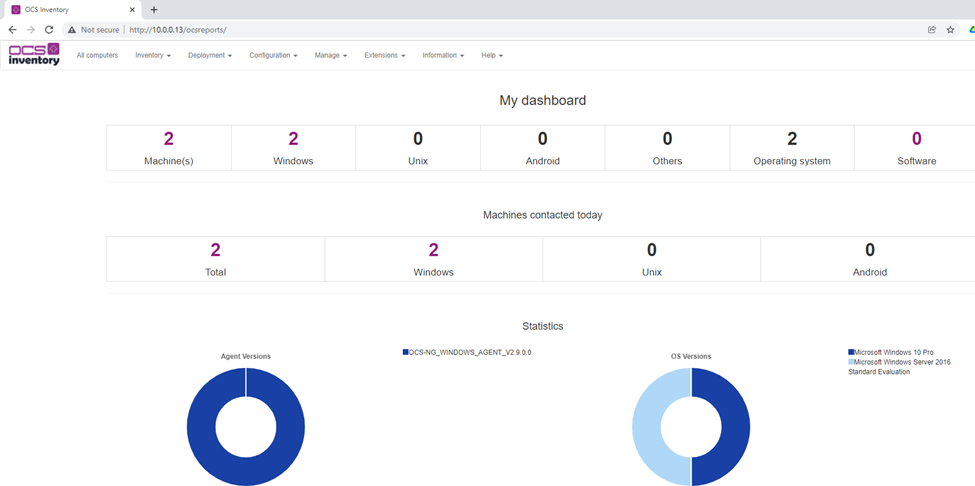
Check TCP ports are running on the server.Access OCS Inventory web interface (http://IPaddressofOCS/ocsreports).
Enter user/password is admin/admin to log on.
Rename the “install.php” file in the “OCSReports” directory.
Run the commands below to install OpenProject on CentOS 7 # sudo yum -y install openproject
Run the command below to configure OpenProject
#sudo openproject configure Select “Install a new PostgreSQL server and database locally”
Select “Install Apache2 server”
Choose Sendmail application as the default send email service on CentOS.
Enter admin email to be used for access and notifications.
Choose to install Memcache server.
The installation was failed because the issue below
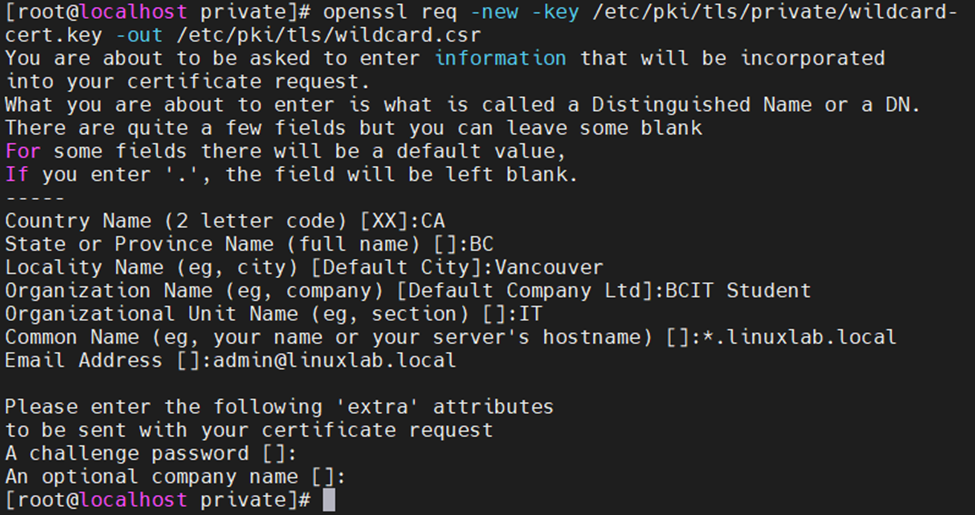
Run the command below to generate a self-signed certificate for OpenProject. # sudo openssl req -x509 -nodes -days 365 -newkey rsa:2048 -keyout /etc/ssl/certs/openproject.cisa2380.tk.key -out /etc/ssl/certs/openproject.cisa2380.tk.crt
Next, disable SELinux in CentOS. Edit /etc/selinux/config file and run a command setenforce 0 to disable SELinux in CentOS
Install wget package:
# yum install wget
Set hostname on Zimbra host. # hostnamectl set-hostname mail
Disable unwanted services. Postfix mail service has already been installed and run on CentOS. We need to disable and remove the postfix service before installing Zimbra.
# systemctl stop postfix
# systemctl disable postfix
# yum remove postfix
Step 3: Install Zimbra Collaboration Suite Open Source Edition # wget https://files.zimbra.com/downloads/8.8.15_GA/zcs-8.8.15_GA_3869.RHEL7_64.20190918004220.tgz
After the download completes, use unzip command to extract the archive
# tar xfz zcs-8.8.15_GA_3953.RHEL8_64.20200629025823.tgz
# cd zcs-8.8.15_GA_3953.RHEL8_64.20200629025823/ # ls
Run the command install.sh to install Zimbra. After a series of system checks, click y in continue installation
# ./install.sh
Next, the installation process will prompt a couple of questions that we need to choose to configure Zimbra properly.
Finally, it will start the Zimbra installation process. The system will be modified. Continue? [N] y
Allow Zimbra services on Linux Firewall.
Step 4: Zimba Initial Configuration. After the installation finishes, access the Zimbra administration page via a link https://mail.cisa2380.tk:7071 or https://172.105.5.143:7071
Jitsi is a true open-source solution for video conferencing. Integrating with Zimbra Collaboration Suite, we have a feasible open-source collaboration solution that has been installed on Linux VPS servers.
Step 1 — Setting the System Hostname Creates jitsi and auth hostname records on an external DNS server as screenshots below
Change hostname of the machine to jitsi.cisa2380.tk.
#sudo hostnamectl set-hostname jitsi.cisa2380.tk
Ping the hostname to check it is reachable.
Step 2 — Configuring the Firewall
Allow some ports below for Jitsi services on Ubuntu Linux Firewall.
Port 80 : uses in the TLS certificate request.
Port 443: uses for the conference room creation web page.
Port 4443/tcp 10000/udp: uses to transmit and receive the encrypted call traffic.
sudo ufw allow 80/tcp
sudo ufw allow 443/tcp
sudo ufw allow 4443/tcpsudo ufw allow 10000/udp
Step 3 — Installing Jitsi Meet
First, download the Jitsi GPG key with the wget downloading utility:
#sudo nano /etc/apt/sources.list.d/jitsi-stable.list to add this line below to the file for the Jitsi repository:deb https://download.jitsi.org stable/
Finally, perform a system update to collect the package list from the Jitsi repository #sudo apt update
Install Jitsi meet with the command below.
#sudo apt install jitsi-meet
Enter the domain name for your Jitsi Meet instance.
Select the option below to create and use a self-signed TLS certificate for Jitsi system.
Step 4 — Obtaining a Signed TLS Certificate
#sudo apt install certbot
#sudo apt install certbot
Step 5 — Locking Conference Creation
Allow registered users to create conference rooms by changing the information as the file below
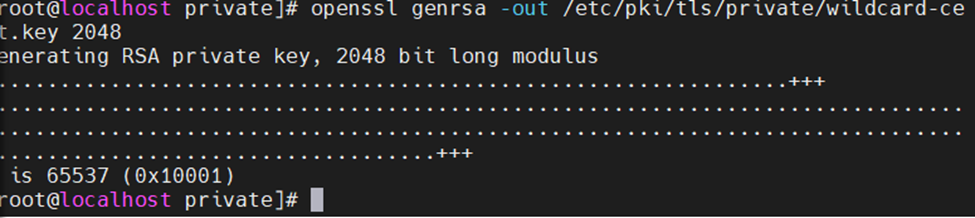
Using WinSCP to download a local Root CA self-signed public-key certificate to a Windows machine. Then, import it into the GPO of the Windows domain or any Windows/Linux/Mac web browser.