This is a diagram that is used to deploy this lab.
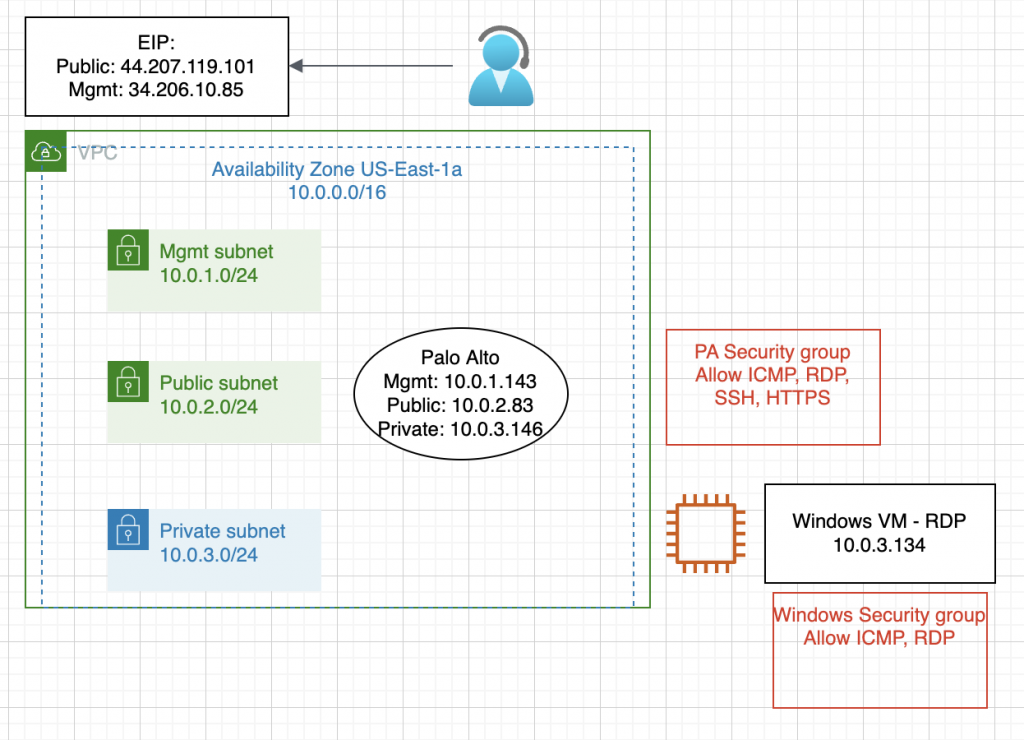
Below are a couple of steps to deploy Palo Alto on AWS
- Create a key pair, VPC, subnets, Internet Gateway, Route tables
- Create a Palo Alto instance on AWS
- Create Elastic IP addresses for Management and Public interface
- Create a Windows VM on private subnet
- Modify Security Group to allow traffic from the Internet to PA and Windows VM
- Configure a Security Policy, NAT to allow traffic from the Internet to the Windows VM via RDP
Create a key pair.


Create a Public subnet on availability zone US-East-1a. I got an error that I cannot create a Palo Alto if my VPC is randomly used US-East-1e.

Create a Private subnet.

There are 3 subnets on AWS Subnet VPC.


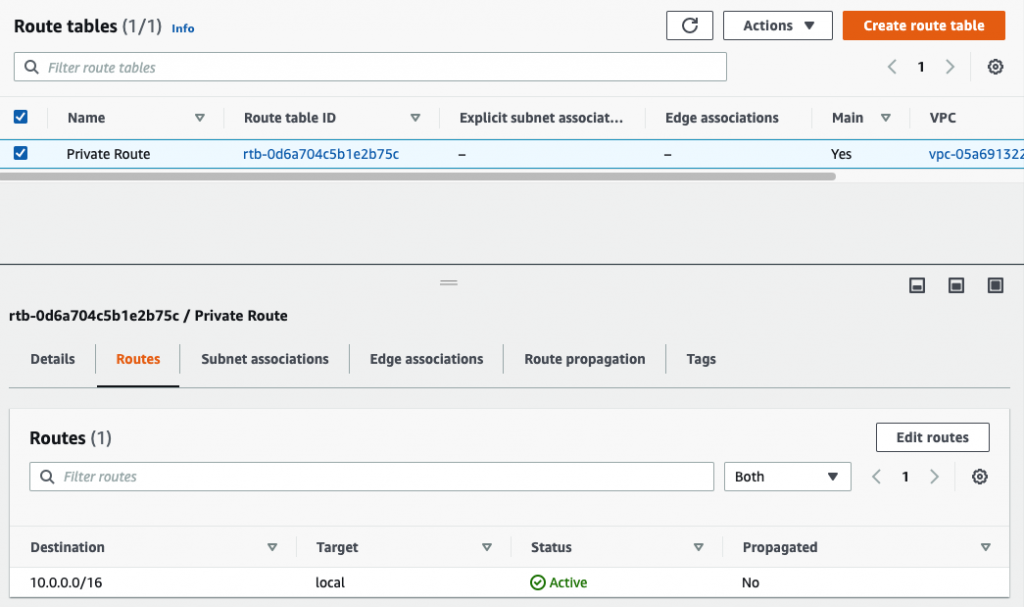
Create a Public Route table.

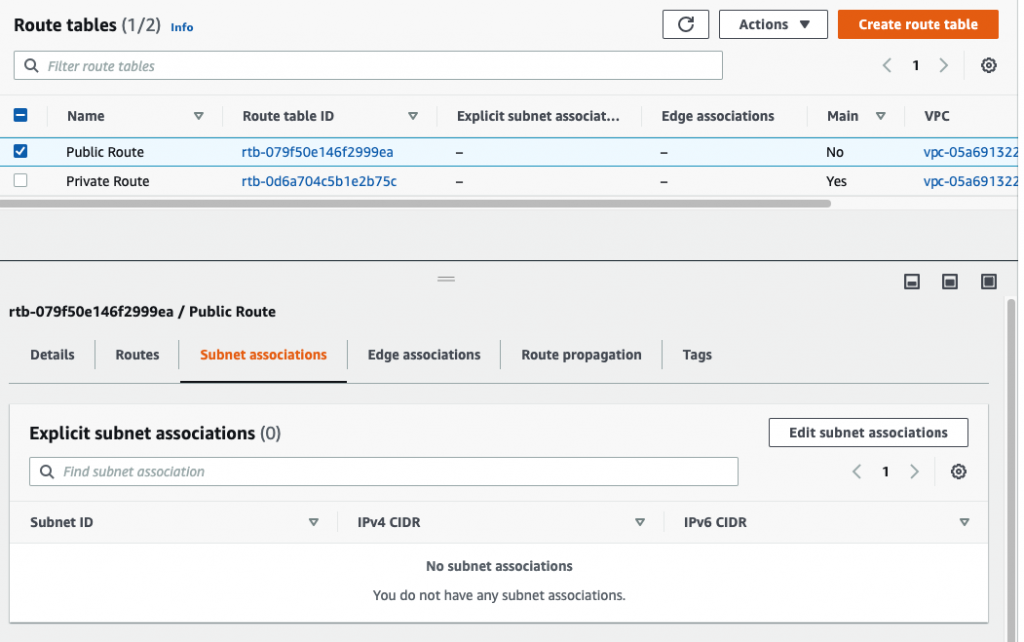
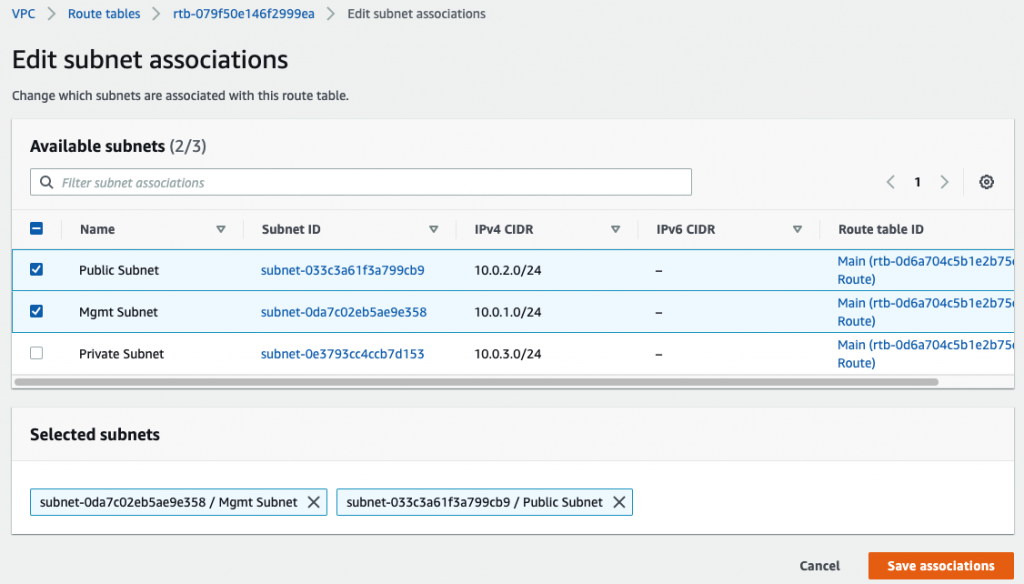
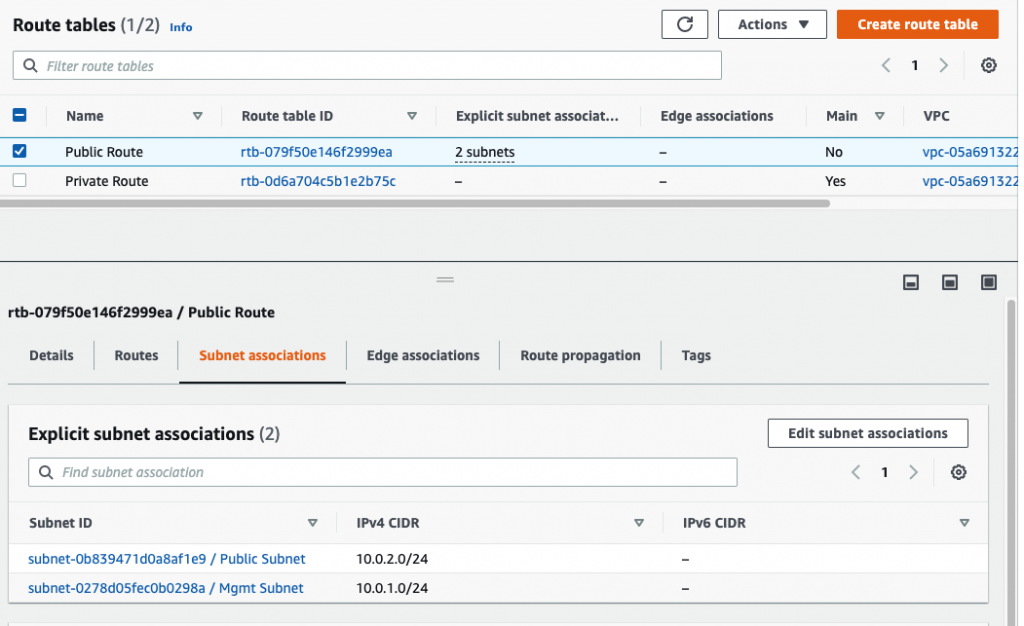
Launch a Palo Alto Firewall on AWS.
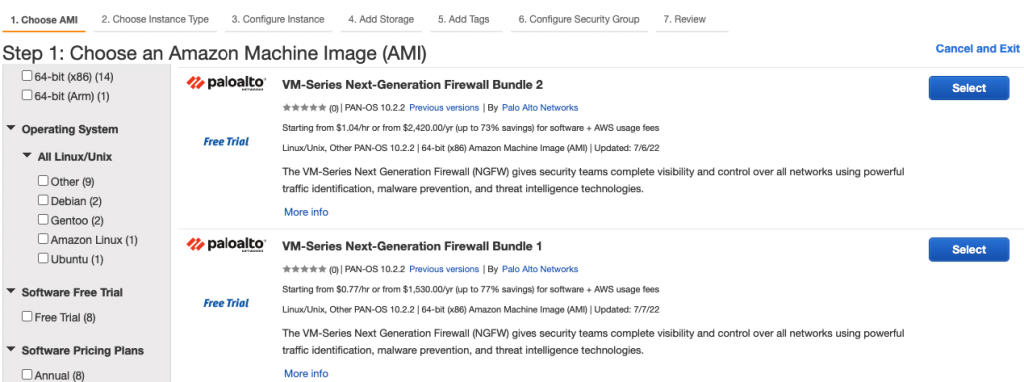
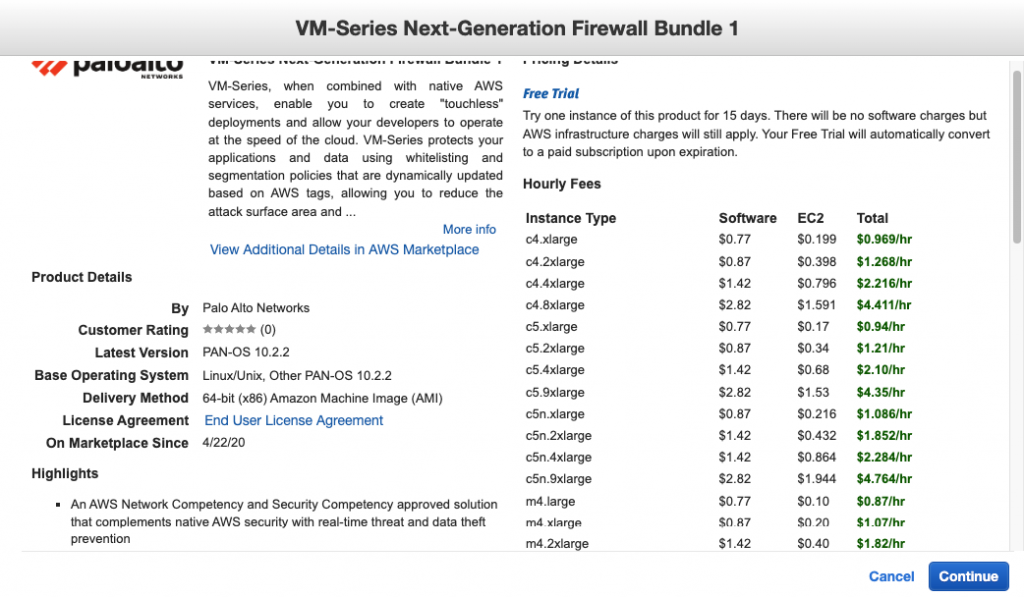
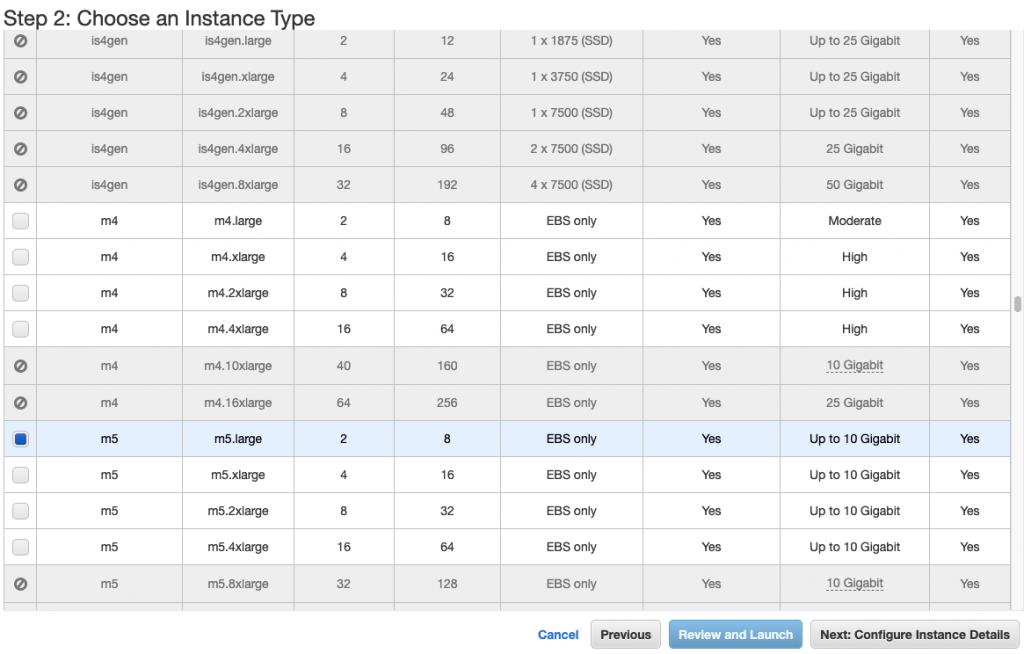
Select “Management Subnet” in the Subnet setting.
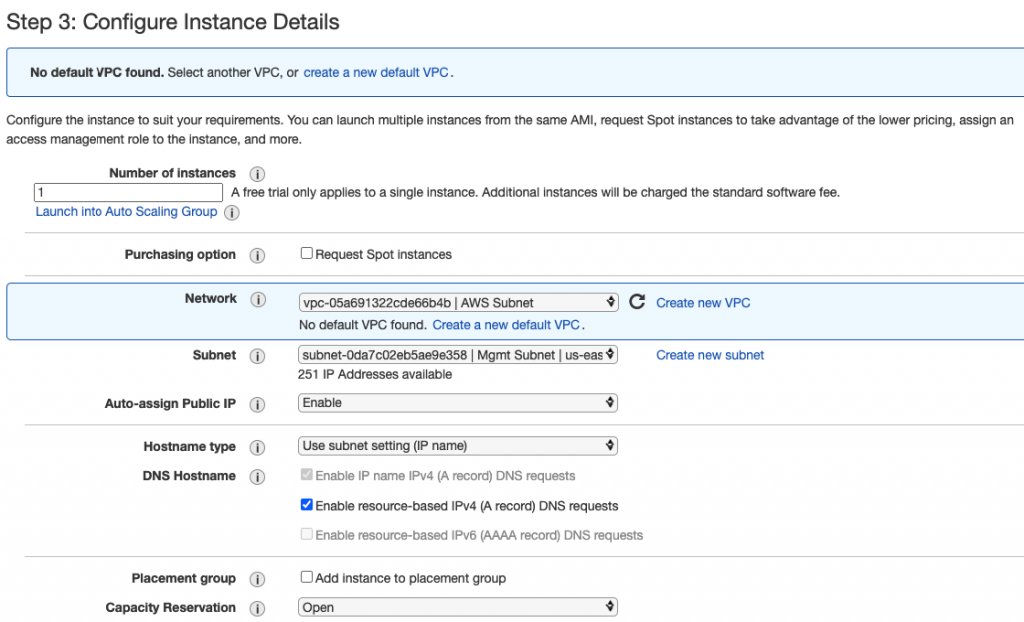
Leave “Add Storage” and Tags as default.

Use a Security Group that has been generated automatically when creating the PA VM.


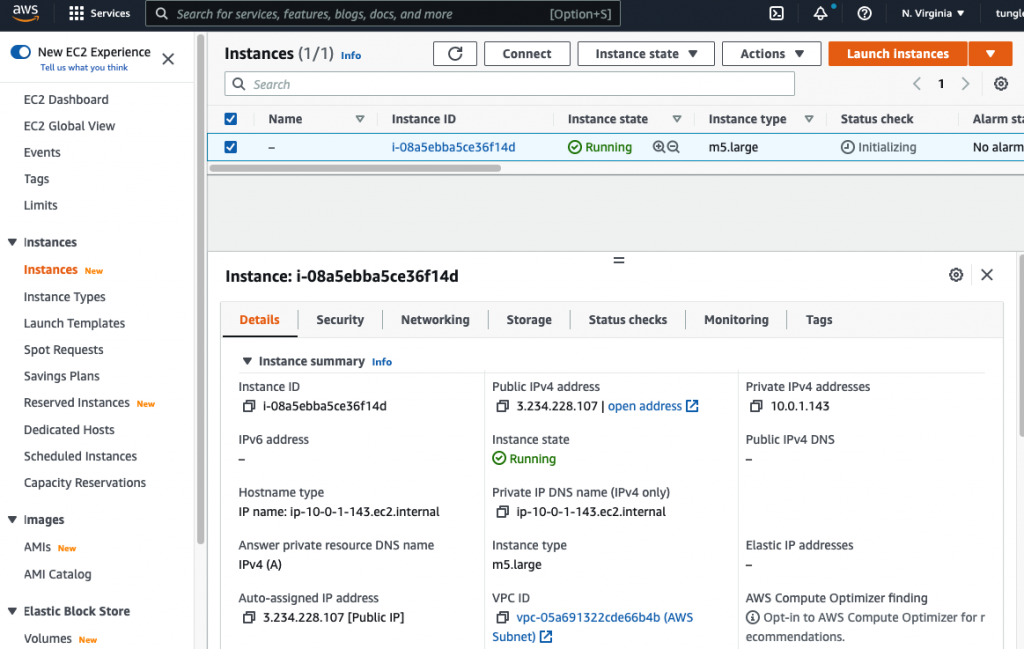
Actions – Monitor – get instance screenshot.

Go to EC2 – Network interfaces. Rename a name of the “-” to “Management interface”.
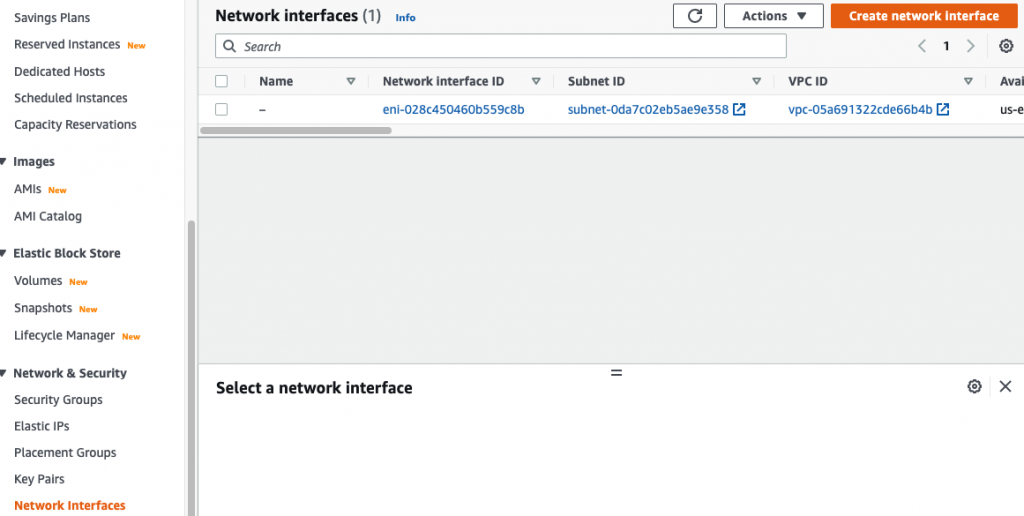

Create a Public interface of PA and link it to the “Public Subnet”.


Rename a name of the “-” to “Public interface”.


Create a Private interface of PA and link it to the “Private Subnet”.


Rename a name of the “-” to “Private interface”.

Attach the Private interface into PA.


Disable “Change source/dest. check” in all interfaces.
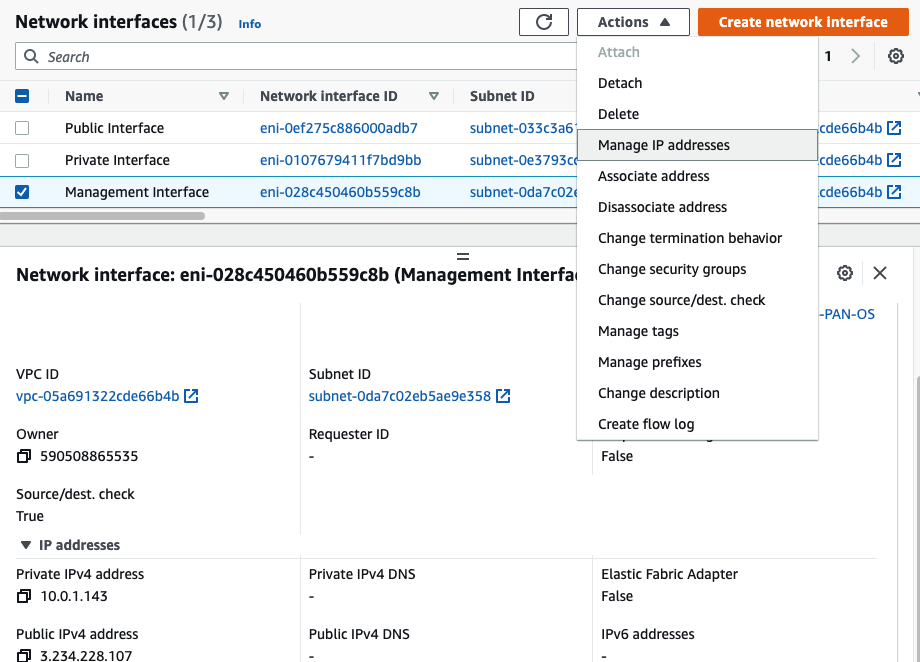


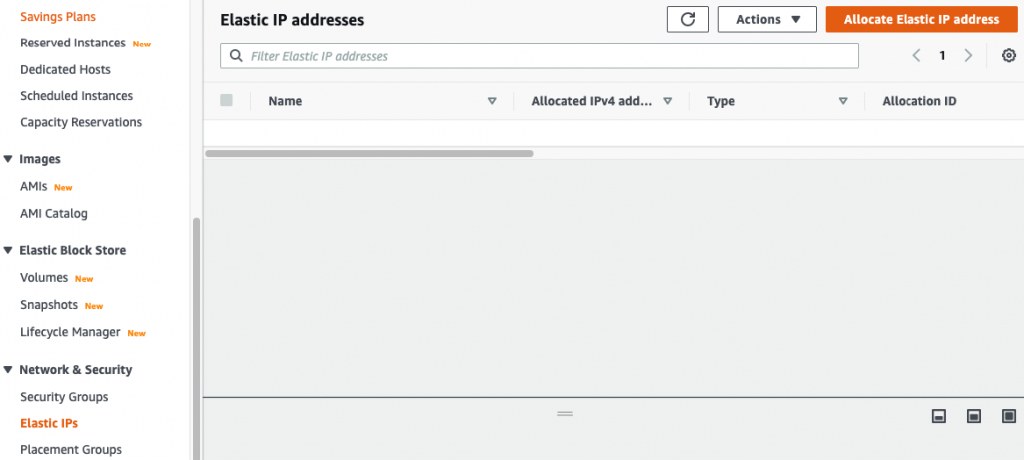


Select “Public interface”

Rename “-” to Public EIP.

Back to Route table,

Create a default route via Internet Gateway.
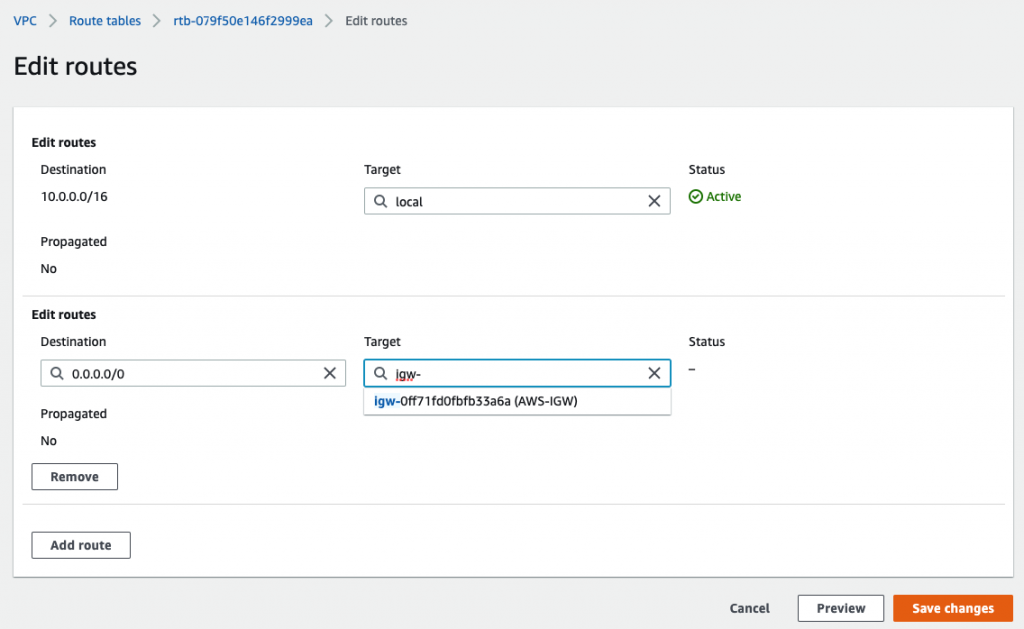

Back to PA instance, rename it into PaloAltoVM.


Access SSH to Palo Alto instance.


Change password of user admin.

Log into PA via a web browser.


Back to EC2 – EIP. Assign a permanent Elastic IP address (IP address does not change when the instance is stopped) for Management interface to and rename “-” to Mgmt EIP.


Access the PA via Elastic IP address.

Configure the Public interface (e1/1) of PA.


Configure the Private interface (e1/2) of PA.


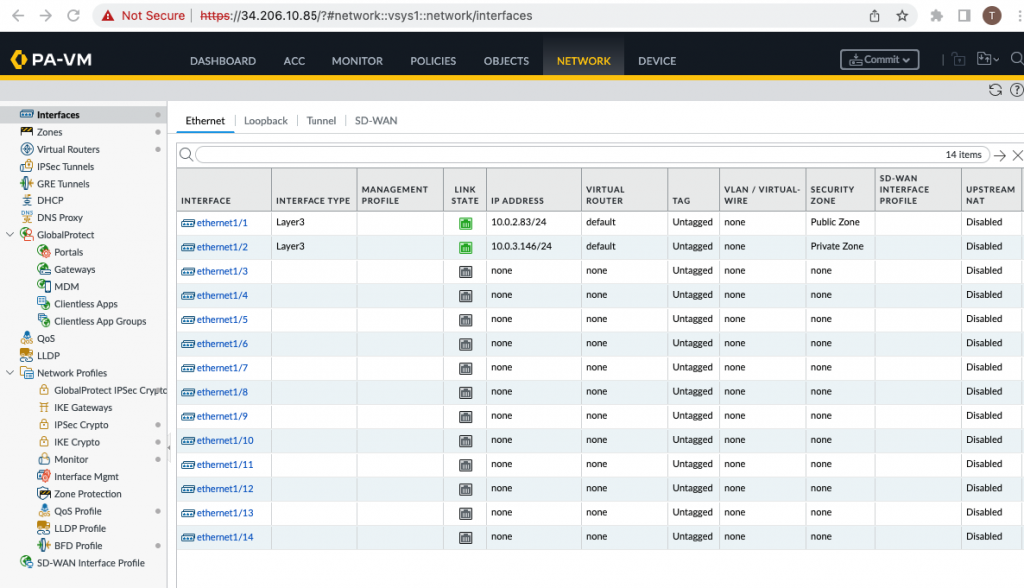
Create a default route via the Public interface.


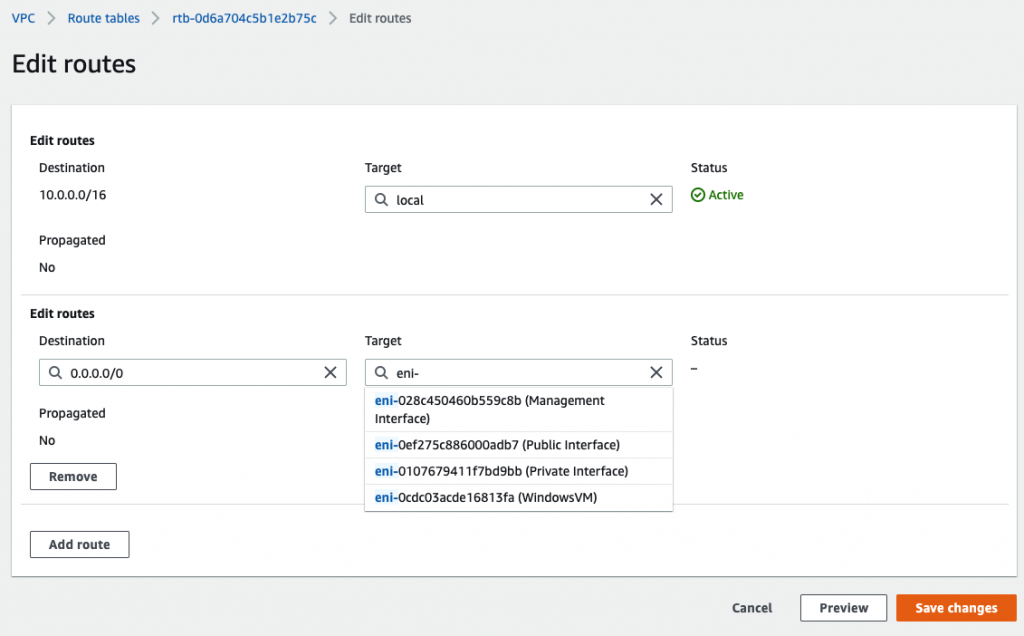
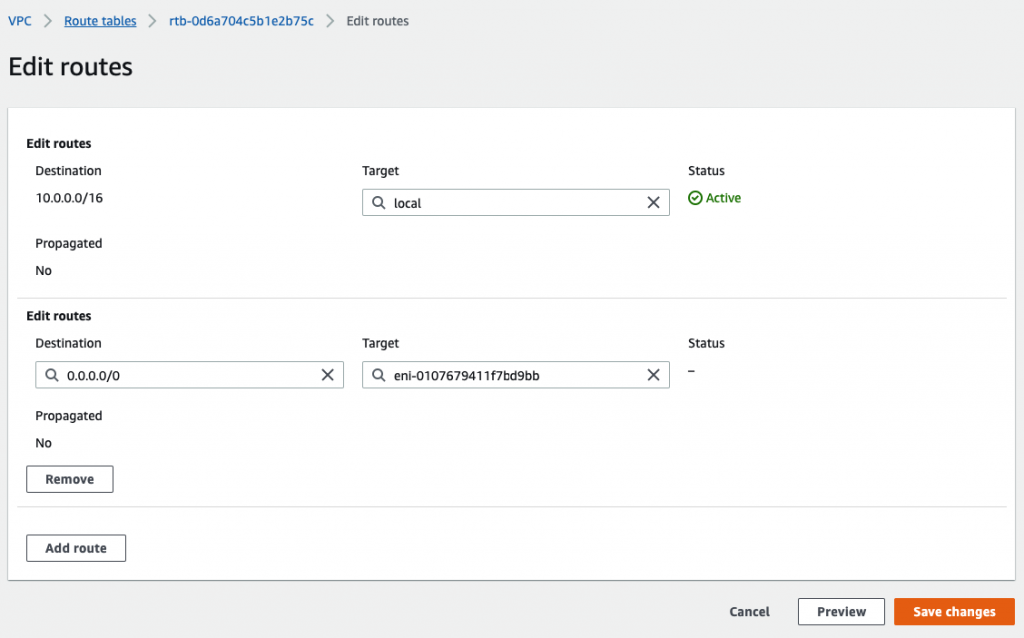
Back to VPC, edit routes in “Private route”.

Add a default route via “Private network”.
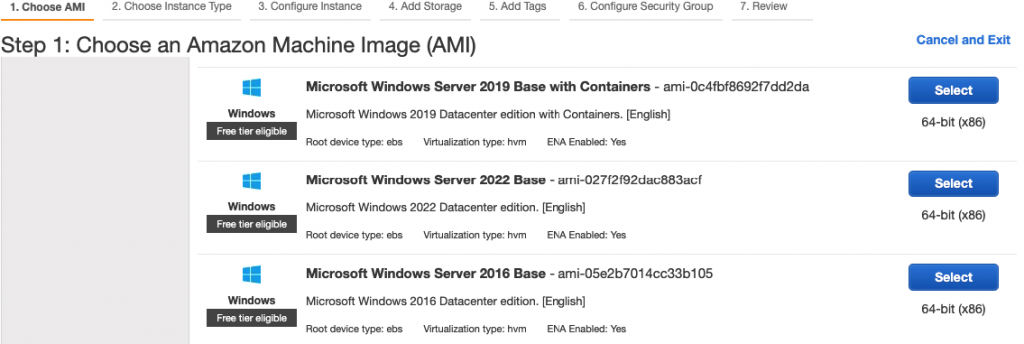
Back to EC2 – instances, create a new Windows VM in the Private network.

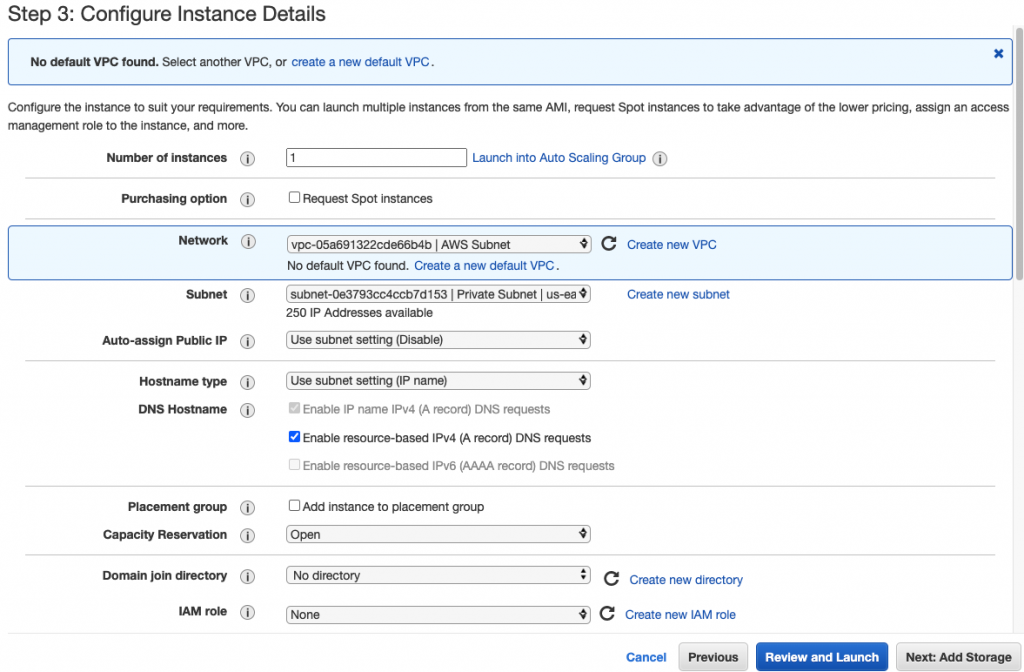
Select “Private Subnet” in Subnet setting and Disable in “Auto-assign Public IP”.


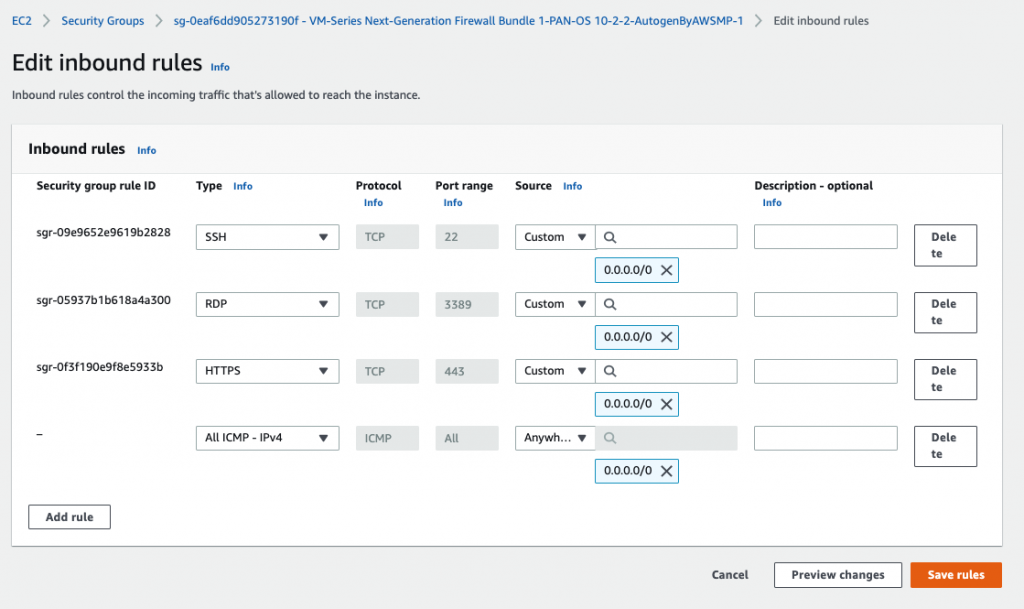
Add the ICMP line to allow ICMP traffic in this Security Group.


Move to PA, create 2 security polices to allow traffic from Private Zone to Public Zone and vice versa.

Create a SNAT and DNAT to allow traffic from Windows VM to the Internet and RDP traffic from Internet to Windows VM in Private subnet.
SNAT.

DNAT.


Back to AWS – EC2 – Security Group, add RDP and ICMP into the following Security Group.

Add RDP and ICMP into this Security Group.

Now access RDP to Windows VM via Public EIP.


Disable Windows Firewall.

Ping 8.8.8.8 from Windows instance.

