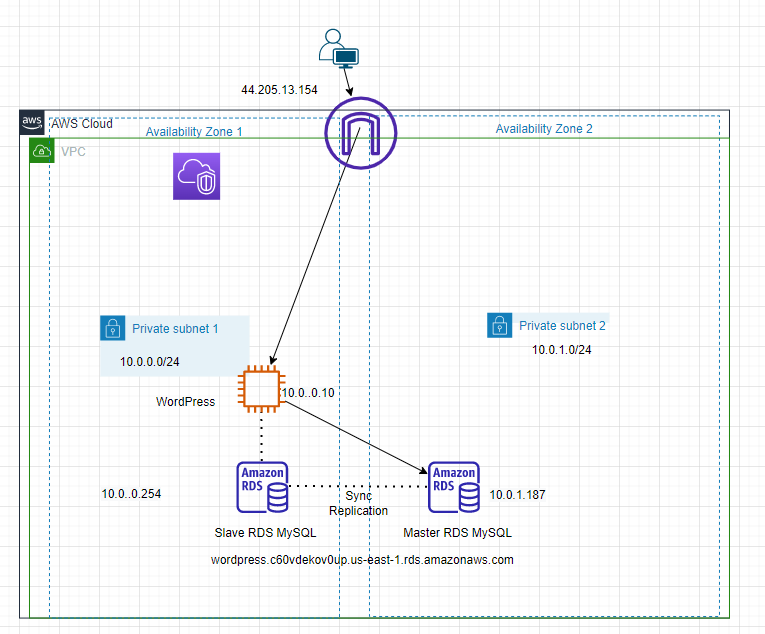
This is a diagram that I have used to deploy this lab.
![](https://tungle.ca/wp-content/uploads/2022/05/image-25.png)
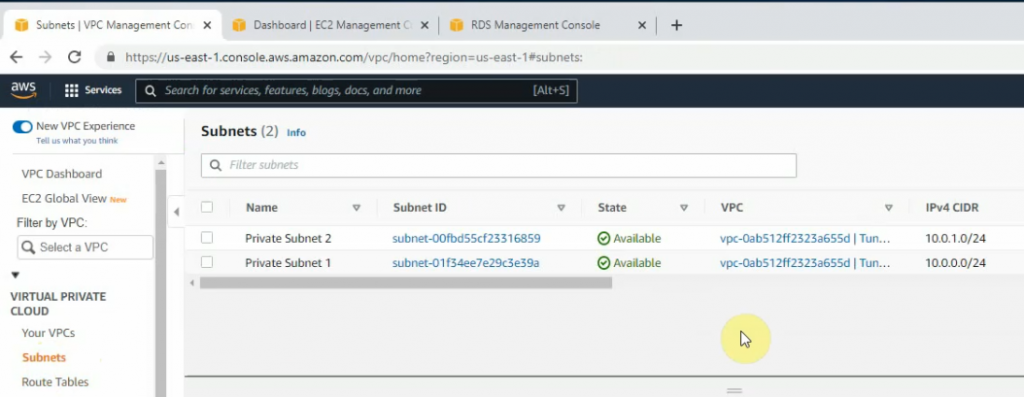
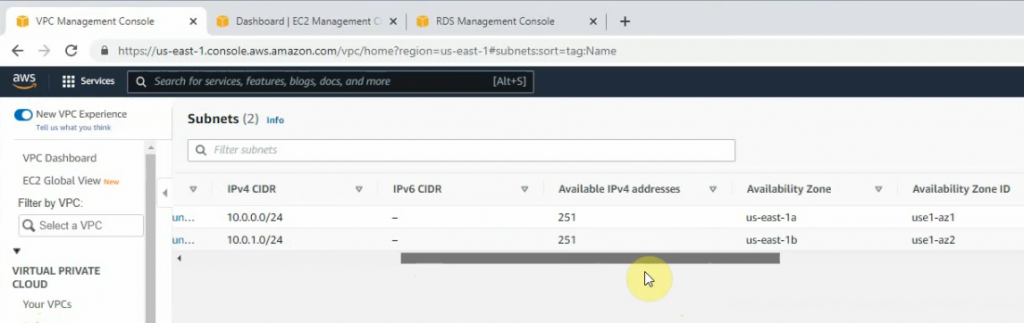
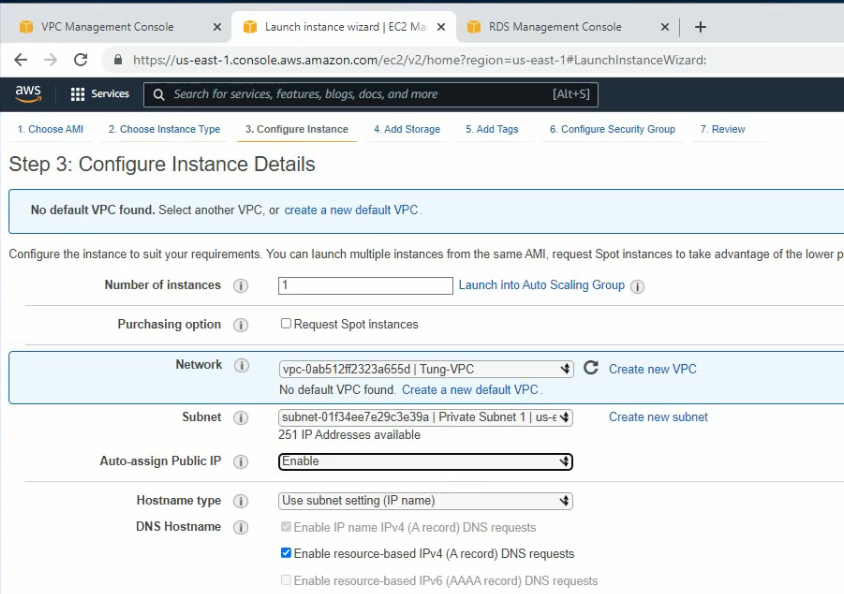
Create your VPC with two different subnets on different AZs.
![](https://tungle.ca/wp-content/uploads/2022/05/image-6-1024x397.png)
![](https://tungle.ca/wp-content/uploads/2022/05/image-7-1024x323.png)
Create a Linux instance.
![](https://tungle.ca/wp-content/uploads/2022/05/image-8.png)
Copy it into the User data setting.
#!/bin/bash
yum update -y
yum install httpd -y
wget https://wordpress.org/latest.tar.gz
tar -zxf latest.tar.gz
amazon-linux-extras install php7.4 -y
![](https://tungle.ca/wp-content/uploads/2022/05/image-9-1024x432.png)
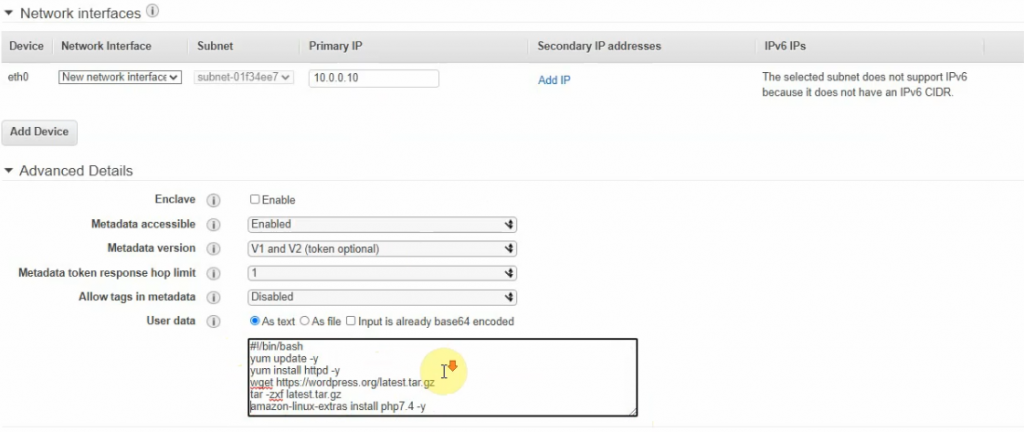
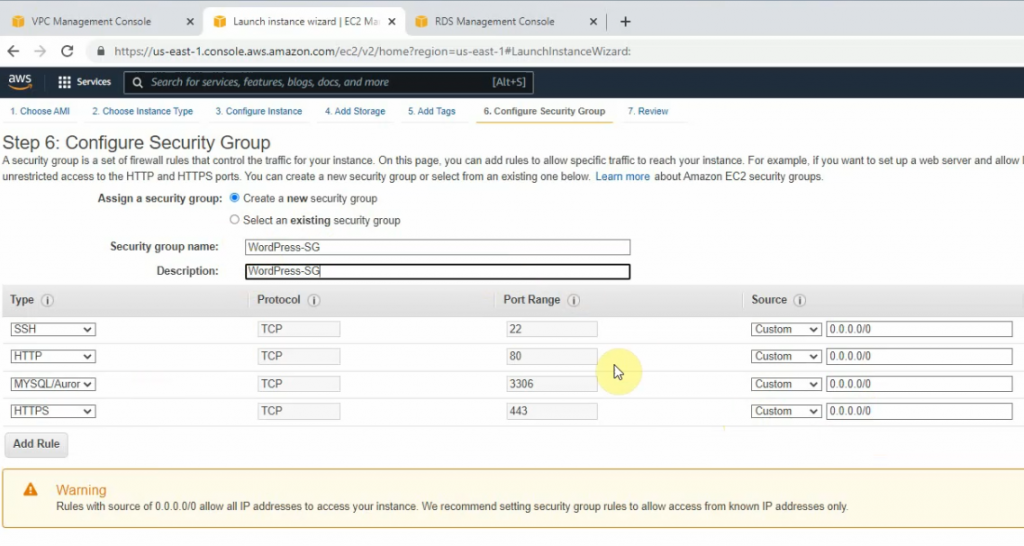
Create a WordPress-SG Security Group.
![](https://tungle.ca/wp-content/uploads/2022/05/image-10-1024x546.png)
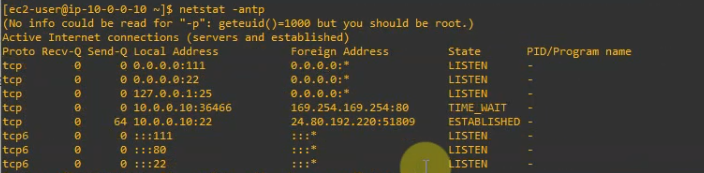
SSH to the Linux instance, and check httpd, php is installed on the machine.
rpm -qa | grep httpd
rpm -qa | grep php
sudo yum install php -y
sudo systemctl start httpd
sudo systemctl enable httpd
netstat -antp
Copy all files on WordPress directory to /var/www/html.
cd wordpress
sudo cp -r * /var/www/html
cd /var/www/html
Check HTTP service is running on the Linux instance.
![](https://tungle.ca/wp-content/uploads/2022/05/image-20.png)
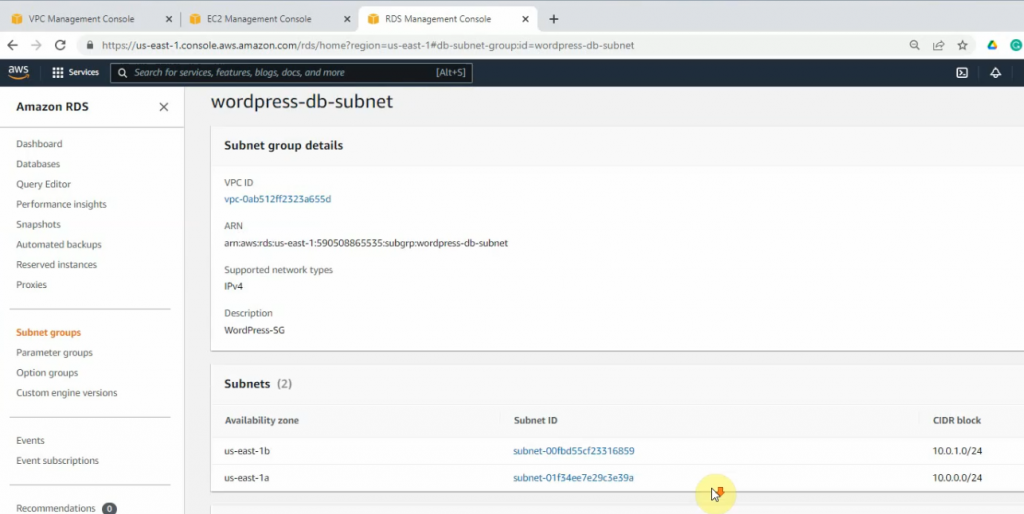
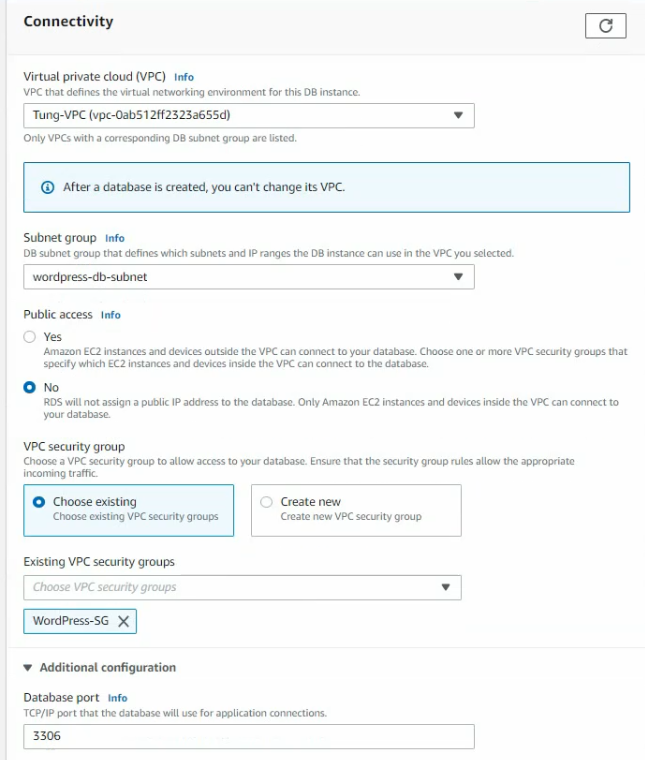
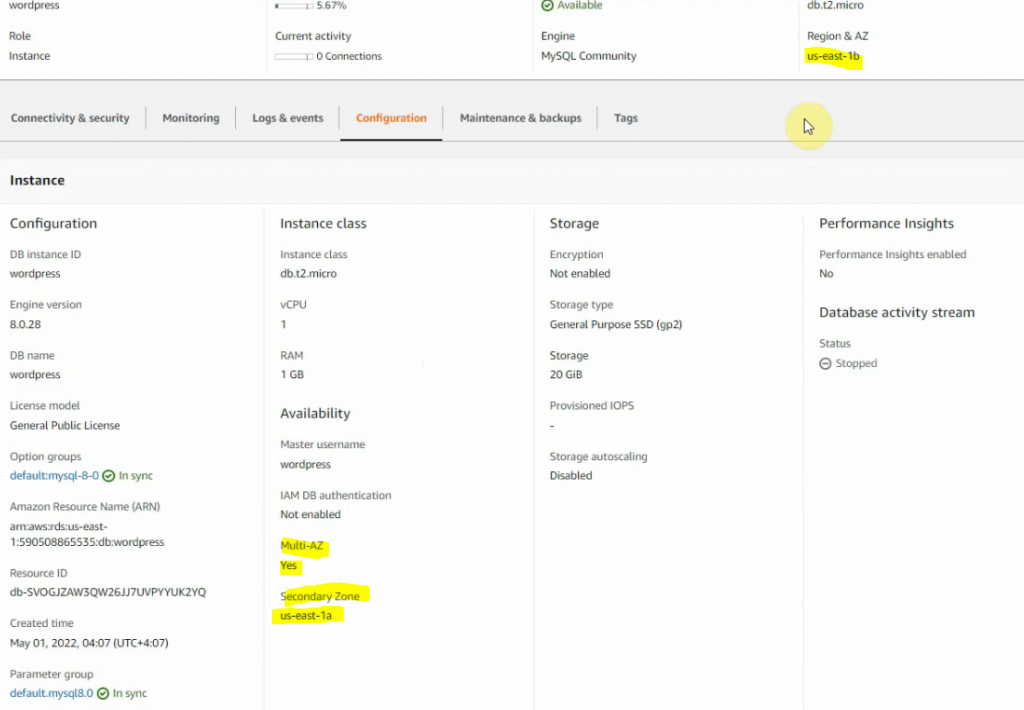
Next, create a database subnet on your Amazon RDS by using both AZs.
![](https://tungle.ca/wp-content/uploads/2022/05/image-12-1024x514.png)
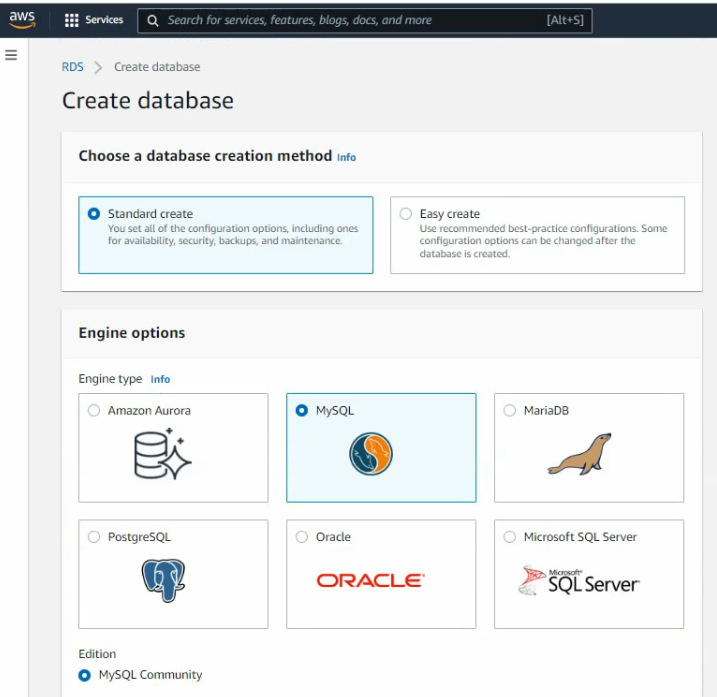
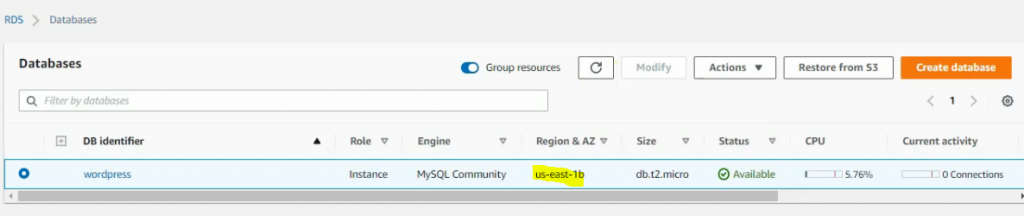
Create a new DS database.
![](https://tungle.ca/wp-content/uploads/2022/05/image-13.png)
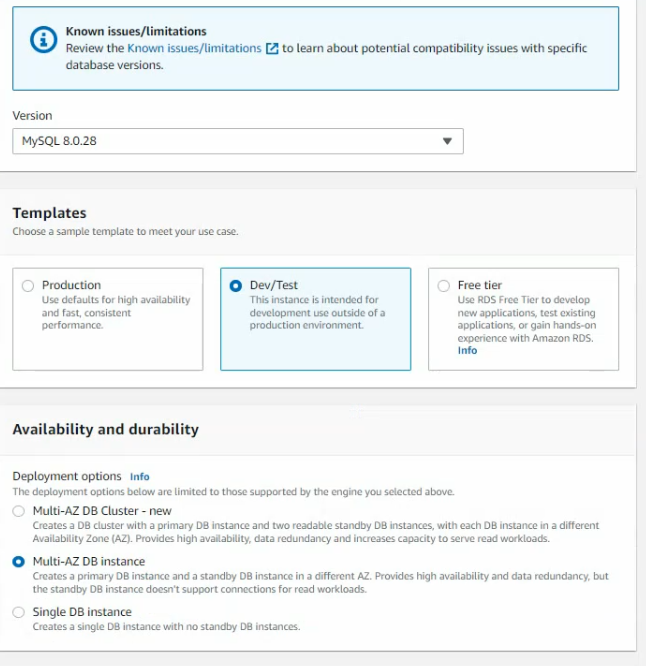
Enable “Multi-AZ DB instance”.
![](https://tungle.ca/wp-content/uploads/2022/05/image-14.png)
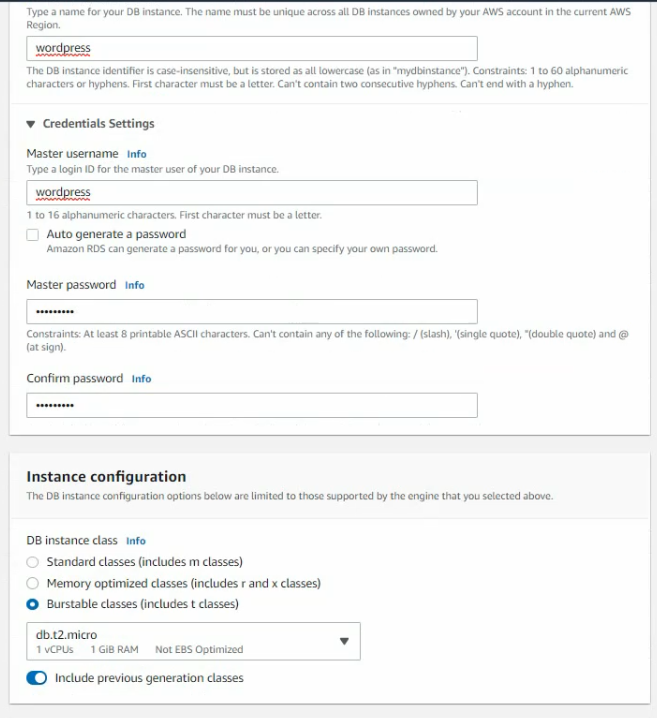
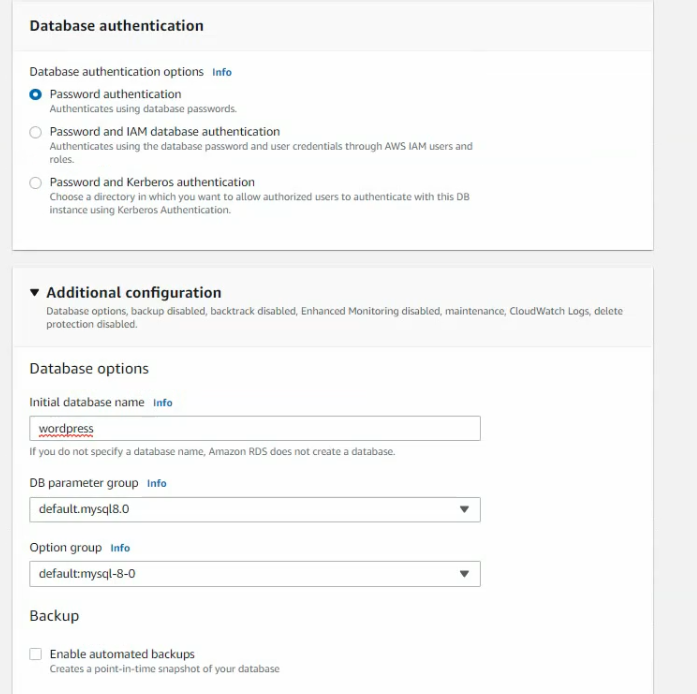
Create a wordpress database, username, and passowrd.
![](https://tungle.ca/wp-content/uploads/2022/05/image-15.png)
![](https://tungle.ca/wp-content/uploads/2022/05/image-17.png)
![](https://tungle.ca/wp-content/uploads/2022/05/image-18.png)
![](https://tungle.ca/wp-content/uploads/2022/05/image-19.png)
![](https://tungle.ca/wp-content/uploads/2022/05/image-21-1024x216.png)
![](https://tungle.ca/wp-content/uploads/2022/05/image-22.png)
![](https://tungle.ca/wp-content/uploads/2022/05/image-23-1024x710.png)
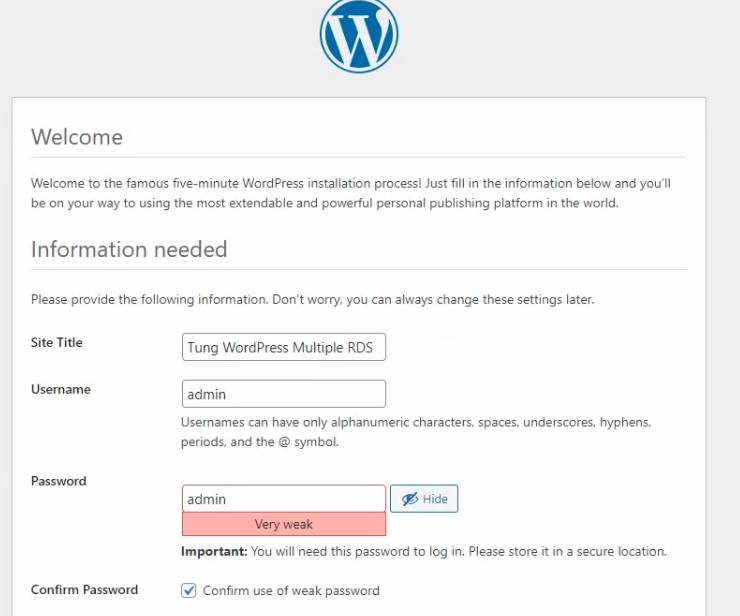
Open http://44.205.13.154 on your web browser to set up WordPress.
![](https://tungle.ca/wp-content/uploads/2022/05/image-24-1024x553.png)
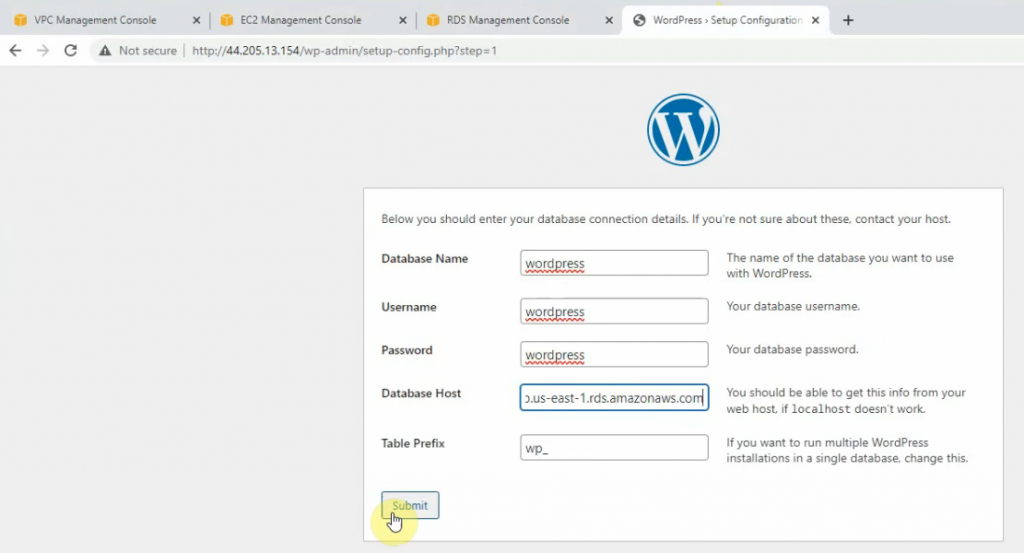
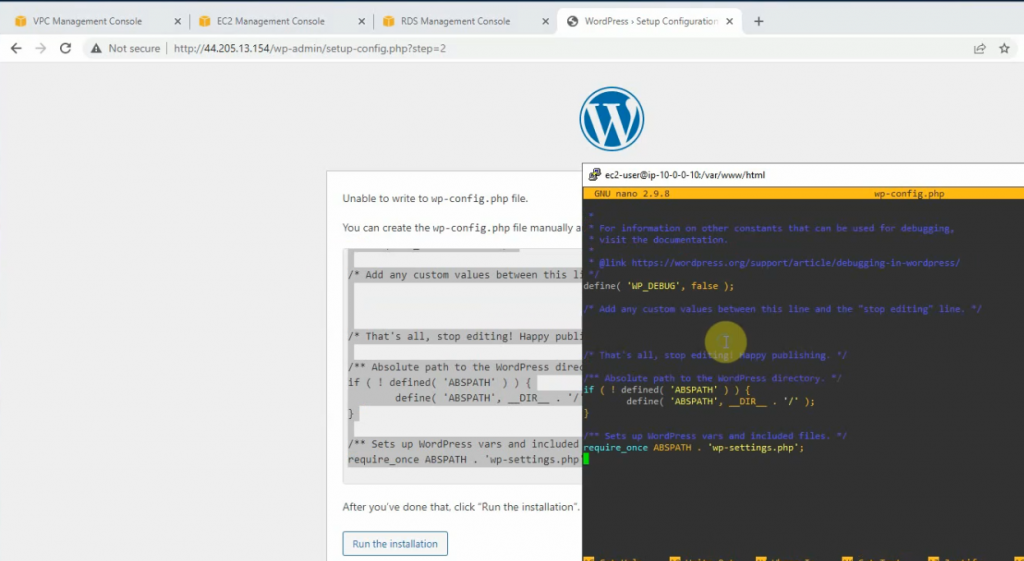
Create a new wp-config.php under /var/www/html directory, and paste the information on the screen to this file. Click “Run the installation”
![](https://tungle.ca/wp-content/uploads/2022/05/image-27-1024x561.png)
![](https://tungle.ca/wp-content/uploads/2022/05/image-28.png)
![](https://tungle.ca/wp-content/uploads/2022/05/image-30-1024x695.png)
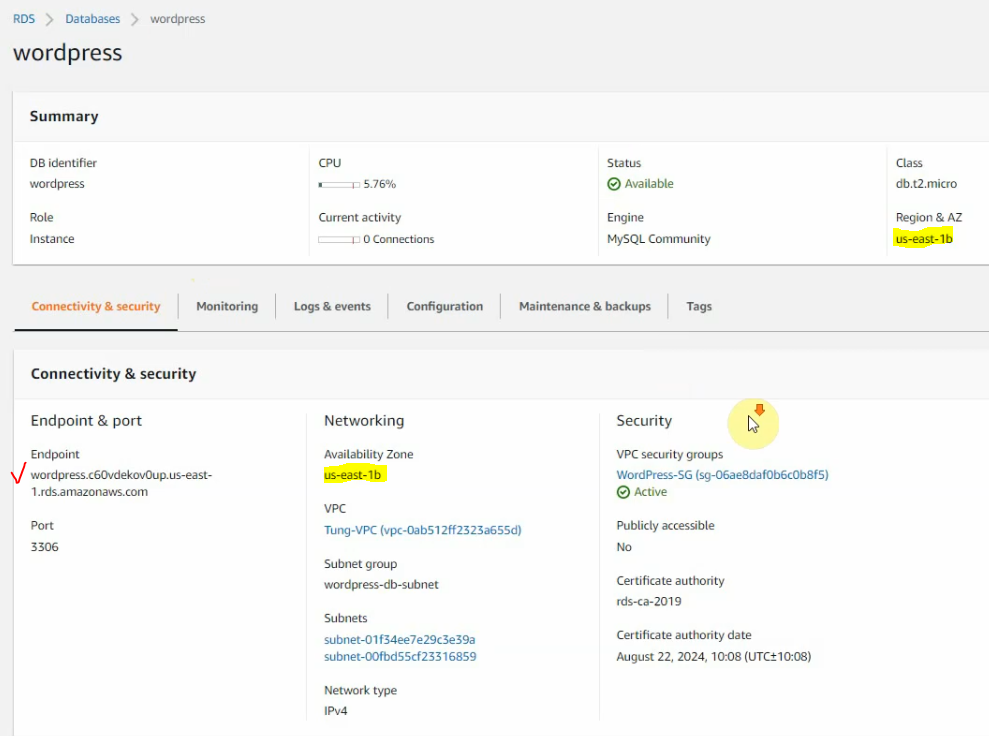
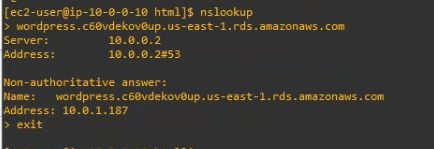
The master RDS MySQL instance is on the IP address 10.0.1.187 on Availability zone 2.
![](https://tungle.ca/wp-content/uploads/2022/05/image-42.png)
![](https://tungle.ca/wp-content/uploads/2022/05/image-41.png)
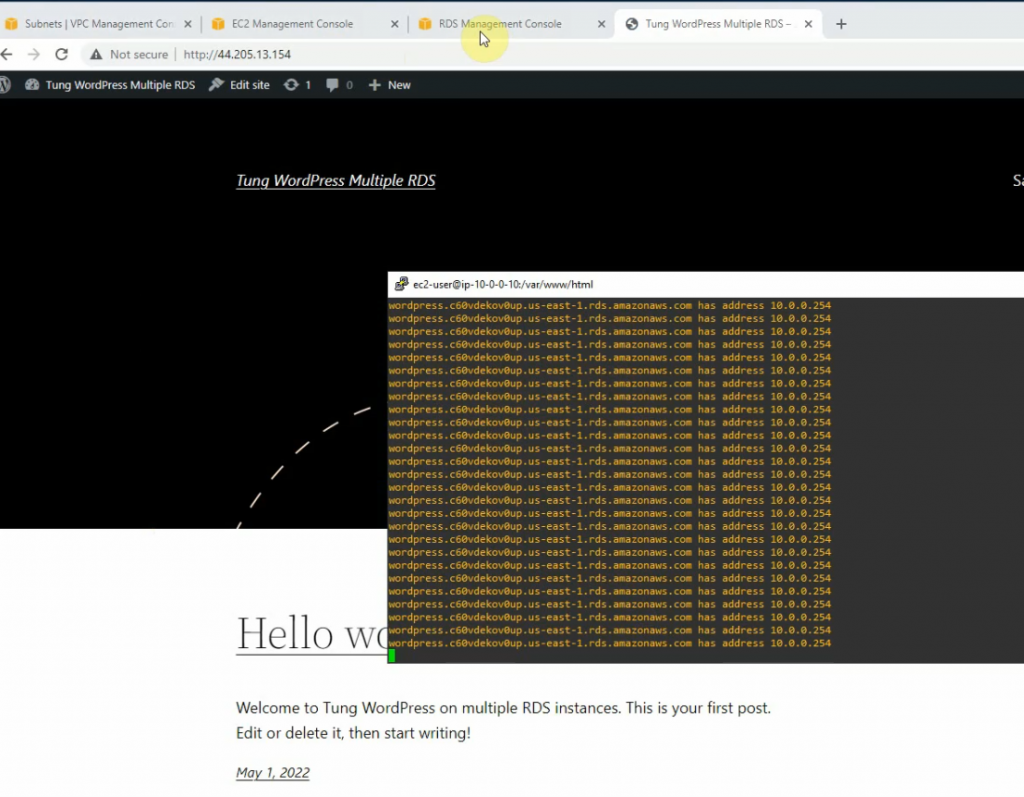
Run the command below to verify RDS MYSQL failover.
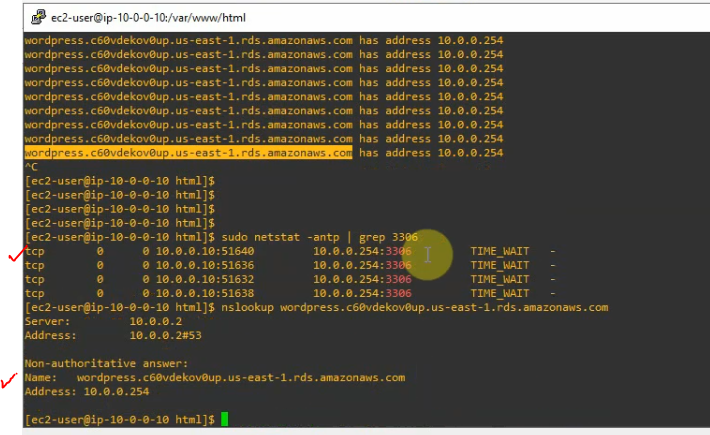
while true; do host wordpress.c60vdekov0up.us-east-1.rds.amazonaws.com ; sleep 1; done
![](https://tungle.ca/wp-content/uploads/2022/05/image-32-1024x562.png)
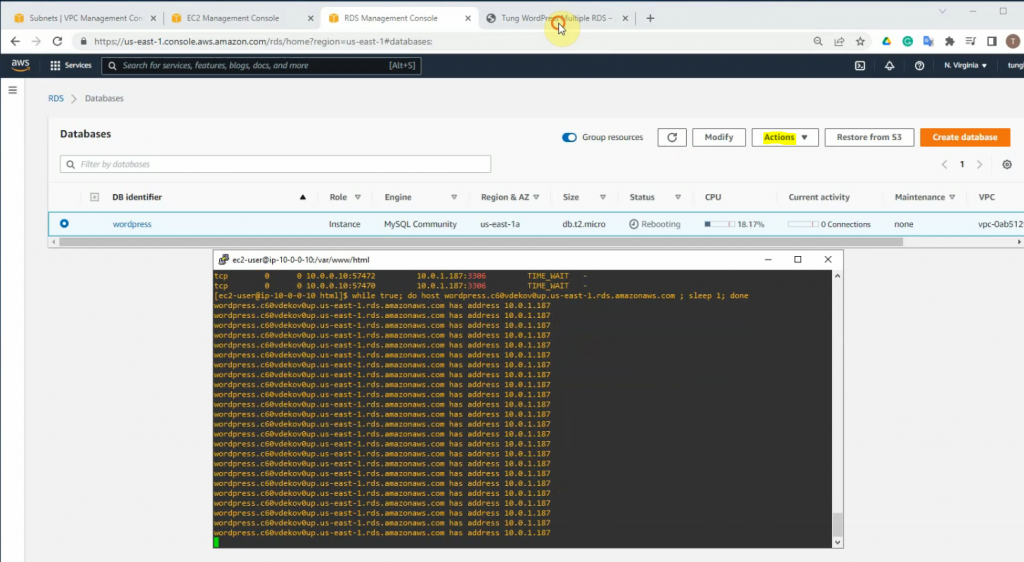
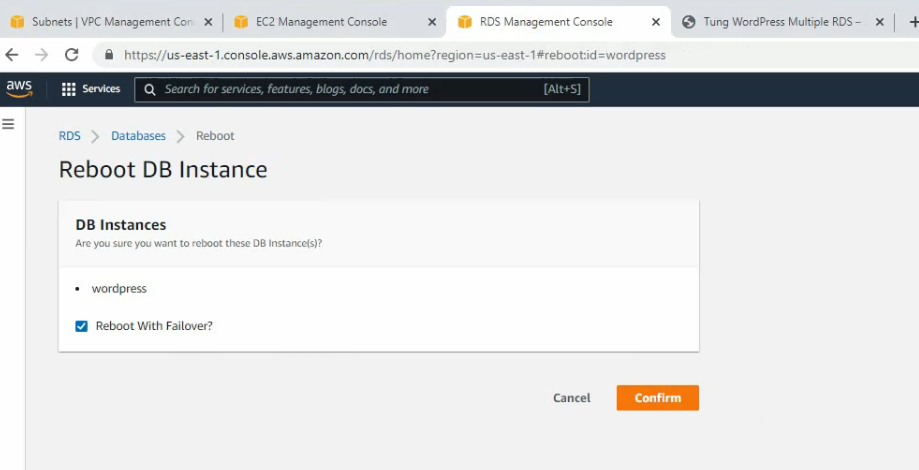
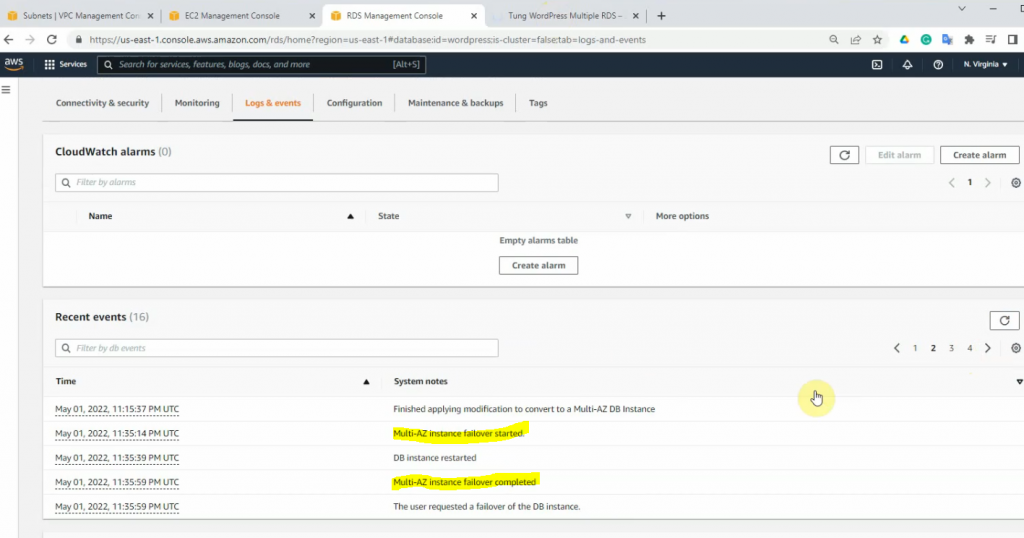
Then select Actions-Reboot to reboot the RDS instance. Enable the “Reboot with Failover” option.
![](https://tungle.ca/wp-content/uploads/2022/05/image-33.png)
Wait for around 1 to 2 minutes and refresh the WP web link. The WordPress site will be offline for around 1 minute when doing RDS failover. It can be seen that the RDS MySQL Endpoint has changed from 10.0.2.187 to 10.0.0.254.
![](https://tungle.ca/wp-content/uploads/2022/05/image-34.png)
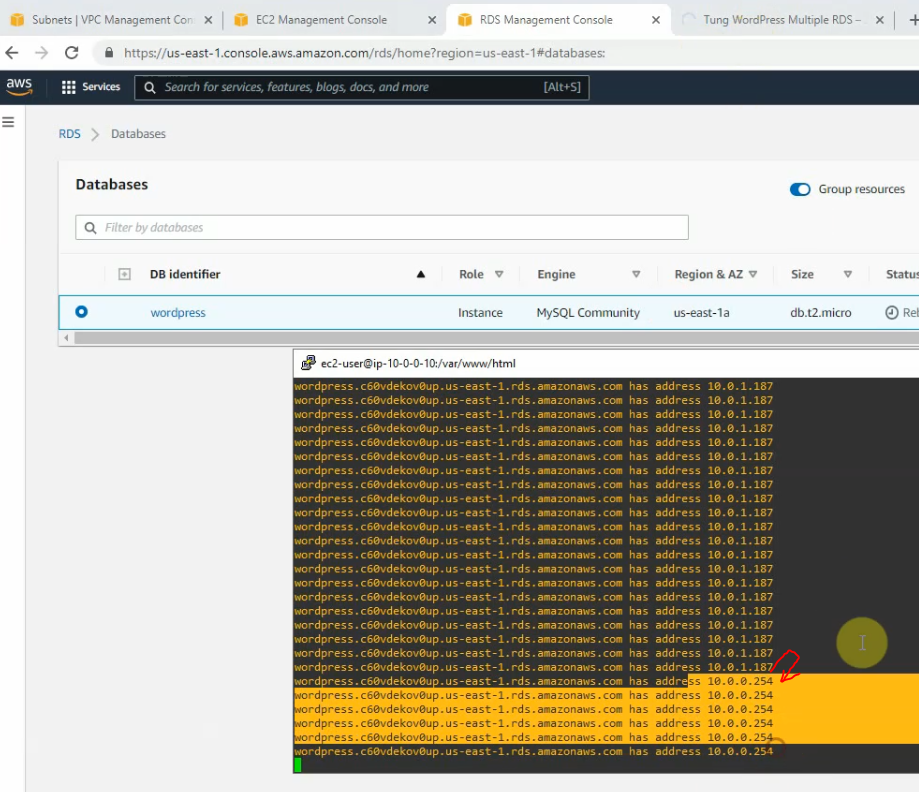
RDS Endpoint has updated with the new address is 10.0.0.254 on us-east-1a.
![](https://tungle.ca/wp-content/uploads/2022/05/image-35-1024x673.png)
![](https://tungle.ca/wp-content/uploads/2022/05/image-36-1024x625.png)
![](https://tungle.ca/wp-content/uploads/2022/05/image-37-1024x538.png)
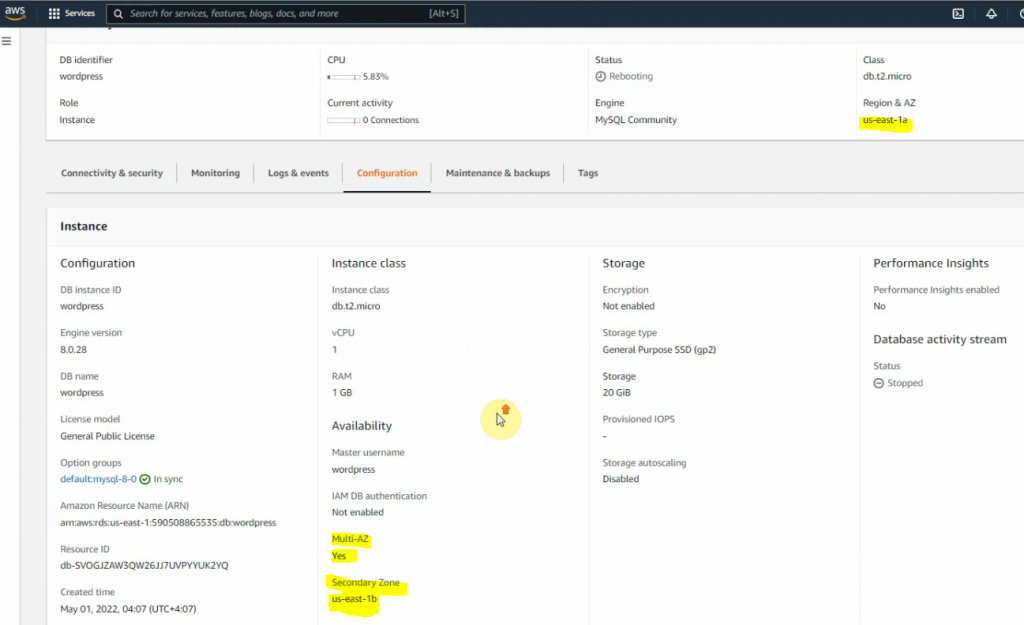
The master RDS MySQL instance is on the IP address 10.0.0.254 on Availability zone 1.
![](https://tungle.ca/wp-content/uploads/2022/05/image-40.png)
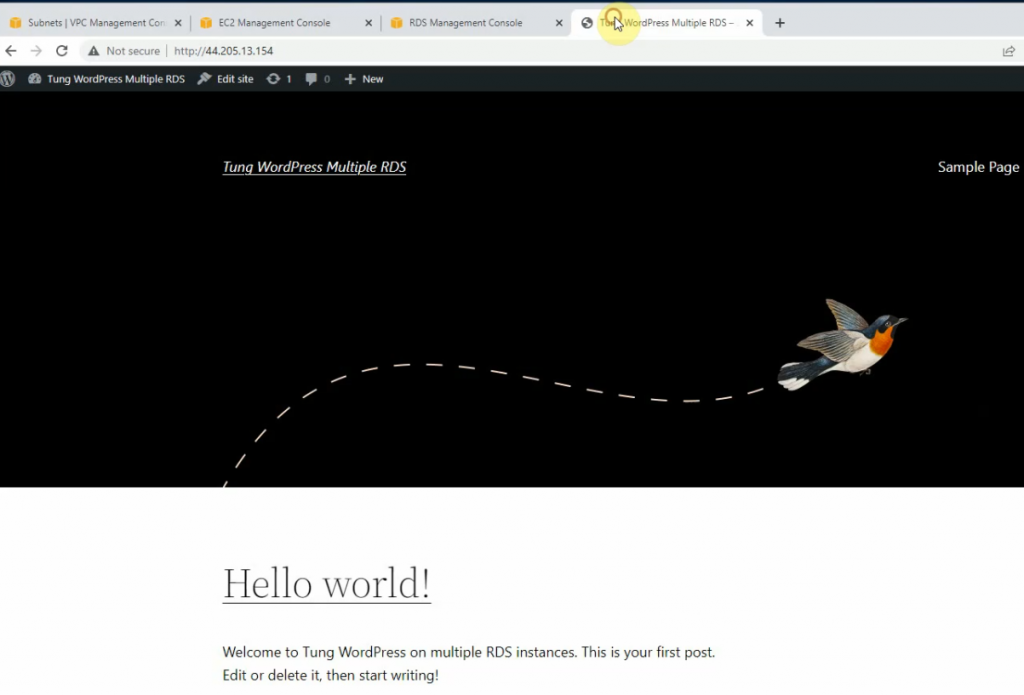
Checking the WordPress site.
![](https://tungle.ca/wp-content/uploads/2022/05/image-38-1024x797.png)