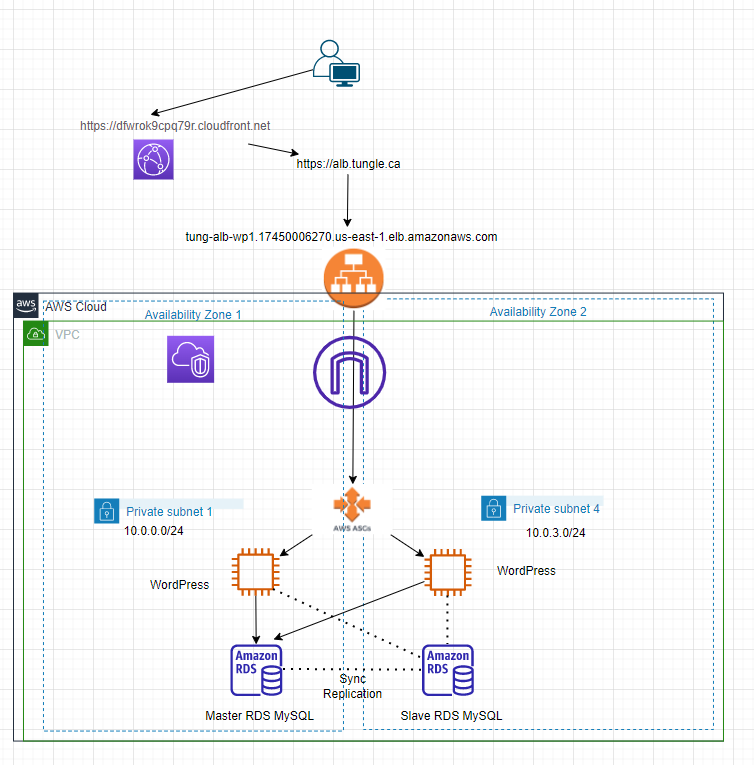
This is a diagram that I have used for this lab.
![](https://tungle.ca/wp-content/uploads/2022/04/image-1010.png)
There are several main steps that I have used in the lab.
- Create four private subnets on four AZs.
- Create a WordPress instance on the first AZ.
- Create a new MySQL instance on Multi-AZs deployment.
- Create an AMI image for the WordPress instance.
- Create a Launch configuration.
- Set up an Auto Scaling Group with your launch configuration.
- Request ALB certificate via AWS Certificate Manager.
- Configure HTTPS listener on ALB.
- Configure the HTTP listener and redirect the HTTP traffic to HTTPS.
- Create a CNAME record on your DNS zone for the Amazon domain name.
- Test an Application Load Balancer for WordPress on multiple AZs with MySQL instance on Multi-AZ deployments.
- Configure Amazon CloudFront.
- Test an Application Load Balancer for WordPress on your cloudfront.net domain.
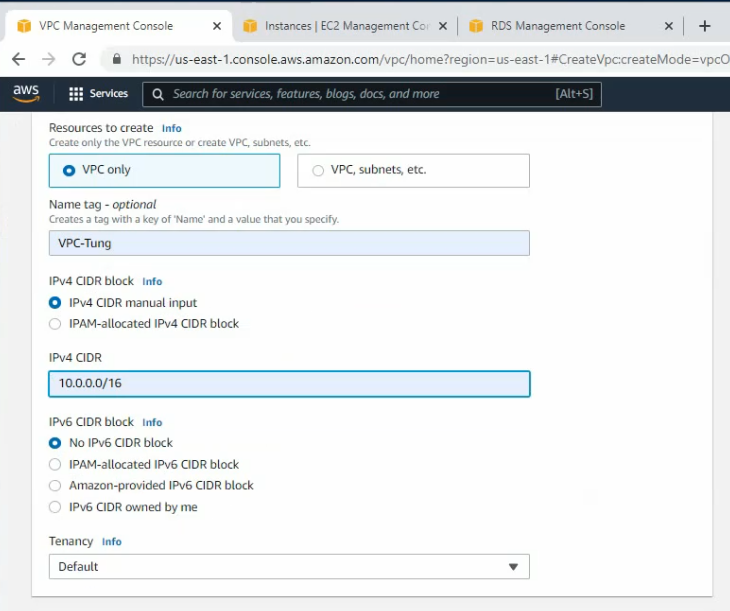
Create a new VPC.
![](https://tungle.ca/wp-content/uploads/2022/04/image-902.png)
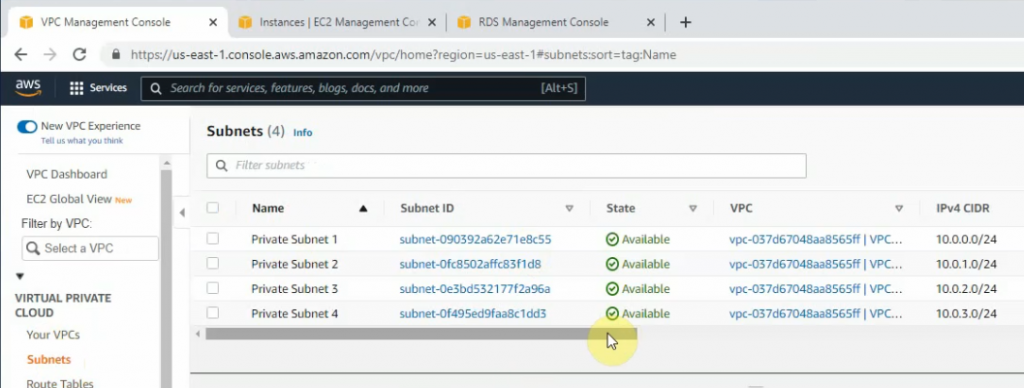
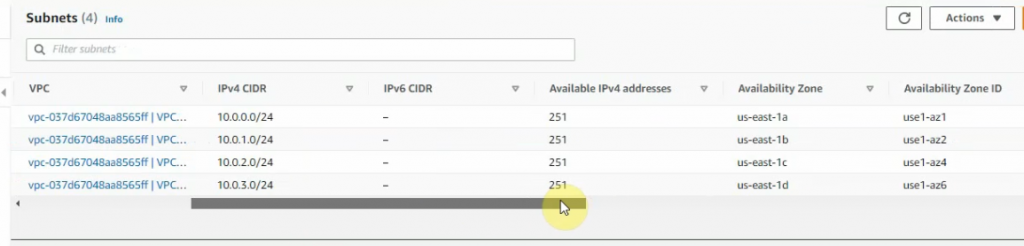
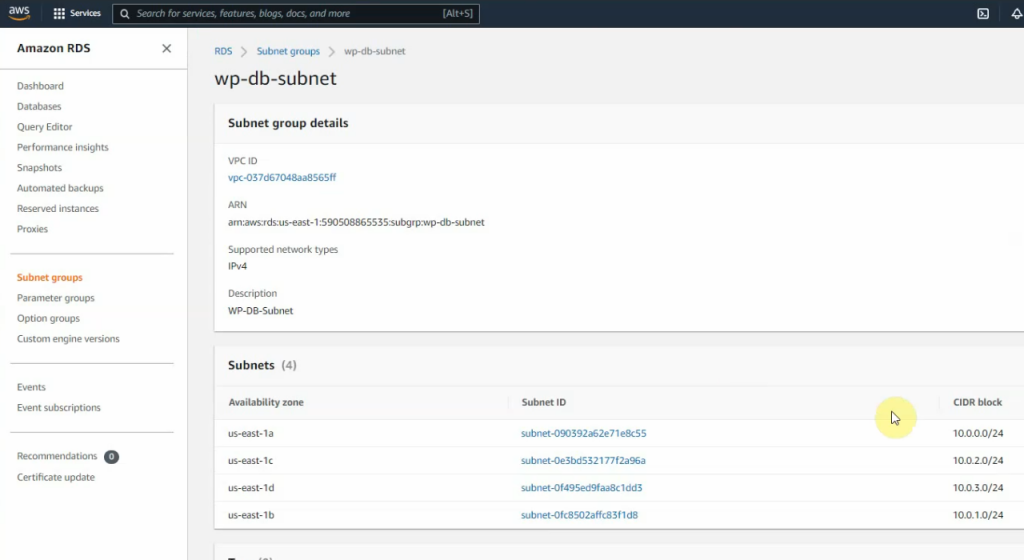
Create 4 private subnets on 4 Availability zones.
![](https://tungle.ca/wp-content/uploads/2022/04/image-903-1024x388.png)
![](https://tungle.ca/wp-content/uploads/2022/04/image-904-1024x246.png)
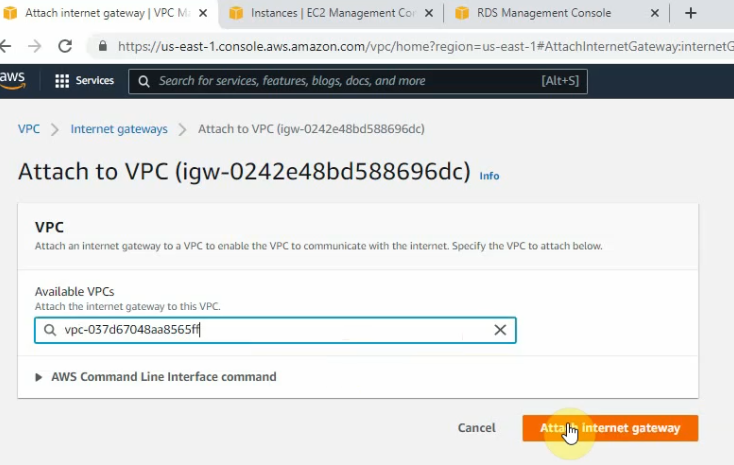
Create and attach a new Internet Gateway to your VPC.
![](https://tungle.ca/wp-content/uploads/2022/04/image-905.png)
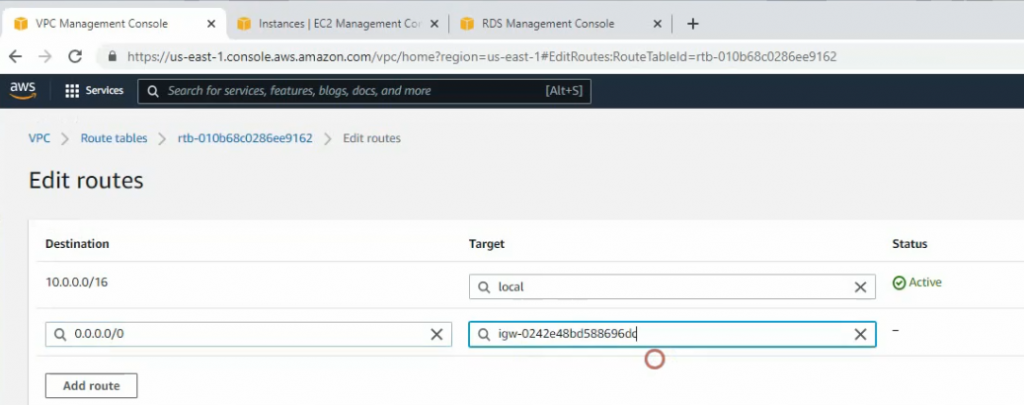
Create a static route 0.0.0.0/0 on your VPC.
![](https://tungle.ca/wp-content/uploads/2022/04/image-906-1024x405.png)
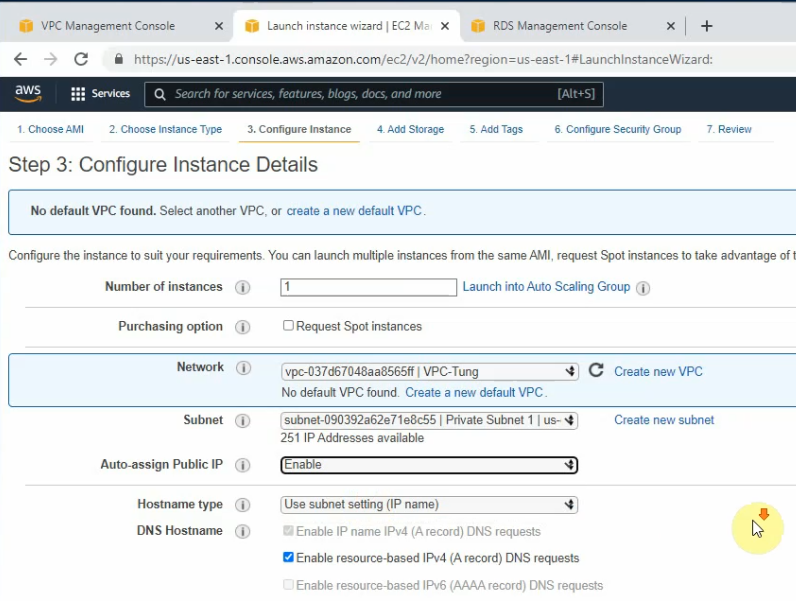
Create a Linux instance.
![](https://tungle.ca/wp-content/uploads/2022/04/image-907.png)
Copy it into the User data setting.
#!/bin/bash
yum update -y
# Install Apache web service
yum install httpd -y
# Download WordPress
wget https://wordpress.org/latest.tar.gz
tar -zxf latest.tar.gz
# Install php7.4
amazon-linux-extras install php7.4 -y
Create a WordPress-SG.
![](https://tungle.ca/wp-content/uploads/2022/04/image-908-1024x462.png)
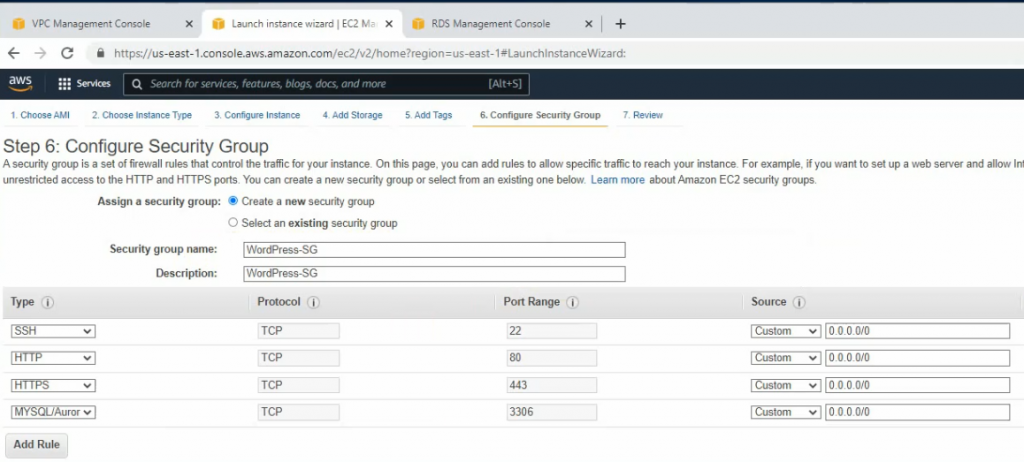
Create a new Security Group is WordPress-ALB-AutoScaling for ALB AutoScaling.
![](https://tungle.ca/wp-content/uploads/2022/04/image-910-1024x593.png)
![](https://tungle.ca/wp-content/uploads/2022/04/image-923-1024x457.png)
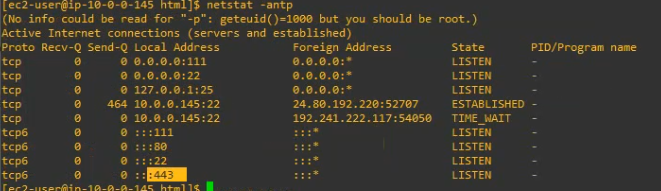
SSH to the Linux instance, and check httpd, php is installed on the machine.
rpm -qa | grep httpd
rpm -qa | grep php
sudo yum install php -y
sudo systemctl start httpd
sudo systemctl enable httpd
netstat -antp
Copy all files on WordPress directory to /var/www/html.
cd wordpress
sudo cp -r * /var/www/html
cd /var/www/html
Create an ip.php file on /var/www/html directory.
#sudo nano ip.php
<?php
echo "Local IP address: "; echo $_SERVER['SERVER_ADDR'];
echo "<br>";
echo "Public IP address: "; echo $_SERVER['SERVER_NAME']
?>
Install mod_ssl on the Linux instance.
sudo yum install mod_ssl
Create a TLS certificate for the Linux instance.
sudo openssl req -x509 -nodes -days 365 -newkey rsa:2048 -keyout /etc/pki/tls/private/localhost.key -out /etc/pki/tls/certs/localhost.crt
![](https://tungle.ca/wp-content/uploads/2022/04/image-924.png)
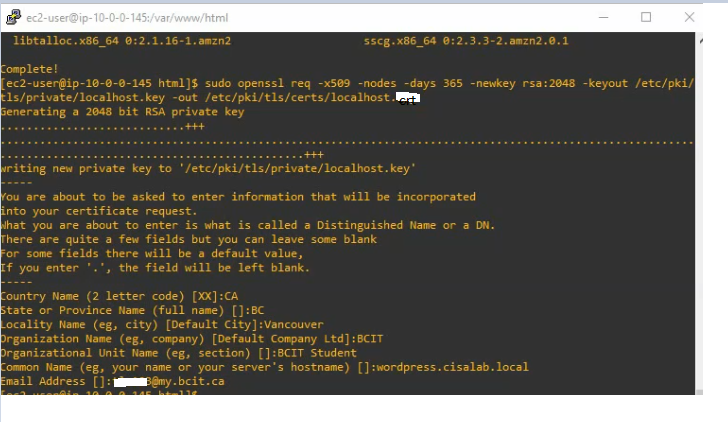
Restart apache web service.
sudo systemctl stop httpd
sudo systemctl start httpd
Check https is running on the Linux instance.
![](https://tungle.ca/wp-content/uploads/2022/04/image-925.png)
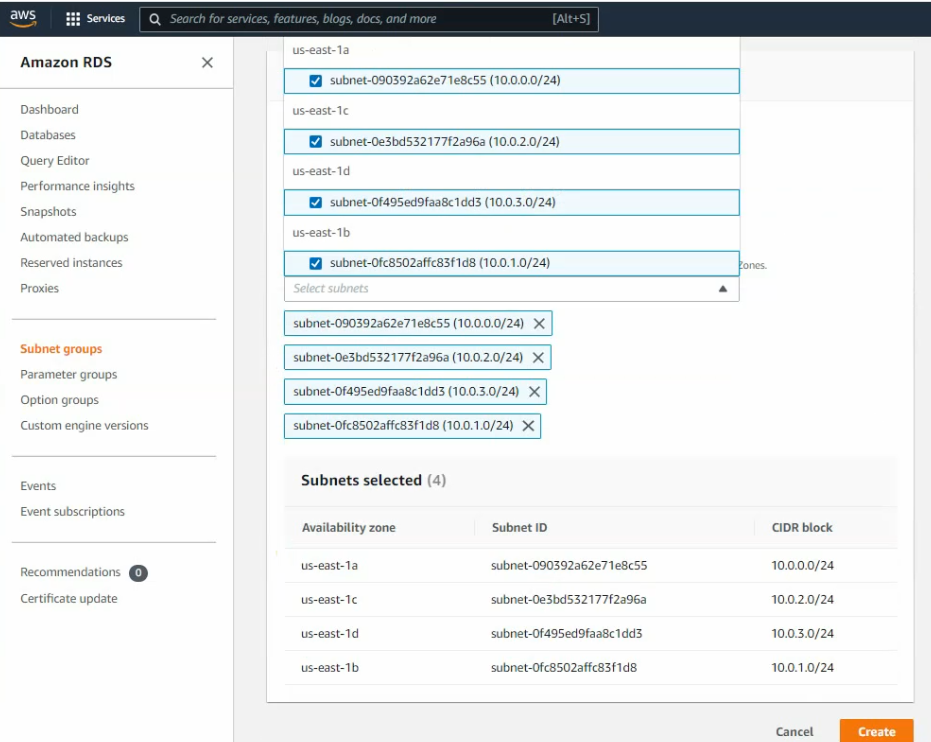
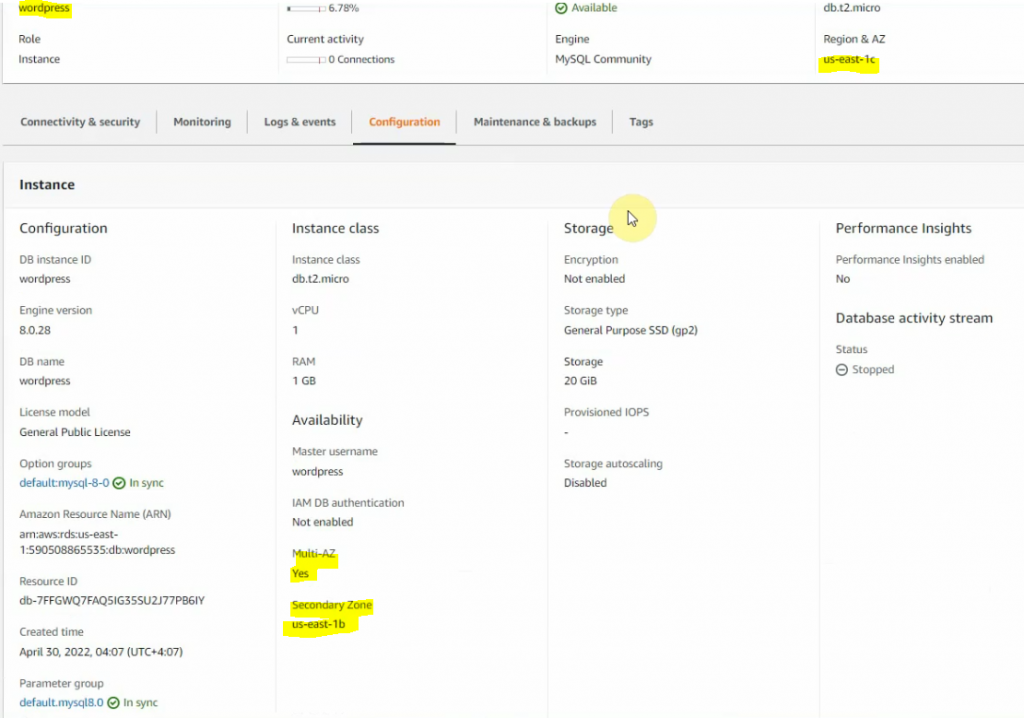
Go to RDS, and create a new database subnet.
![](https://tungle.ca/wp-content/uploads/2022/04/image-1005.png)
![](https://tungle.ca/wp-content/uploads/2022/04/image-1006-1024x560.png)
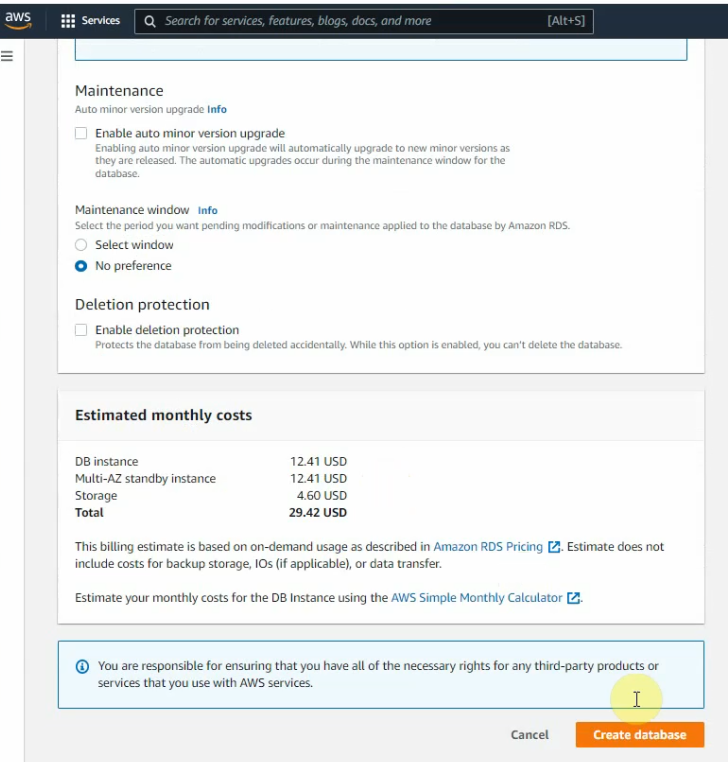
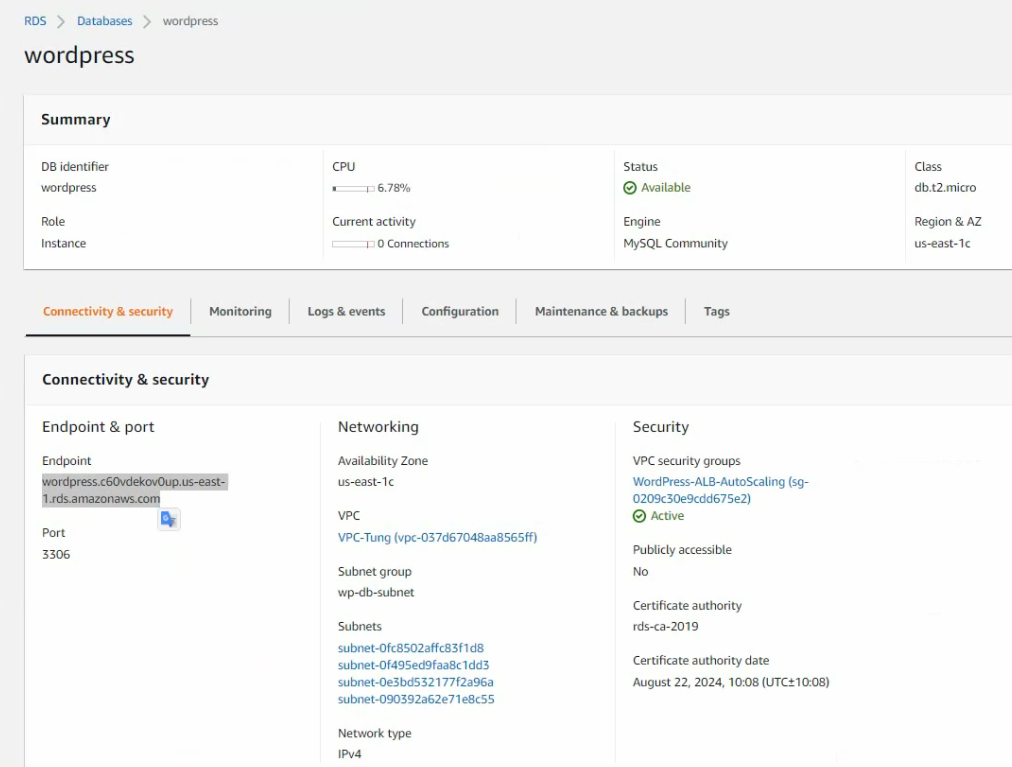
Create a new database instance on AWS.
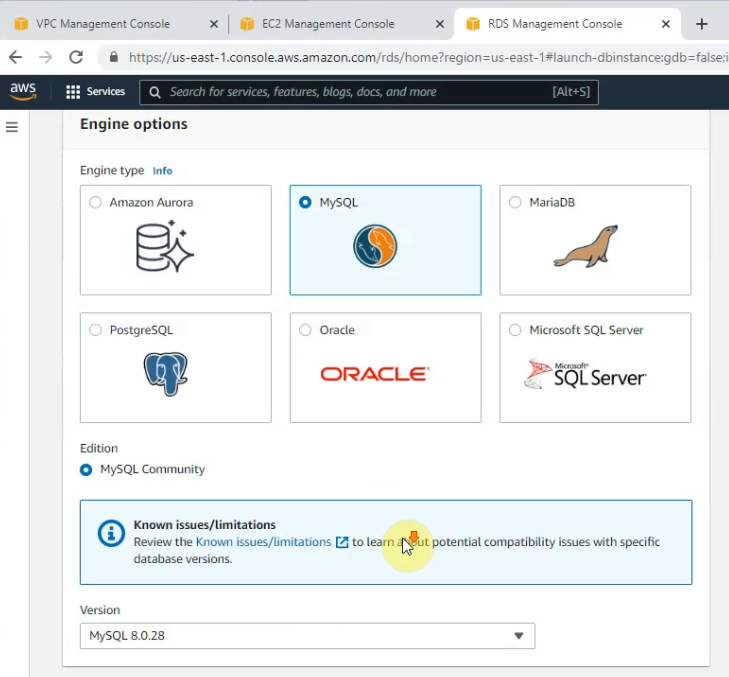
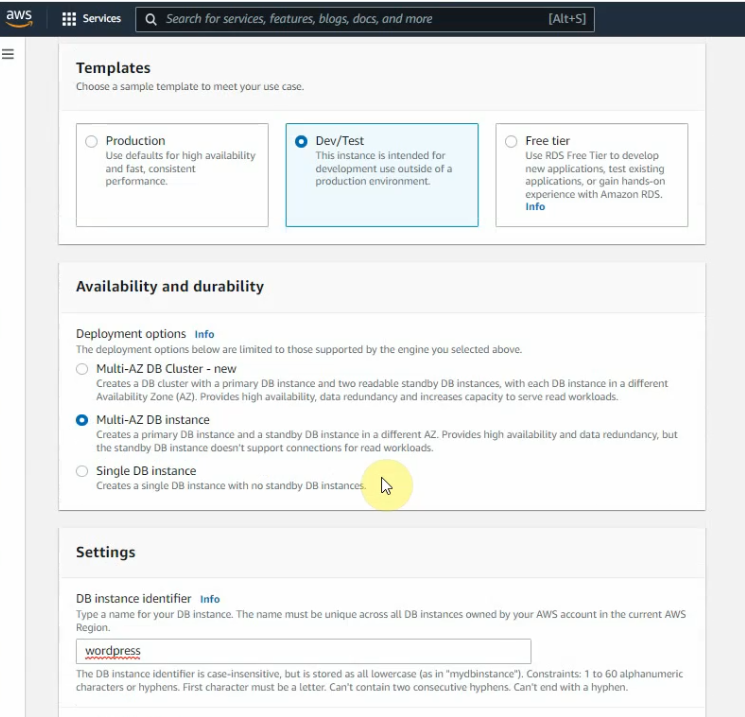
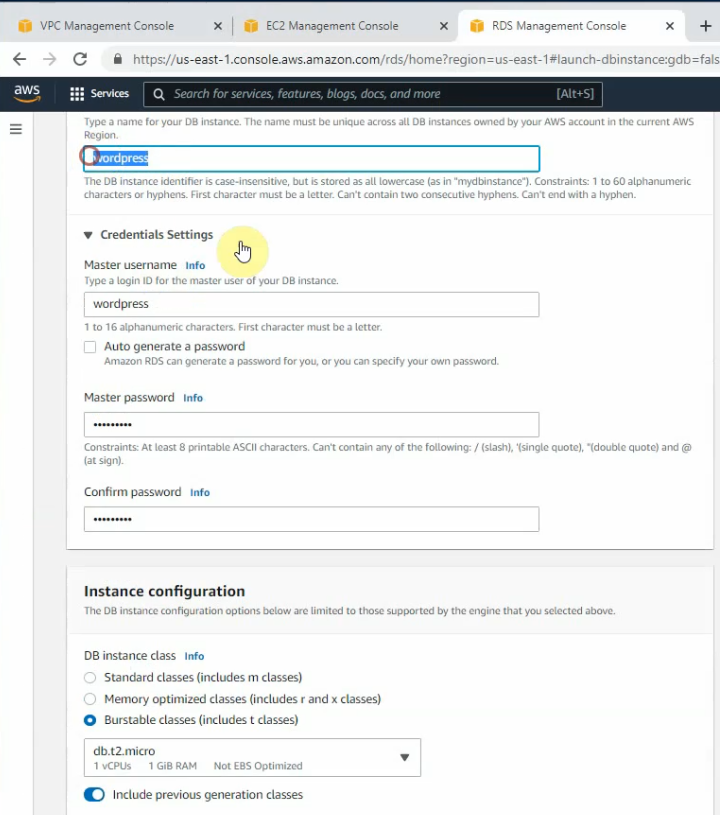
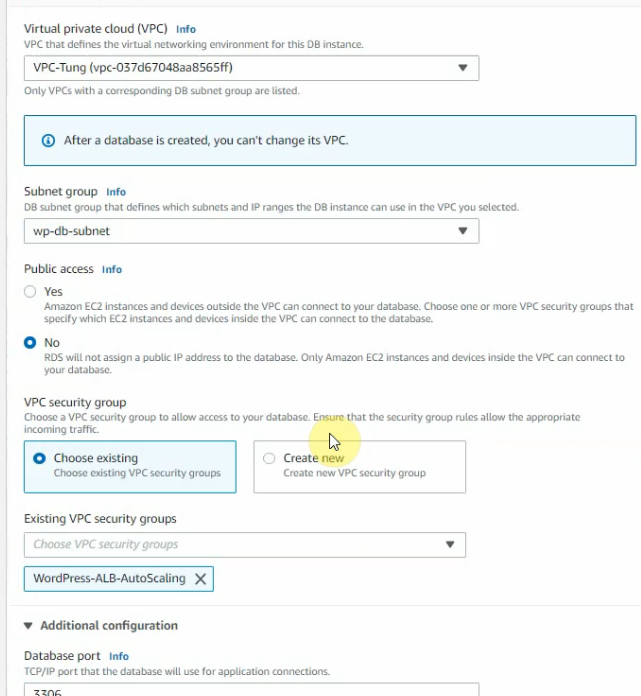
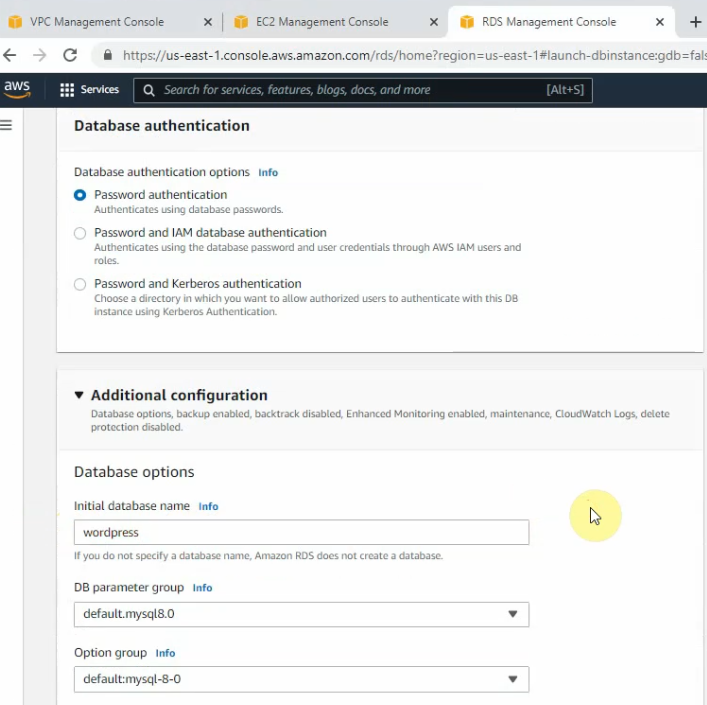
![](https://tungle.ca/wp-content/uploads/2022/04/image-909.png)
![](https://tungle.ca/wp-content/uploads/2022/04/image-920.png)
![](https://tungle.ca/wp-content/uploads/2022/04/image-918.png)
![](https://tungle.ca/wp-content/uploads/2022/04/image-921.png)
![](https://tungle.ca/wp-content/uploads/2022/04/image-919.png)
Create a database.
![](https://tungle.ca/wp-content/uploads/2022/04/image-922.png)
![](https://tungle.ca/wp-content/uploads/2022/04/image-926.png)
![](https://tungle.ca/wp-content/uploads/2022/05/image-3-1024x718.png)
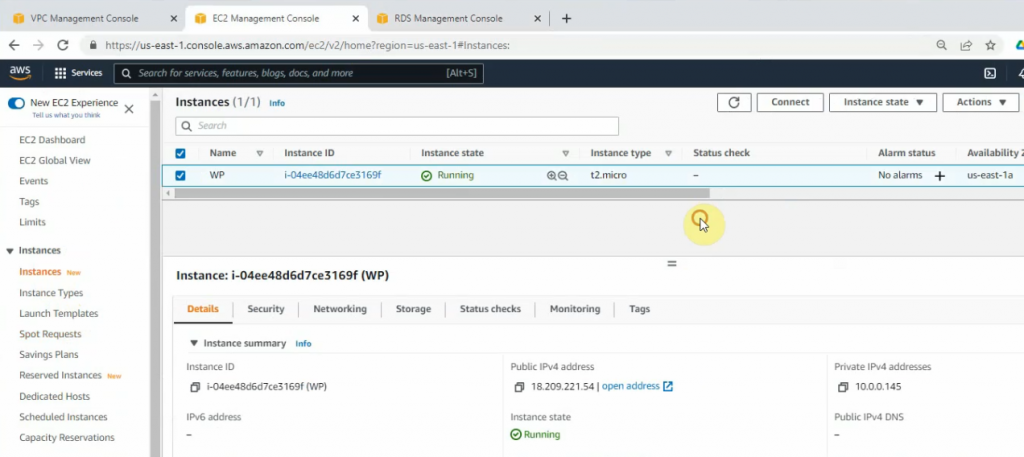
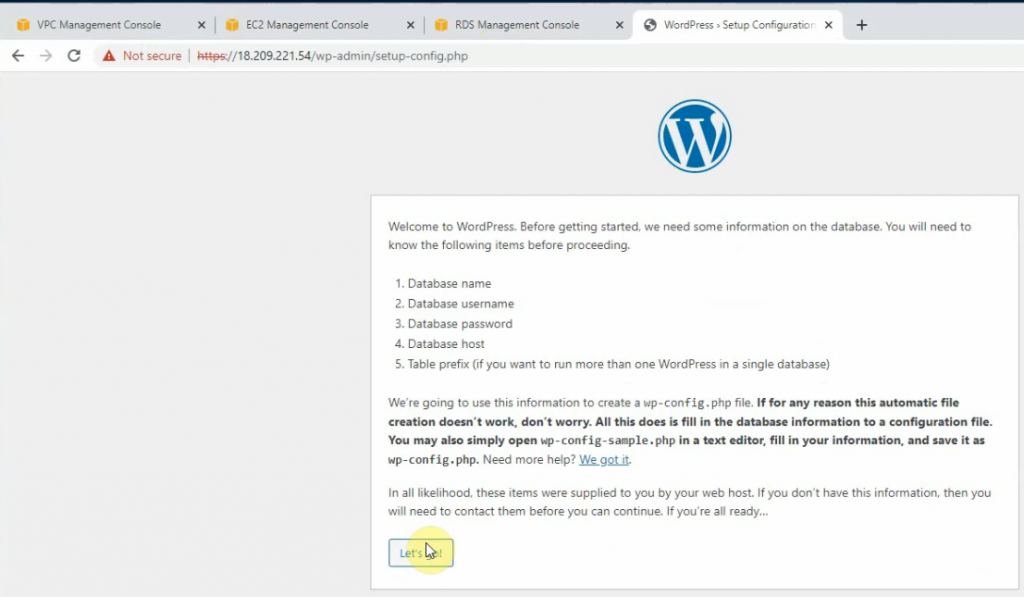
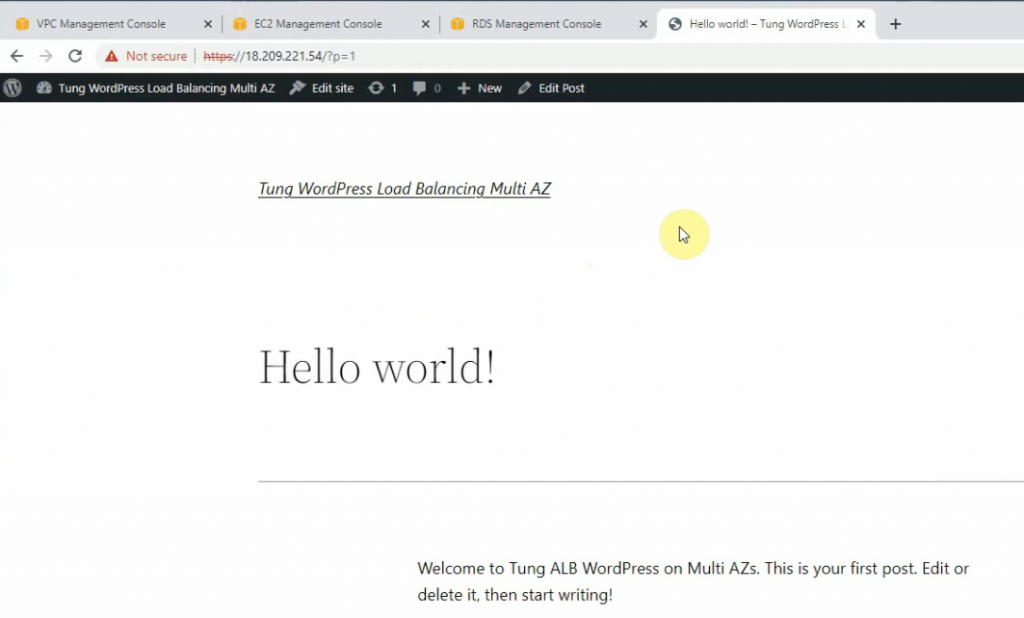
Open https://18.209.221.54 on your web browser to set up WordPress.
![](https://tungle.ca/wp-content/uploads/2022/04/image-927-1024x597.png)
![](https://tungle.ca/wp-content/uploads/2022/04/image-928-1024x567.png)
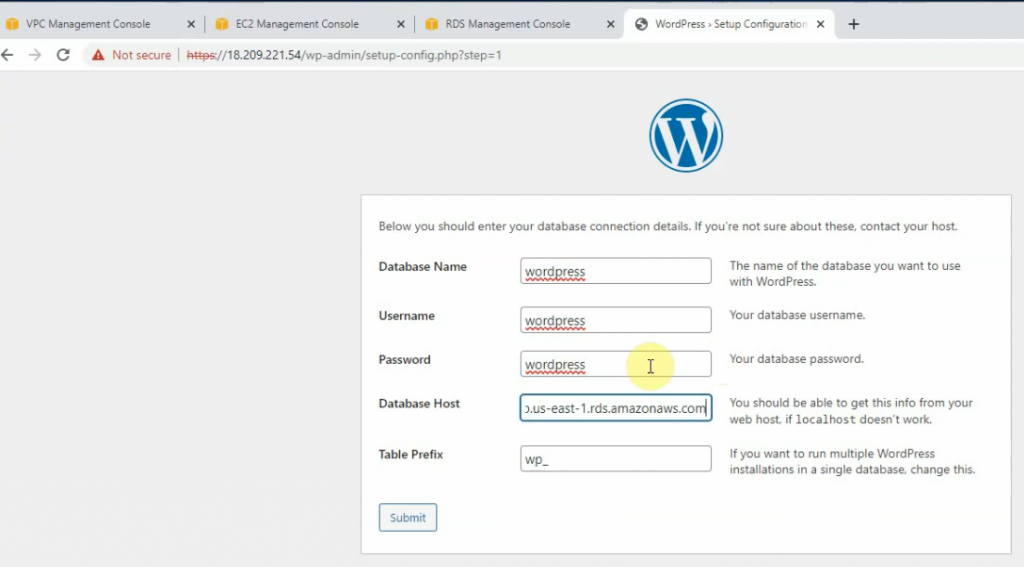
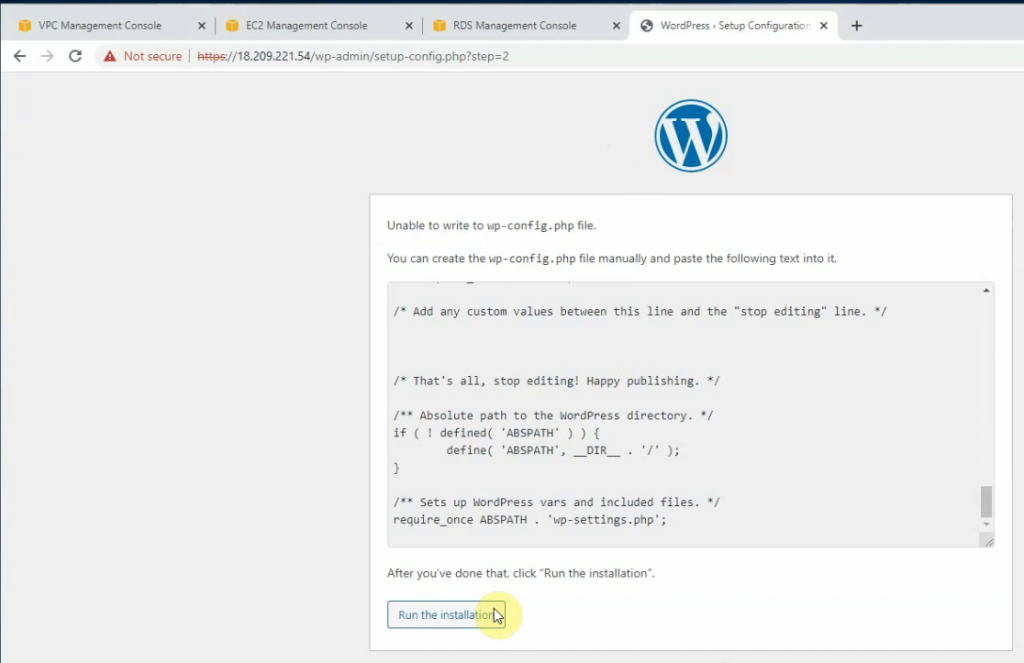
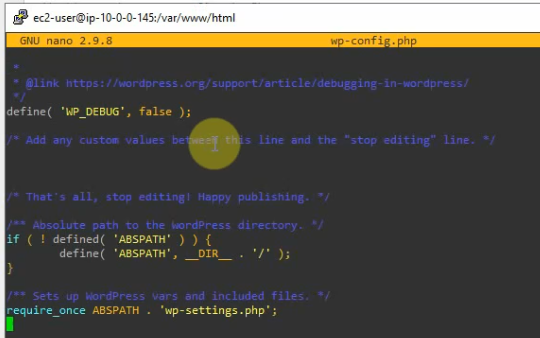
Create a new wp-config.php under /var/www/html directory, and paste the information on the screen to this file. Click “Run the installation”
![](https://tungle.ca/wp-content/uploads/2022/04/image-930-1024x663.png)
![](https://tungle.ca/wp-content/uploads/2022/04/image-929.png)
![](https://tungle.ca/wp-content/uploads/2022/04/image-931-1024x618.png)
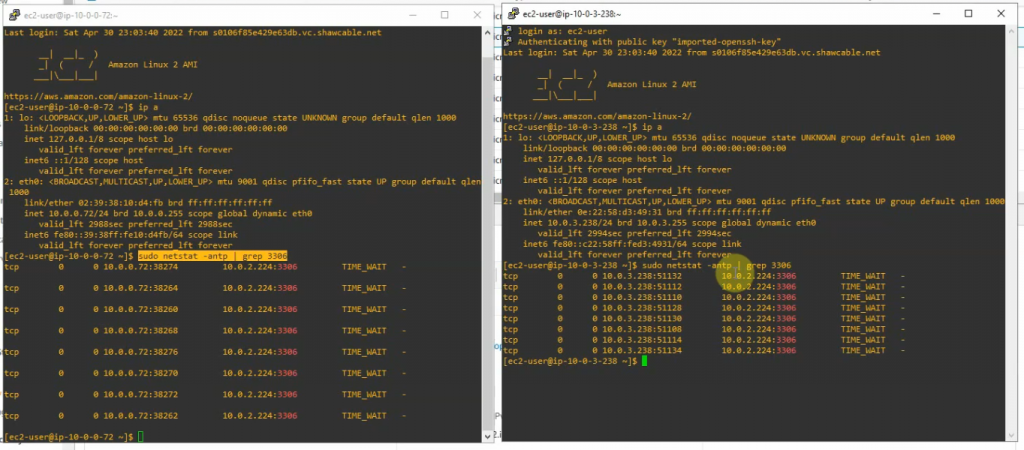
Check the connection from WP to RDS instance via the port 3306.
![](https://tungle.ca/wp-content/uploads/2022/04/image-934.png)
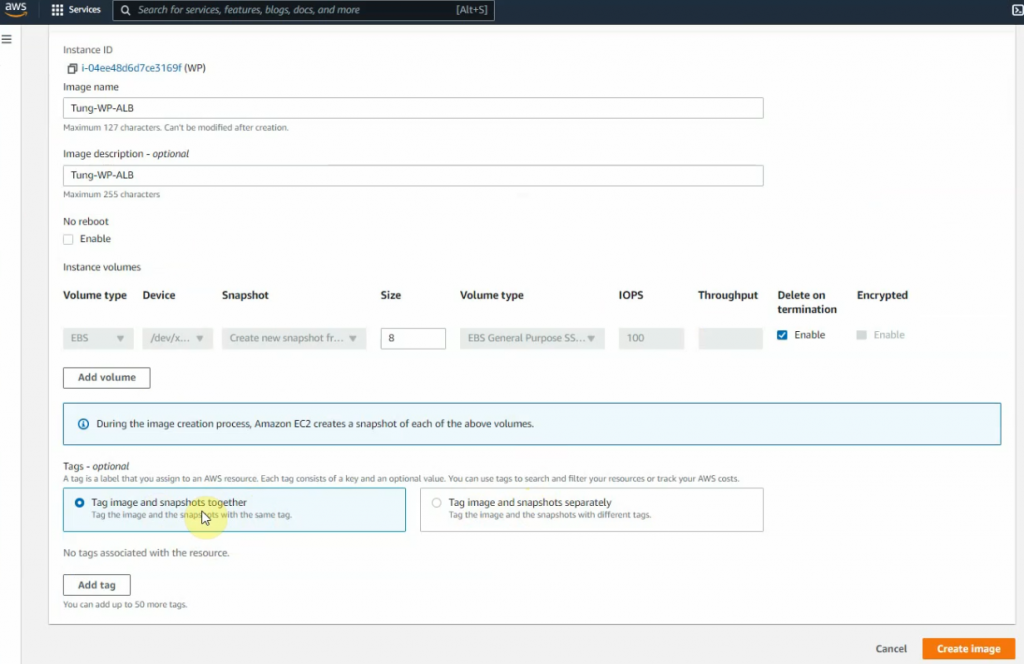
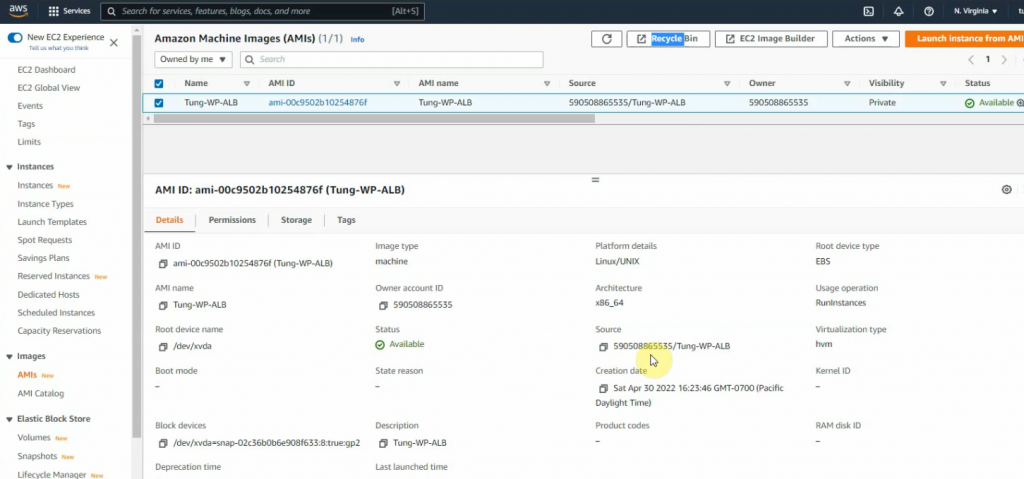
Create an image for the WP instance.
![](https://tungle.ca/wp-content/uploads/2022/04/image-933-1024x664.png)
![](https://tungle.ca/wp-content/uploads/2022/04/image-936-1024x479.png)
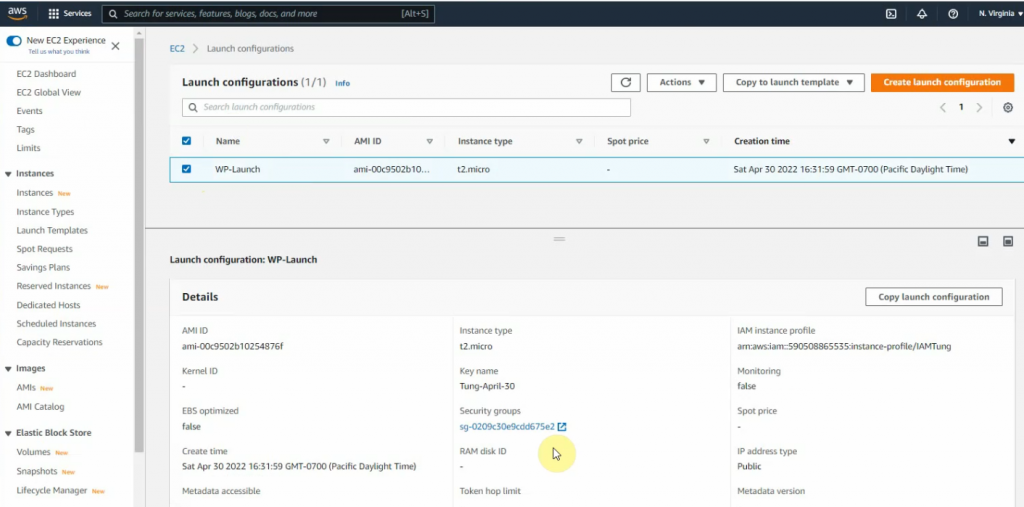
Go to launch configuration and create a launch configuration.
![](https://tungle.ca/wp-content/uploads/2022/04/image-937.png)
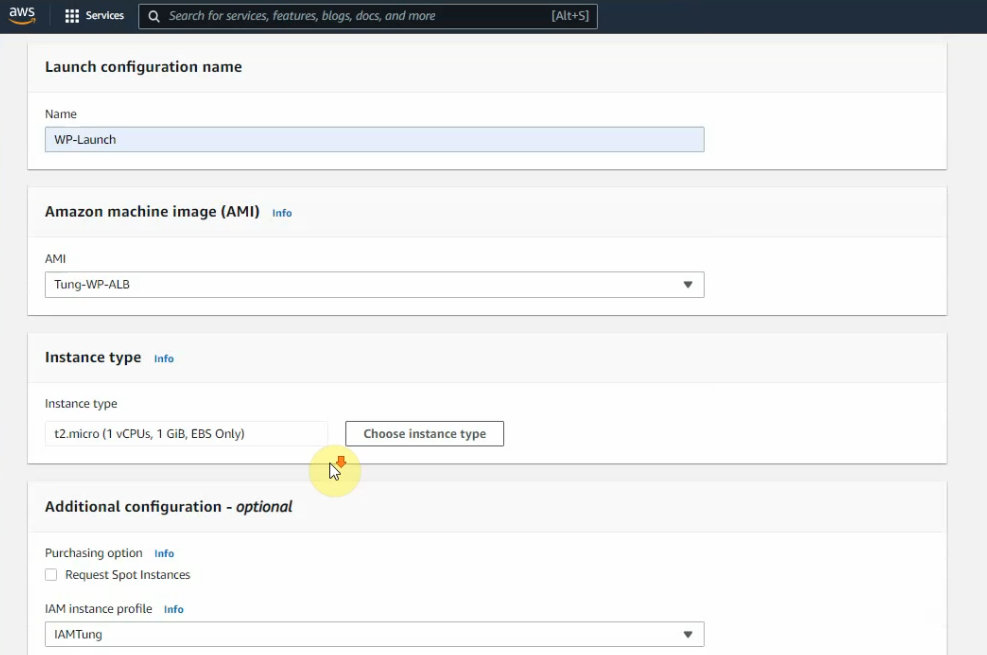
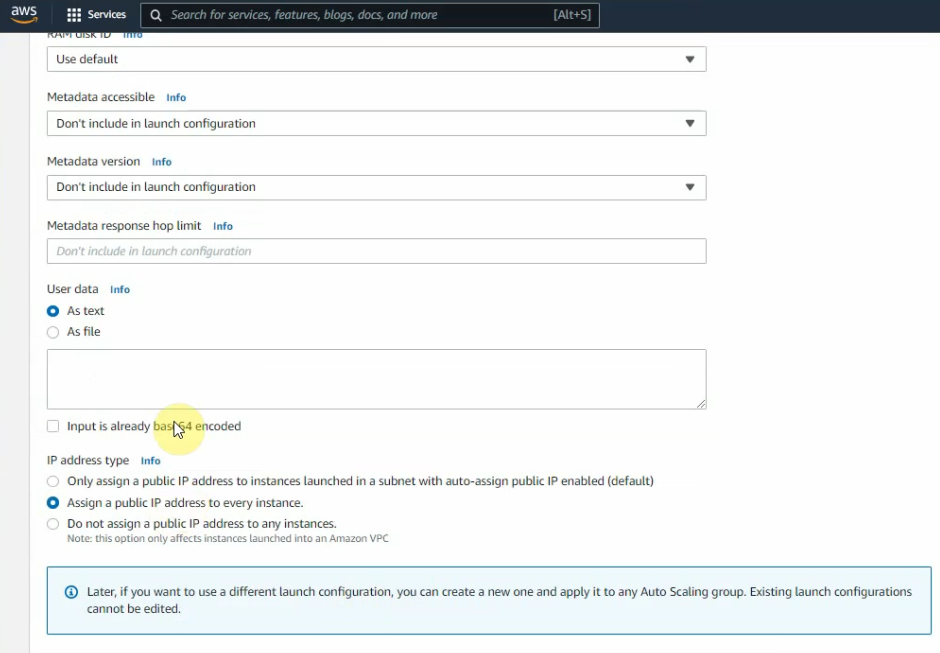
On Advanced configuration – advanced details – Select “Assign a pubic IP address to any instances”
![](https://tungle.ca/wp-content/uploads/2022/04/image-939.png)
Select an existing security group. Click create a launch configuration.
![](https://tungle.ca/wp-content/uploads/2022/04/image-940.png)
![](https://tungle.ca/wp-content/uploads/2022/04/image-942-1024x507.png)
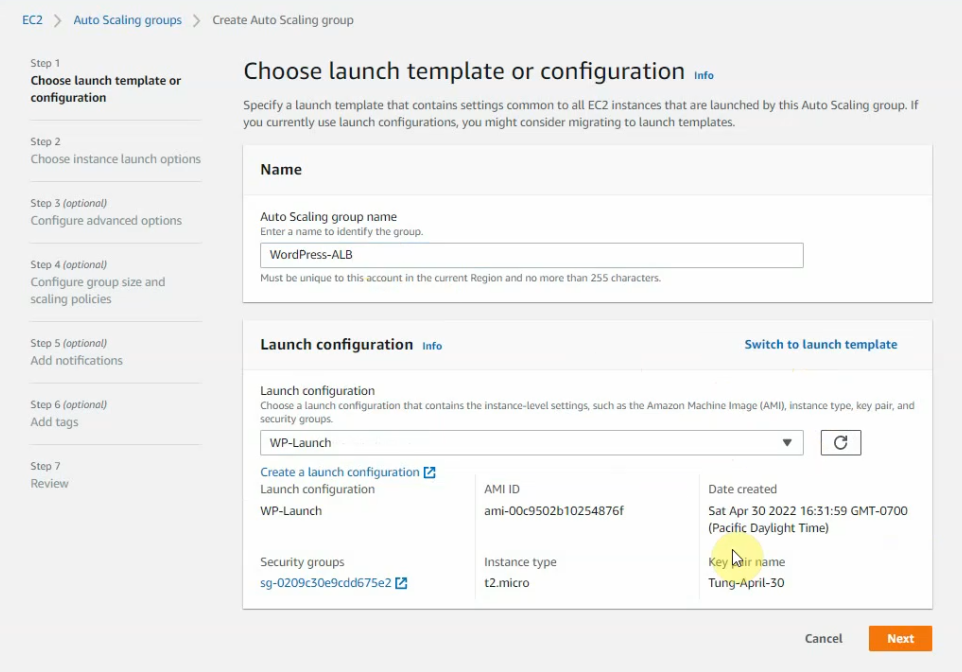
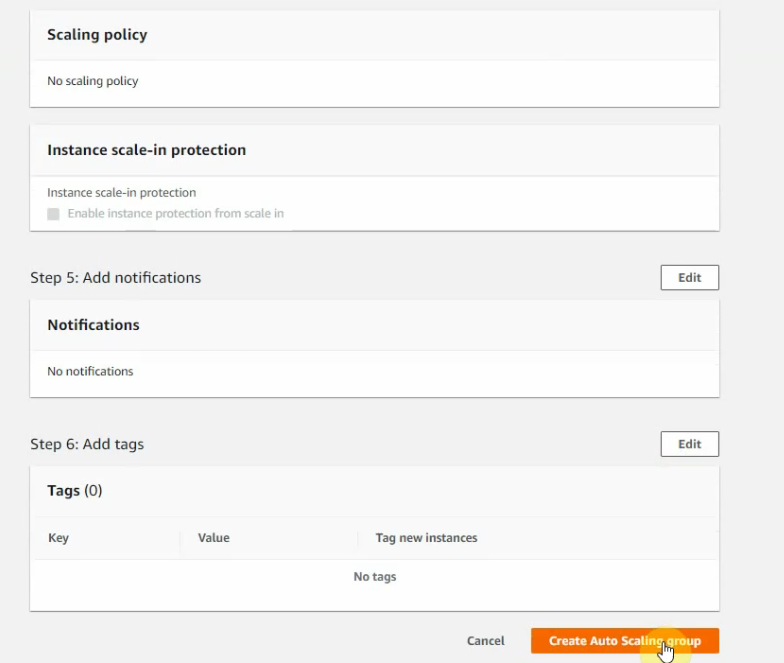
Go to Auto Scaling Group and create a new one.
![](https://tungle.ca/wp-content/uploads/2022/04/image-943.png)
![](https://tungle.ca/wp-content/uploads/2022/04/image-944-1024x715.png)
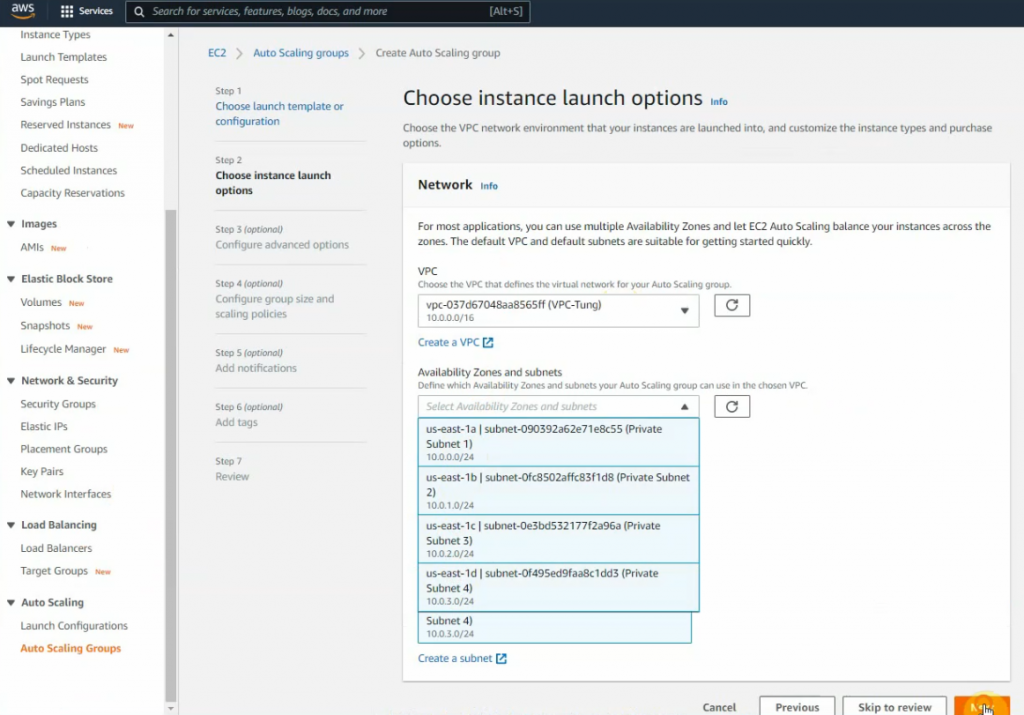
Enable “Internet-facing” on load balancing scheme.
![](https://tungle.ca/wp-content/uploads/2022/04/image-945.png)
![](https://tungle.ca/wp-content/uploads/2022/04/image-946.png)
![](https://tungle.ca/wp-content/uploads/2022/04/image-948.png)
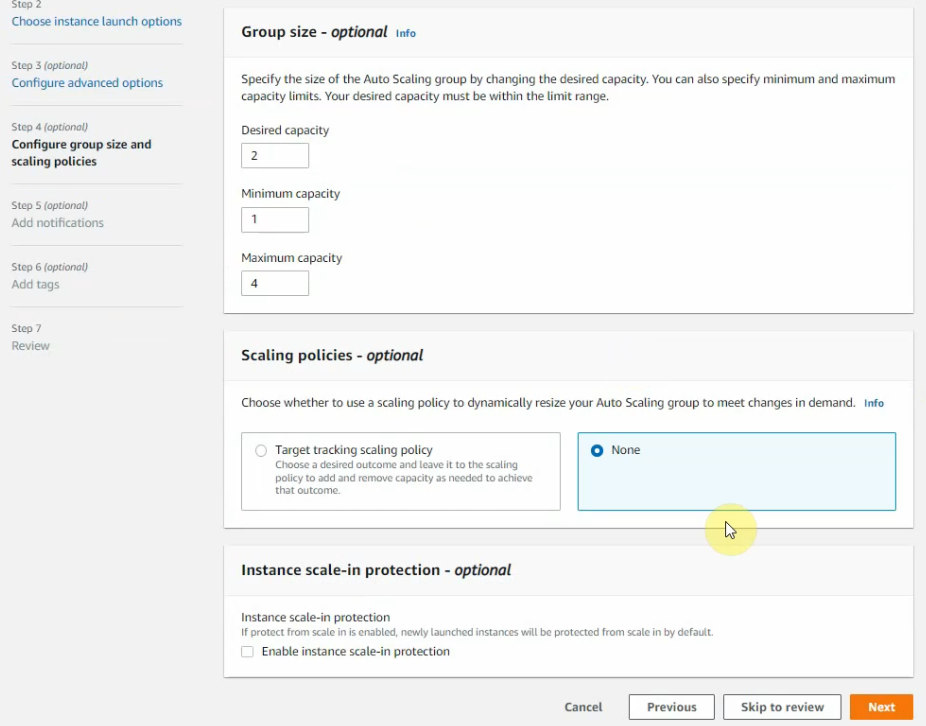
On “Configure group size and scaling policies”.
![](https://tungle.ca/wp-content/uploads/2022/04/image-949.png)
![](https://tungle.ca/wp-content/uploads/2022/04/image-950.png)
![](https://tungle.ca/wp-content/uploads/2022/04/image-951-1024x479.png)
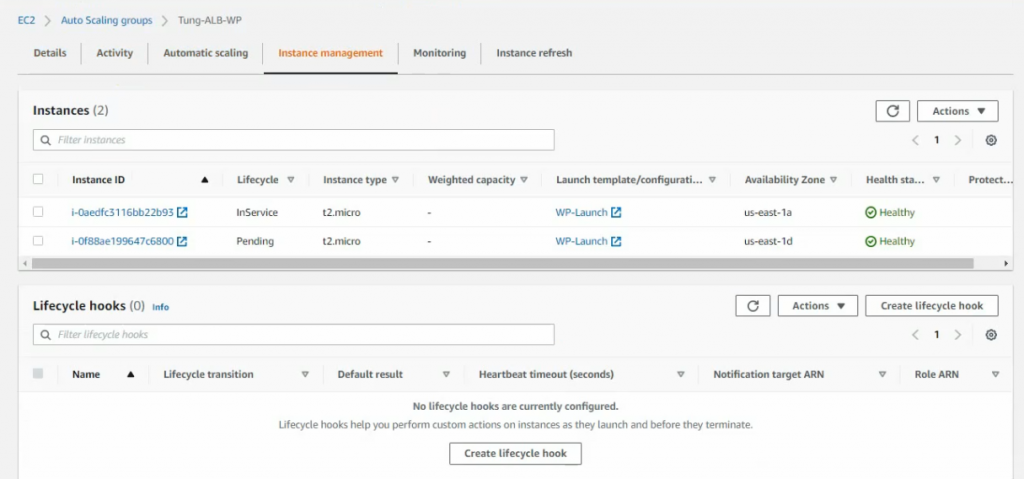
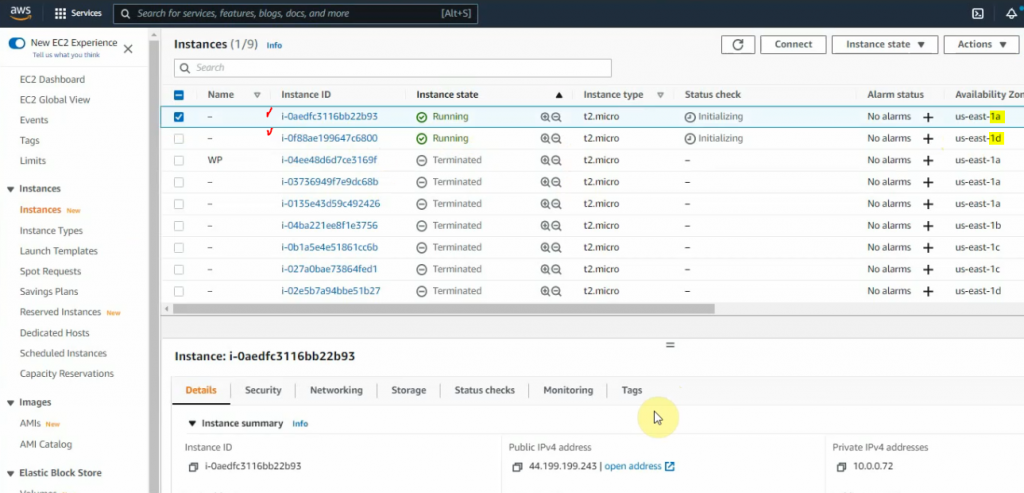
Both WP instances have been automatically created via the AutoScaling group.
![](https://tungle.ca/wp-content/uploads/2022/04/image-952-1024x493.png)
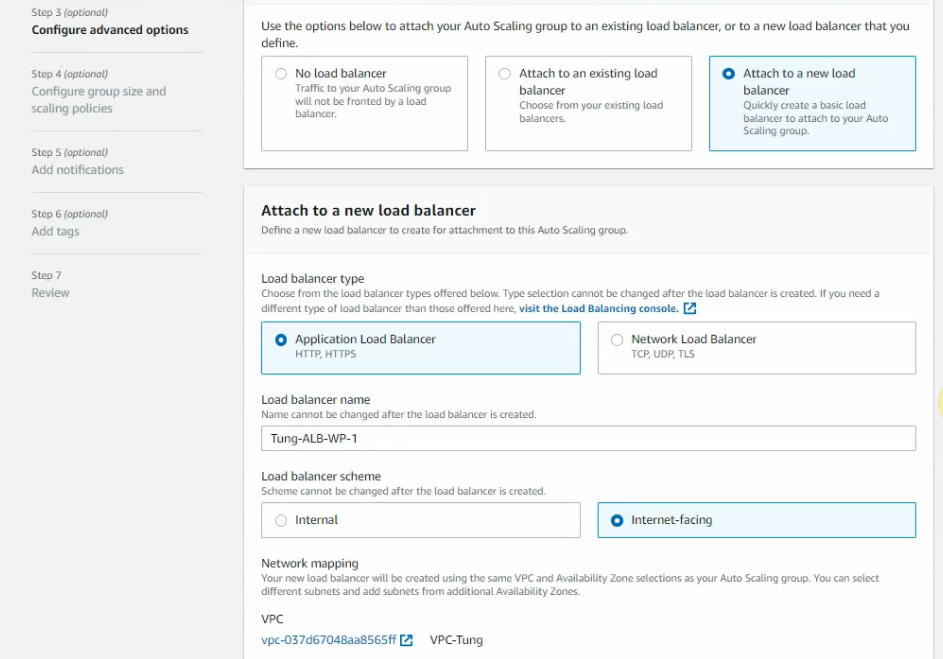
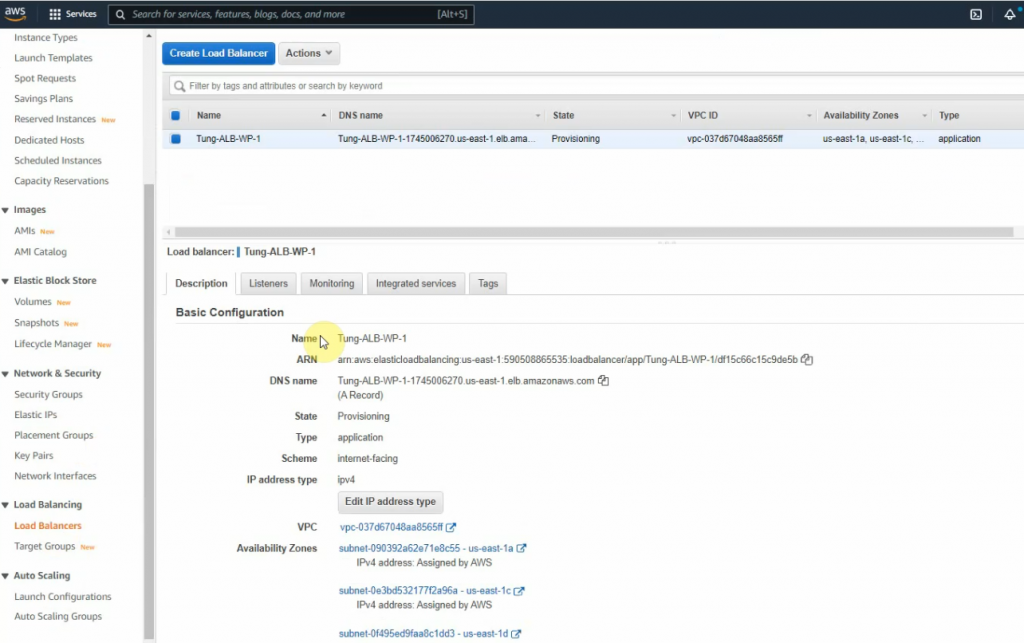
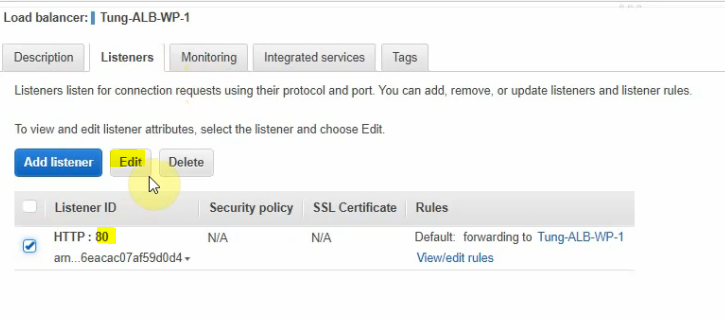
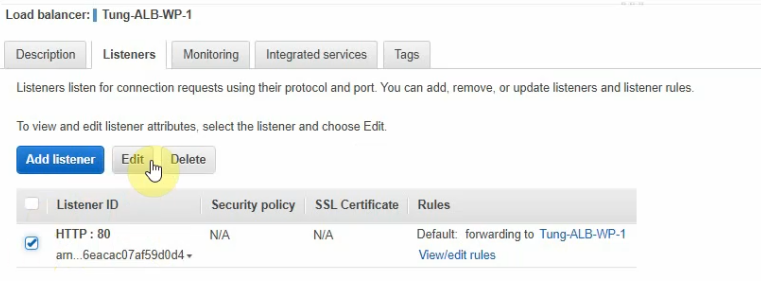
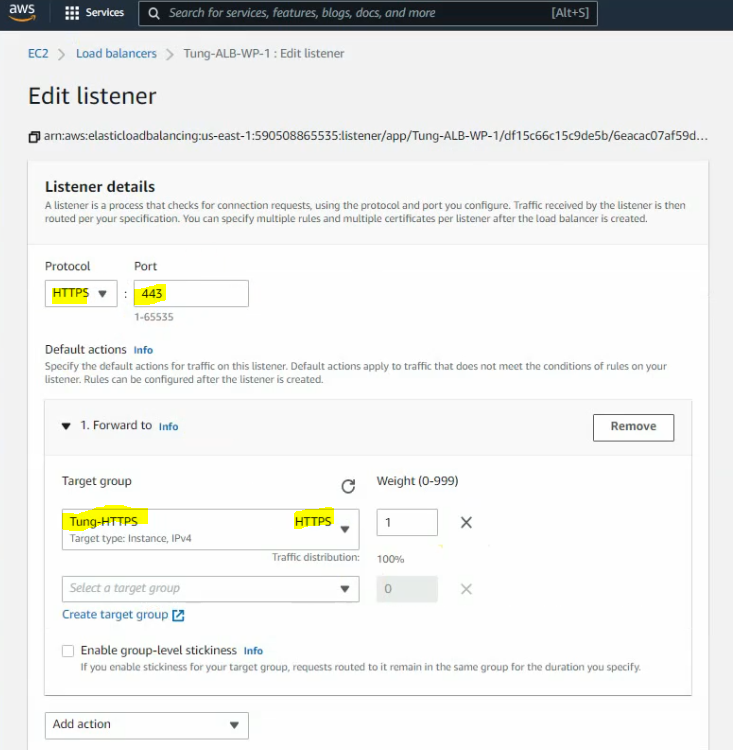
Go to the load balancer.
![](https://tungle.ca/wp-content/uploads/2022/04/image-953-1024x643.png)
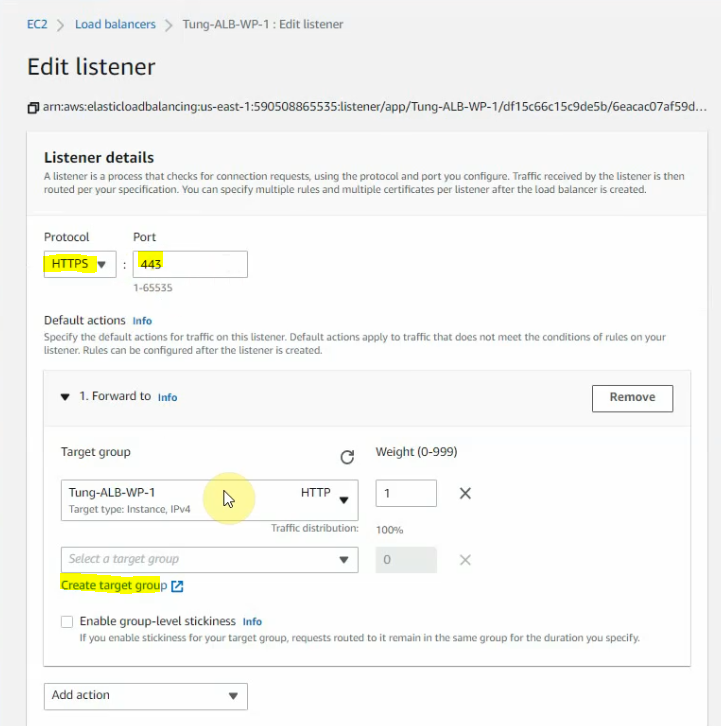
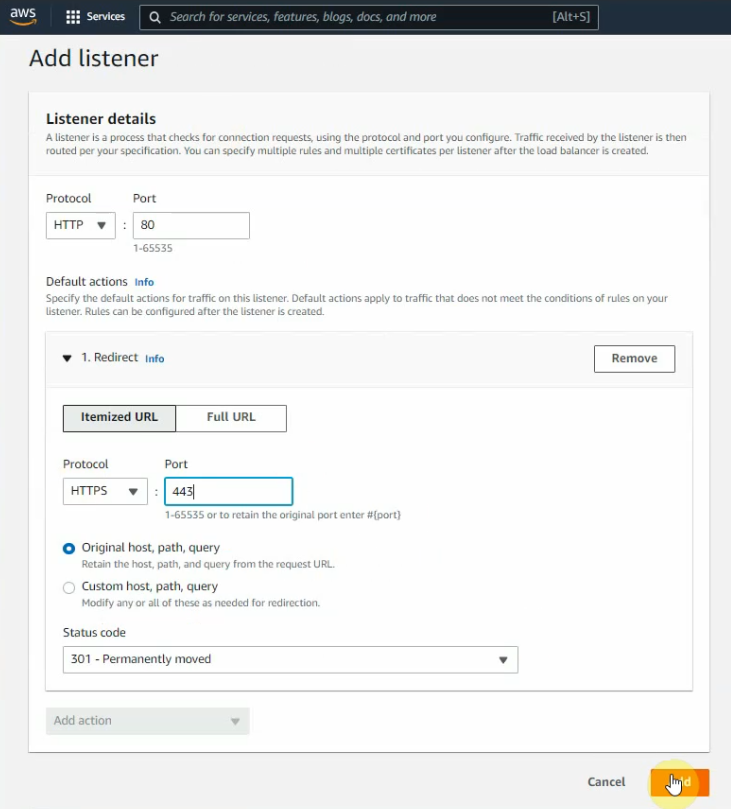
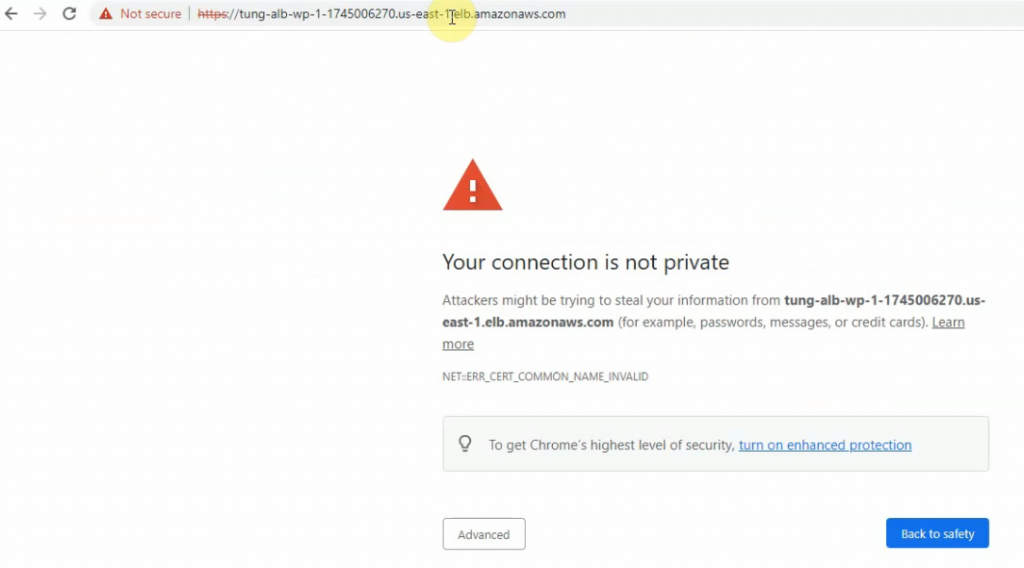
Click edit to create a new listener for port 443.
![](https://tungle.ca/wp-content/uploads/2022/04/image-954.png)
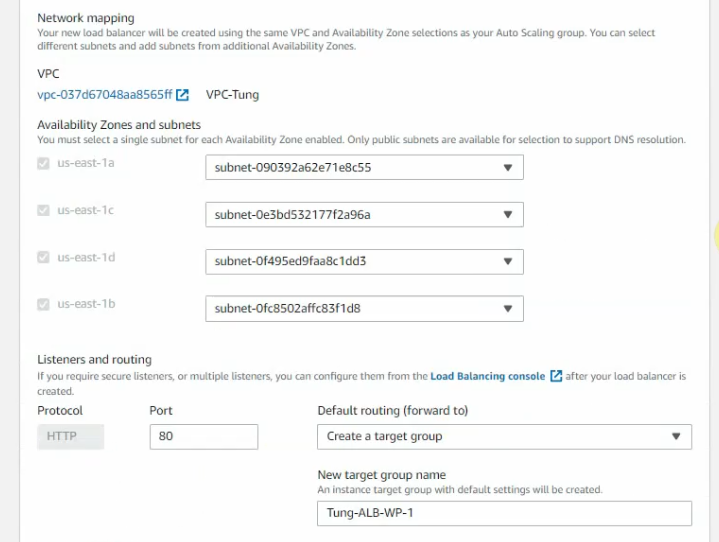
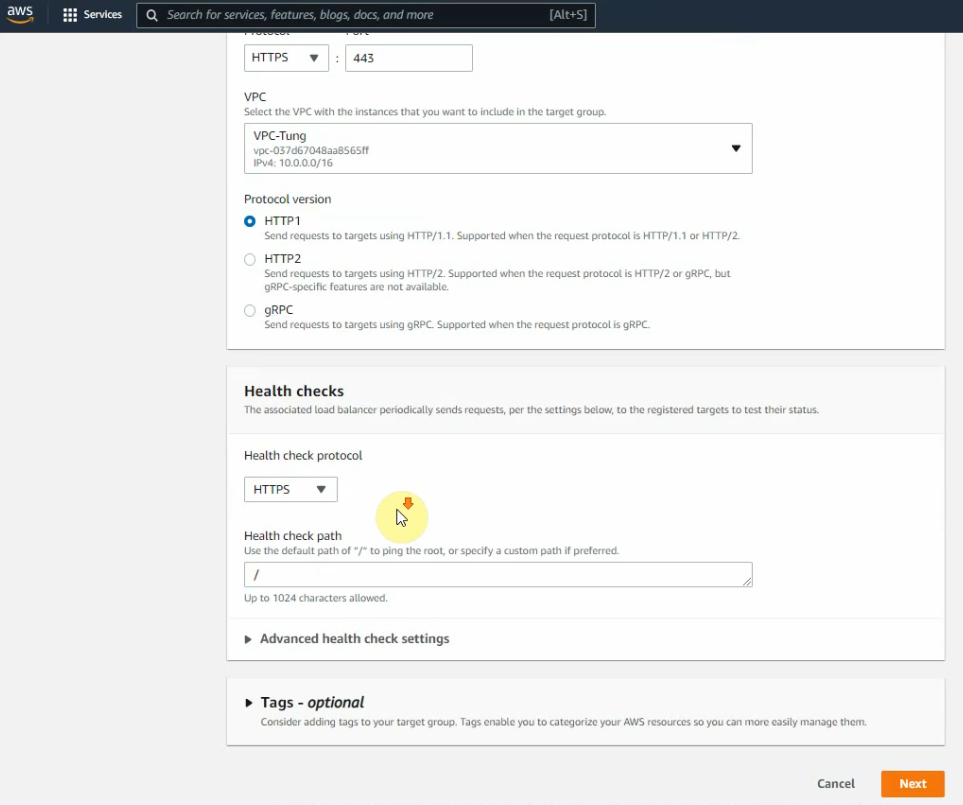
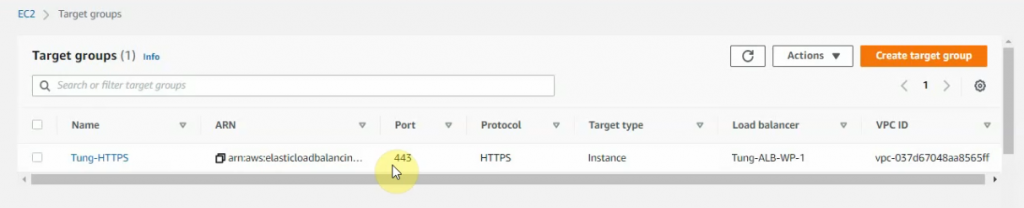
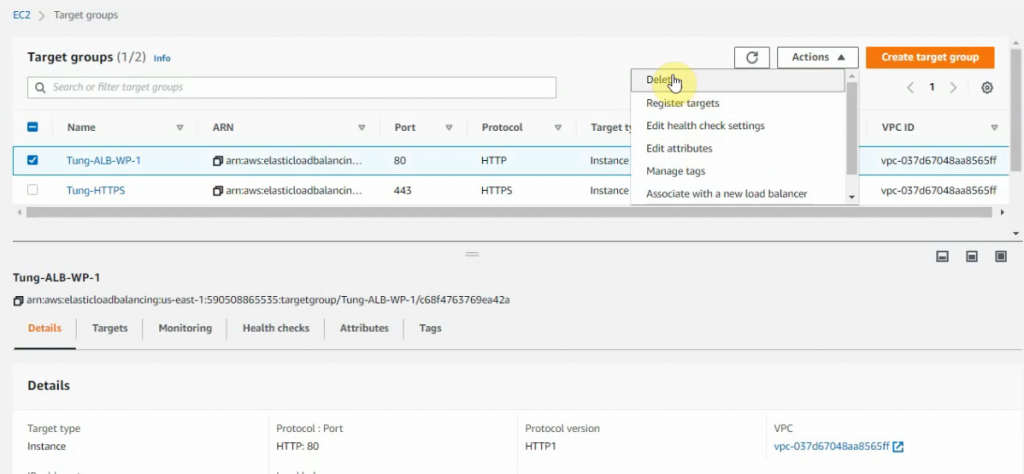
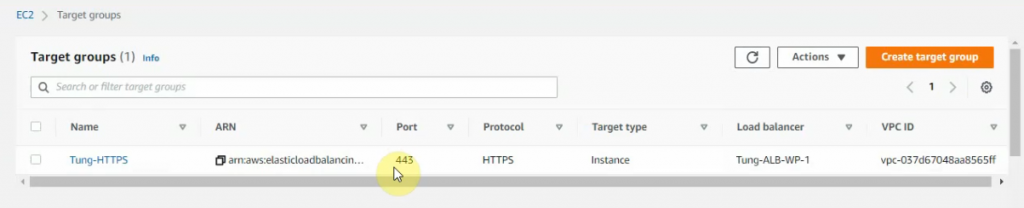
Create a new target group for HTTPS.
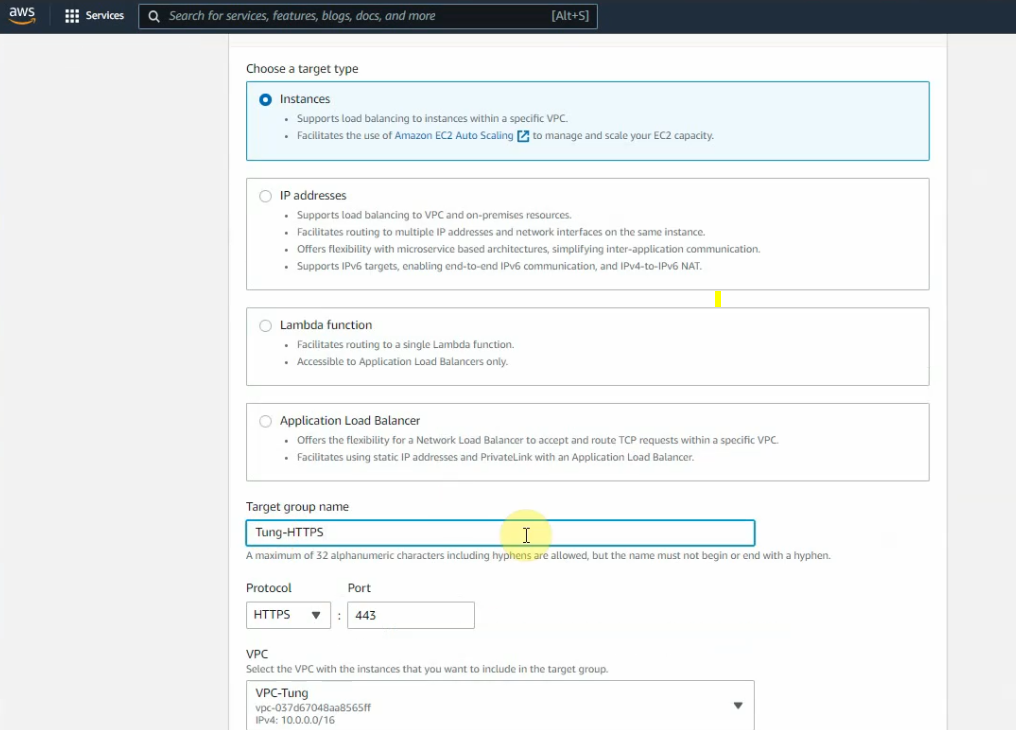
![](https://tungle.ca/wp-content/uploads/2022/04/image-955.png)
![](https://tungle.ca/wp-content/uploads/2022/04/image-956.png)
Click Next.
![](https://tungle.ca/wp-content/uploads/2022/04/image-957.png)
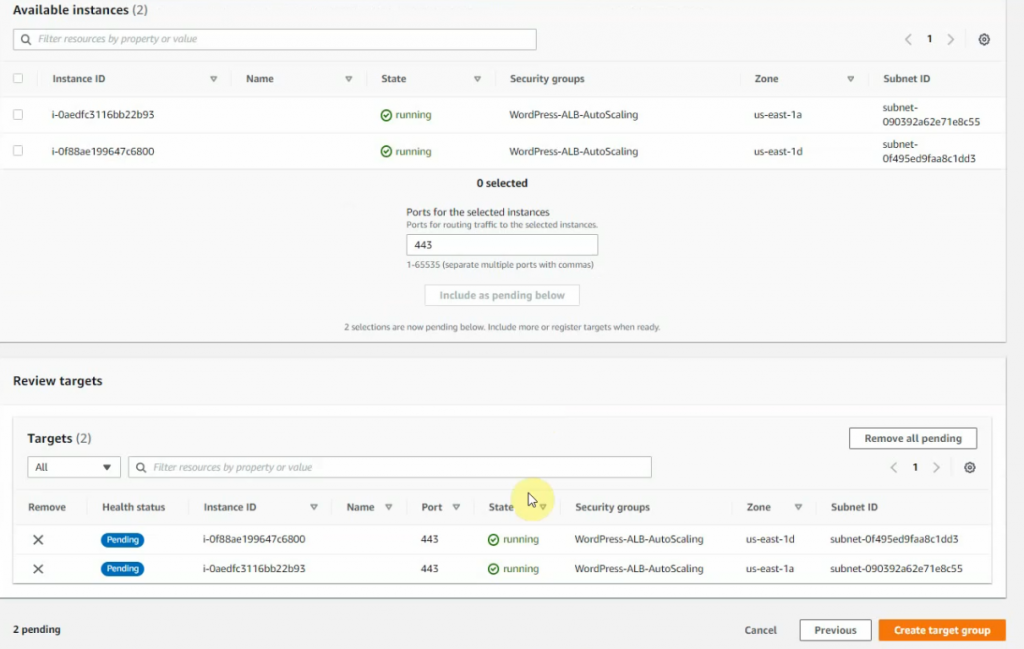
Select both instances, and select “include as pending below”. Then, click “create target group”.
![](https://tungle.ca/wp-content/uploads/2022/04/image-958-1024x649.png)
![](https://tungle.ca/wp-content/uploads/2022/04/image-966-1024x208.png)
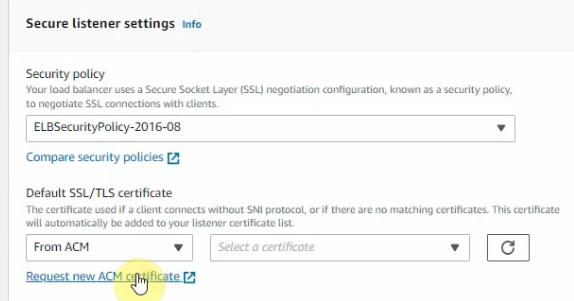
Go back and change the listener.
![](https://tungle.ca/wp-content/uploads/2022/04/image-959.png)
![](https://tungle.ca/wp-content/uploads/2022/04/image-961.png)
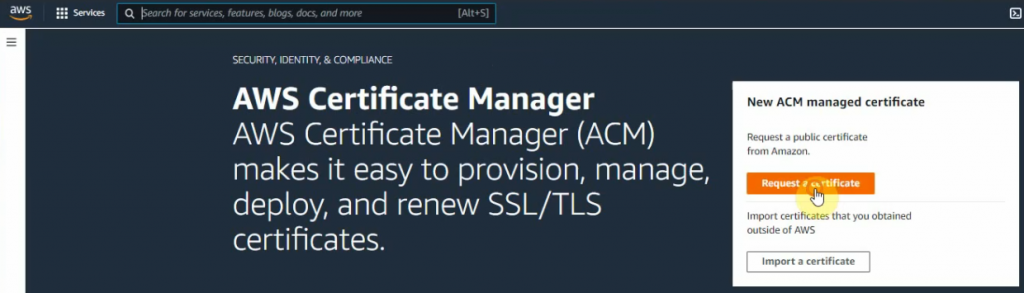
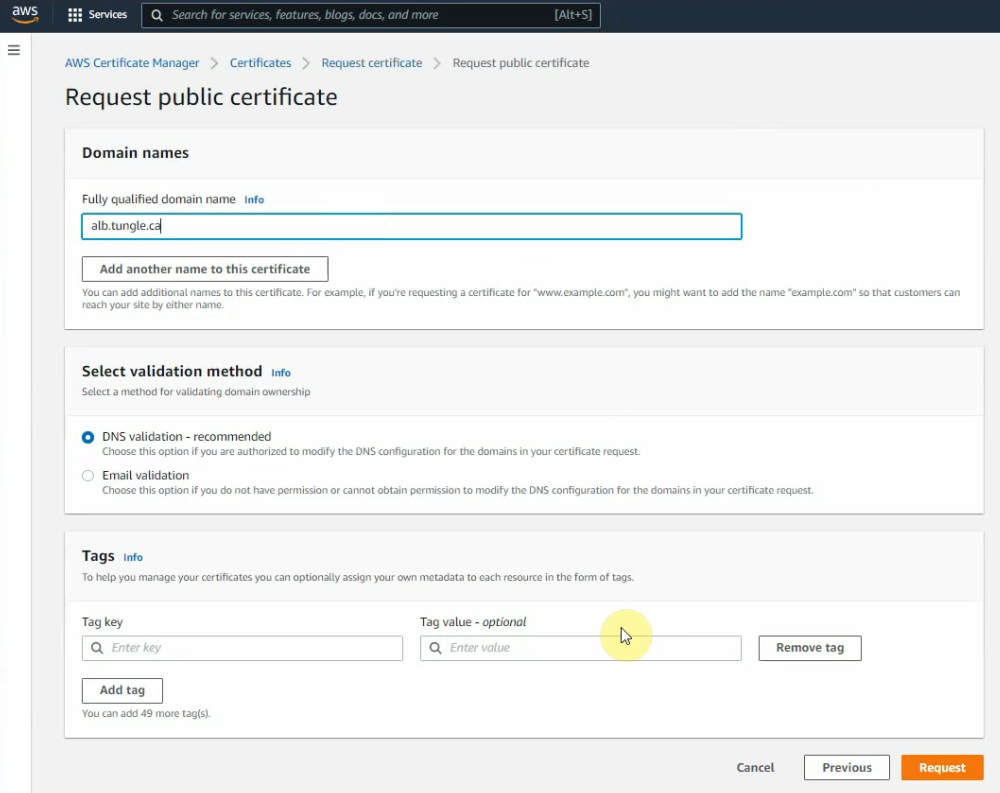
Select “Request new ACM certificate” for ALB instance.
![](https://tungle.ca/wp-content/uploads/2022/04/image-962.png)
Click “Request a certificate”.
![](https://tungle.ca/wp-content/uploads/2022/04/image-963-1024x293.png)
![](https://tungle.ca/wp-content/uploads/2022/04/image-964.png)
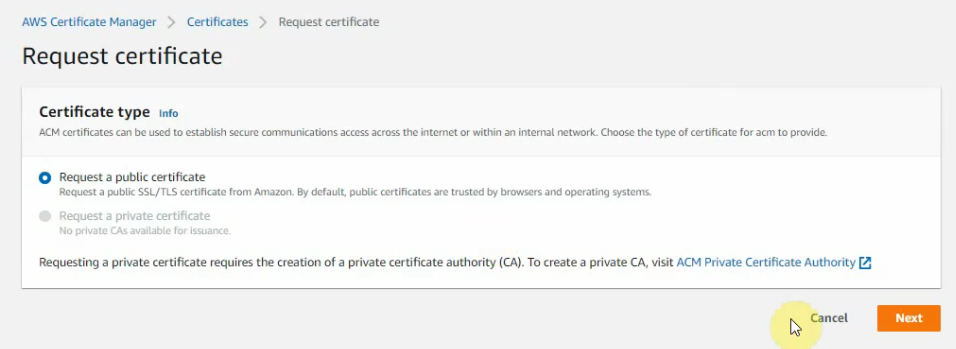
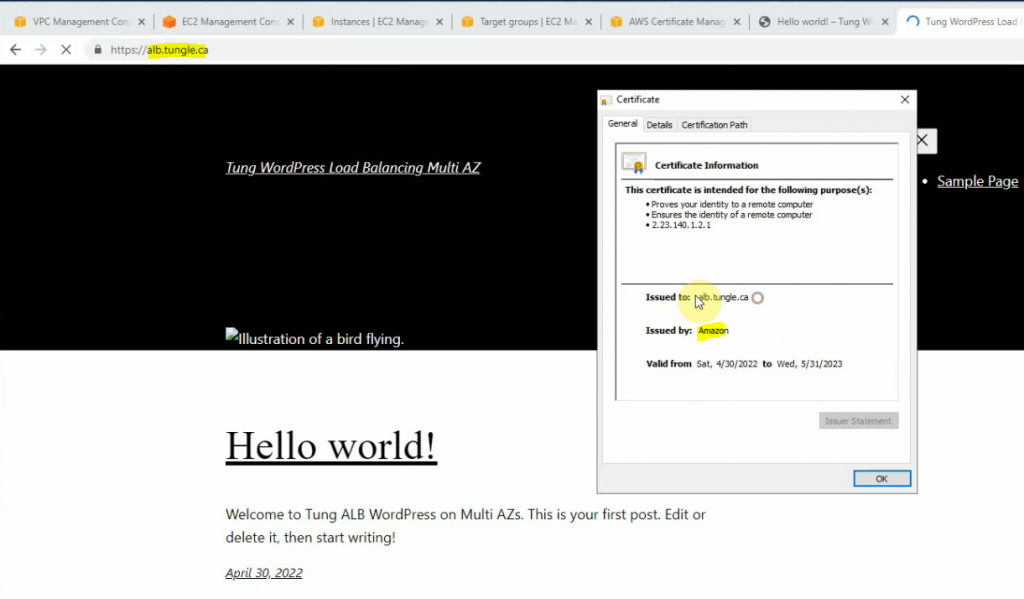
Enter your domain: alb.tungle.ca.
![](https://tungle.ca/wp-content/uploads/2022/04/image-965.png)
![](https://tungle.ca/wp-content/uploads/2022/04/image-969-1024x547.png)
Go to your hosting DNS domain name.
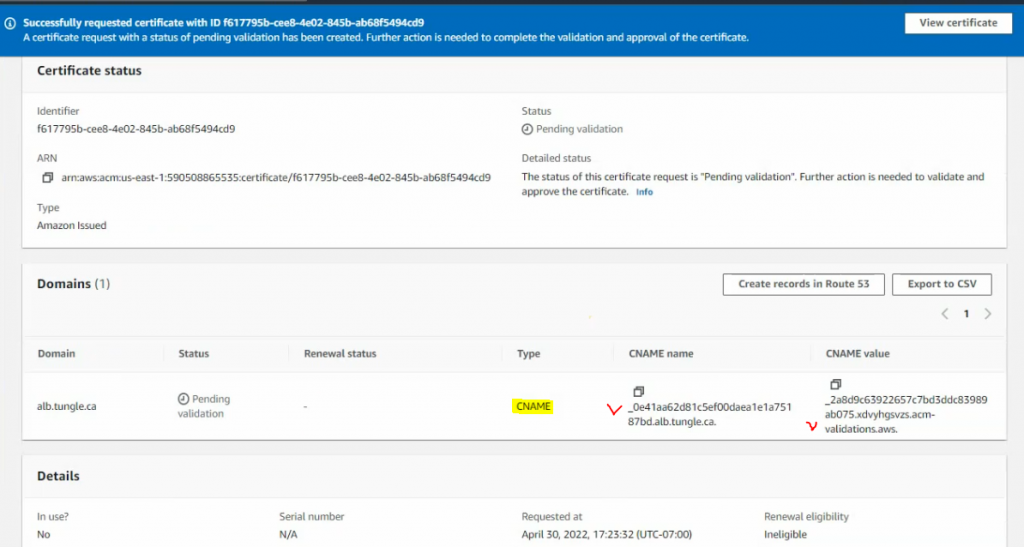
Create a CNAME record is alb with Amazon ALB domain name as a screenshot below.
![](https://tungle.ca/wp-content/uploads/2022/04/image-967-1024x49.png)
Copy and paste information on the Amazon certificate into your CNAME record.
![](https://tungle.ca/wp-content/uploads/2022/04/image-968-1024x135.png)
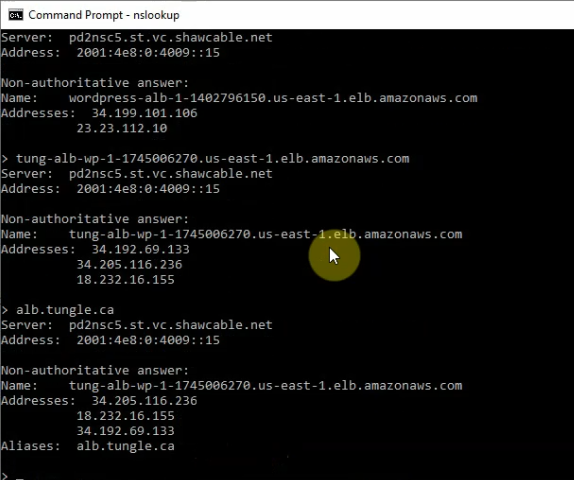
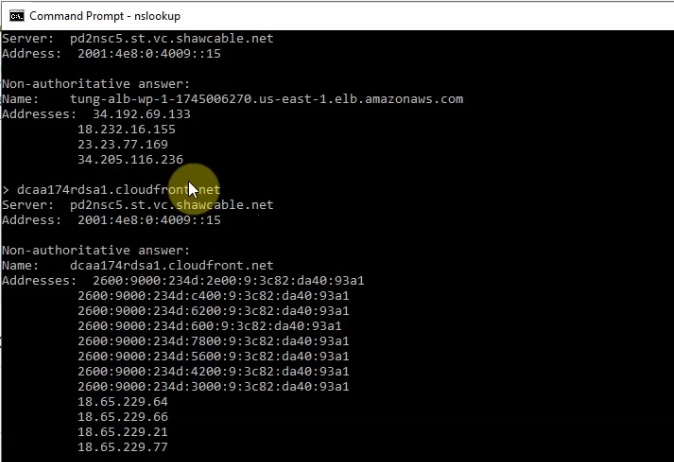
Checking domain via nslookup command.
![](https://tungle.ca/wp-content/uploads/2022/04/image-971.png)
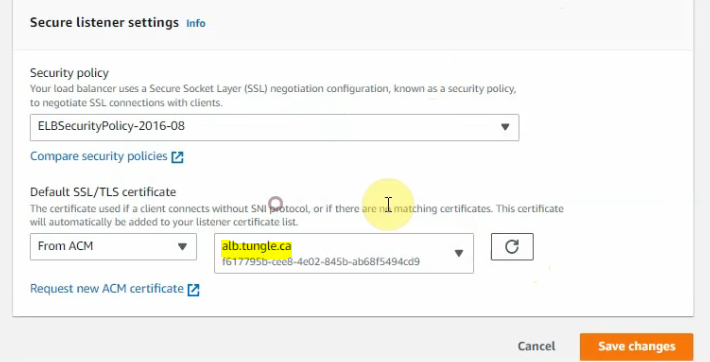
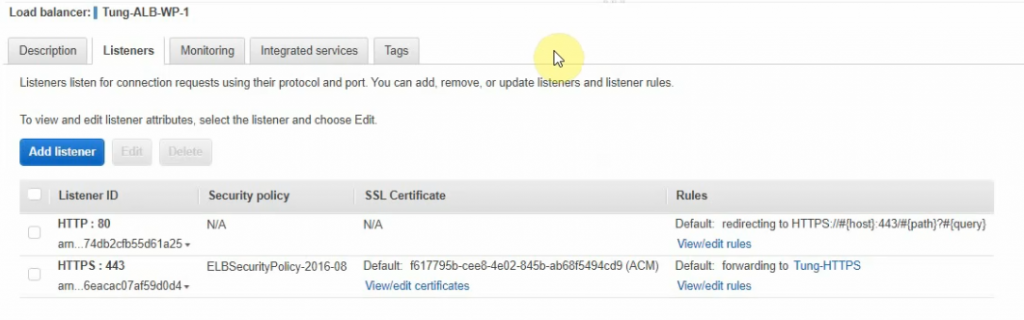
Back to configure listener setting, and choose the certificate that has been issued from AWS.
![](https://tungle.ca/wp-content/uploads/2022/04/image-972.png)
![](https://tungle.ca/wp-content/uploads/2022/04/image-973-1024x522.png)
Delete the unnecessary HTTP listener.
![](https://tungle.ca/wp-content/uploads/2022/04/image-974-1024x474.png)
![](https://tungle.ca/wp-content/uploads/2022/04/image-975-1024x208.png)
Add the new listener on ALB to redirect port 80 to port 443.
![](https://tungle.ca/wp-content/uploads/2022/04/image-976.png)
![](https://tungle.ca/wp-content/uploads/2022/04/image-978.png)
![](https://tungle.ca/wp-content/uploads/2022/04/image-979-1024x320.png)
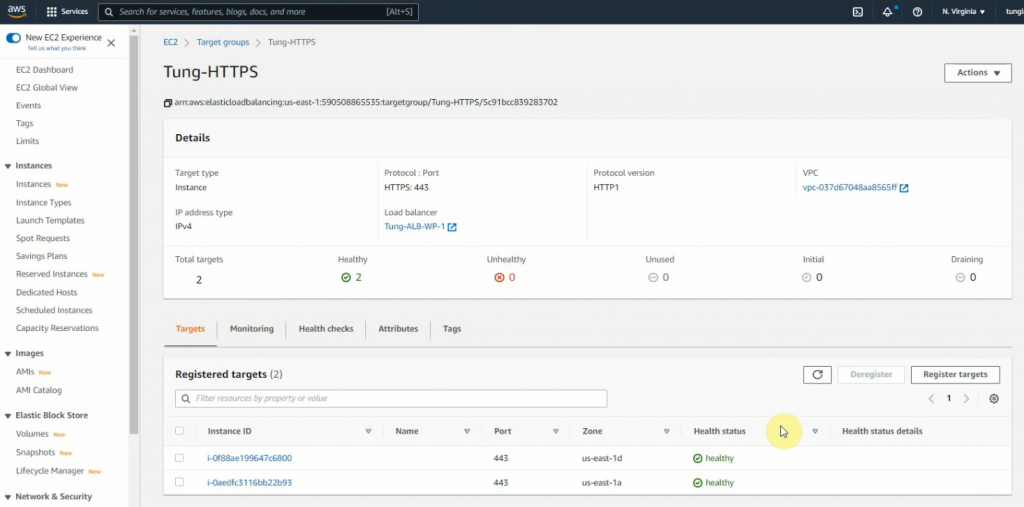
Check target groups and verify both instances have healthy status on registered targets.
![](https://tungle.ca/wp-content/uploads/2022/04/image-980-1024x507.png)
Access the ALB web link on your web browser.
![](https://tungle.ca/wp-content/uploads/2022/04/image-982-1024x568.png)
![](https://tungle.ca/wp-content/uploads/2022/04/image-984-1024x599.png)
Check load balancing on both WPs.
![](https://tungle.ca/wp-content/uploads/2022/04/image-985.png)
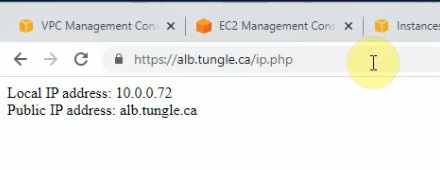
Refresh the web link.
![](https://tungle.ca/wp-content/uploads/2022/04/image-986.png)
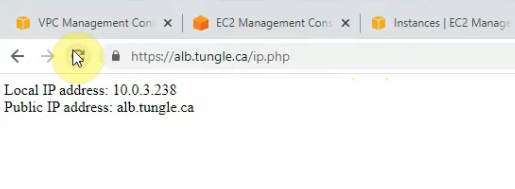
Both WPS have accessed the same RDS instance (the master) on the IP address 10.0.2.224.
![](https://tungle.ca/wp-content/uploads/2022/04/image-988-1024x450.png)
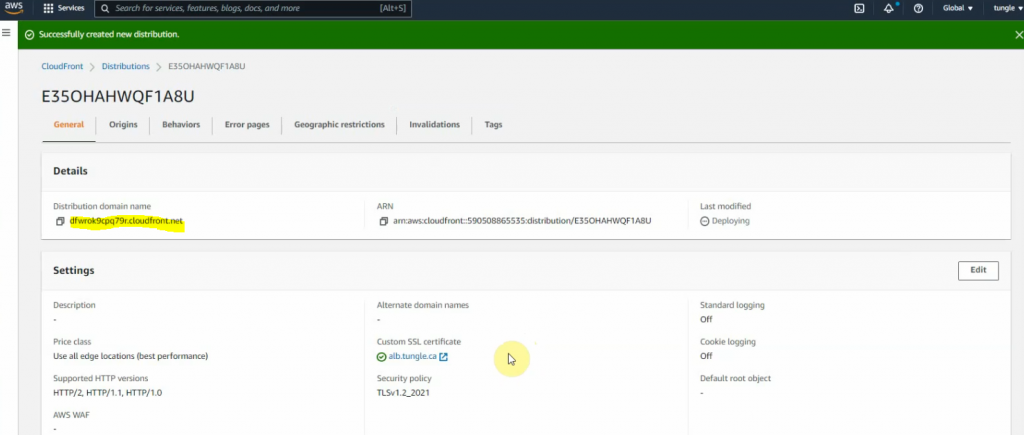
Go to Amazon CloudFront to create CloudFront distribution.
![](https://tungle.ca/wp-content/uploads/2022/04/image-989-1024x248.png)
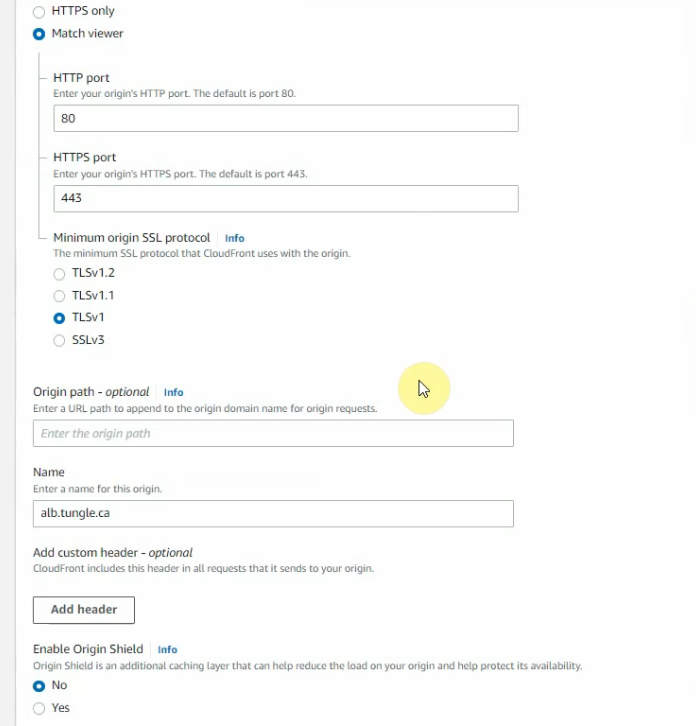
Enter your domain on the origin domain.
![](https://tungle.ca/wp-content/uploads/2022/04/image-991.png)
![](https://tungle.ca/wp-content/uploads/2022/04/image-992.png)
![](https://tungle.ca/wp-content/uploads/2022/04/image-994.png)
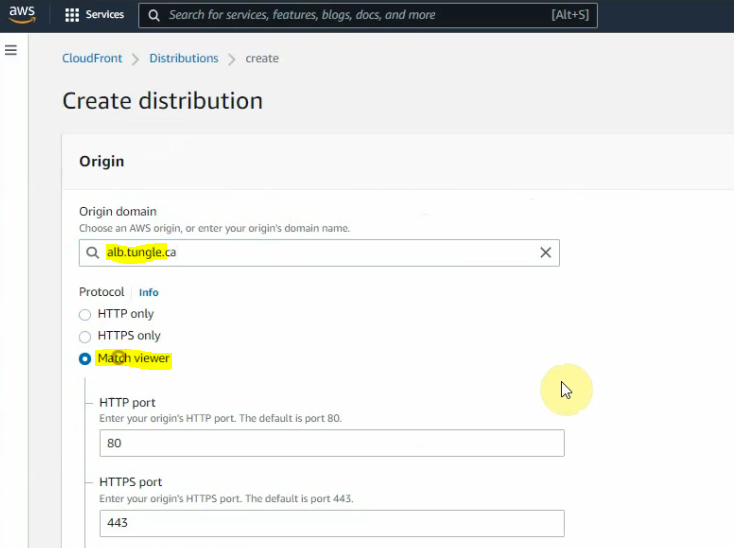
Select your certificate on “the custom SSL certificate”.
![](https://tungle.ca/wp-content/uploads/2022/04/image-995.png)
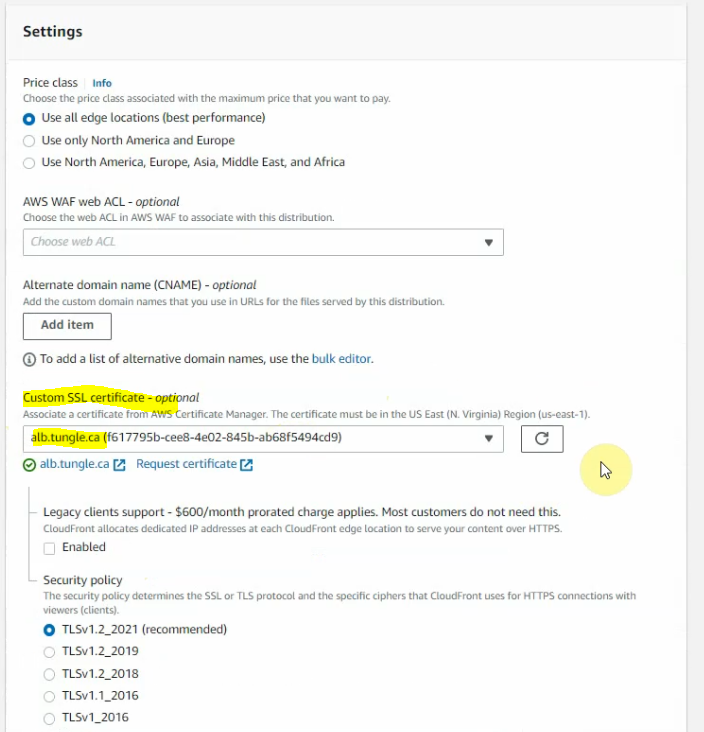
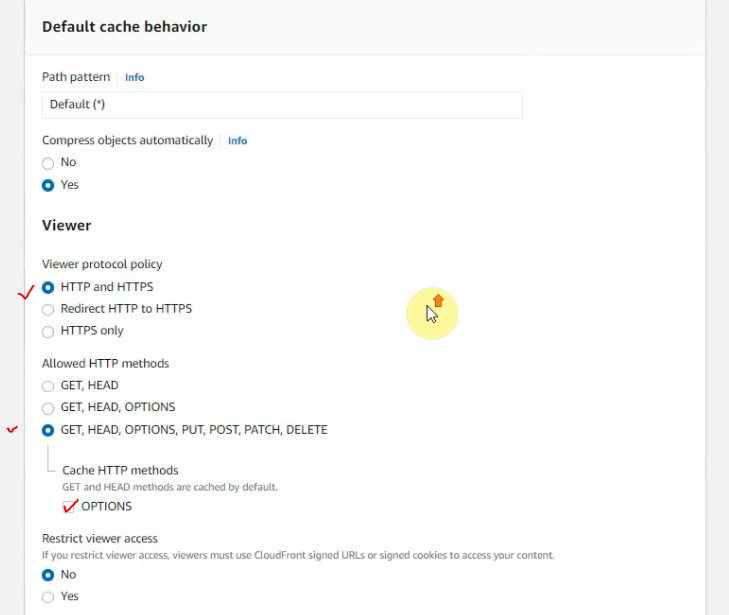
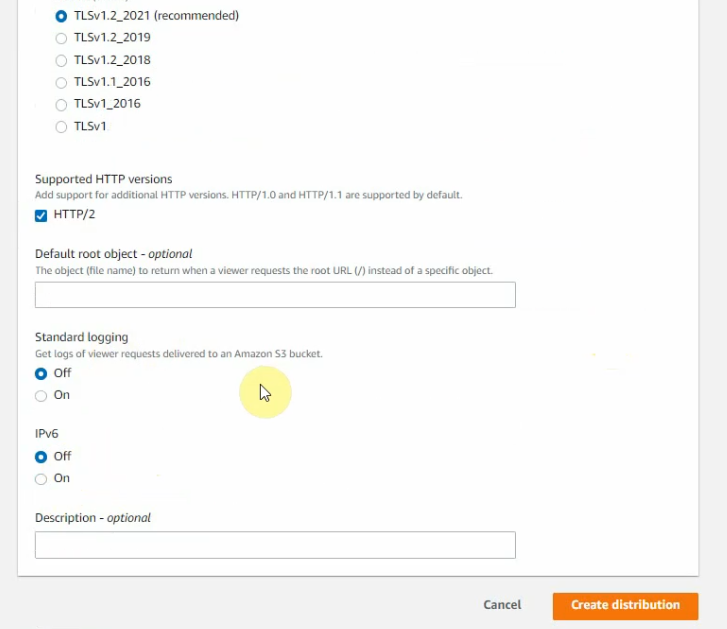
Leave the other settings default, then click Create distribution.
![](https://tungle.ca/wp-content/uploads/2022/04/image-996.png)
![](https://tungle.ca/wp-content/uploads/2022/04/image-998-1024x435.png)
![Image](https://media.discordapp.net/attachments/831564248484020324/970127778009726976/unknown.png?width=954&height=220)
![](https://tungle.ca/wp-content/uploads/2022/04/image-1003.png)
Access your CloudFront domain.
![Image](https://media.discordapp.net/attachments/953072509236940813/970126674505121812/unknown.png?width=1066&height=596)
![Image](https://media.discordapp.net/attachments/953072509236940813/970127118799339520/unknown.png?width=426&height=130)