
This is a diagram that is used to deploy this lab.
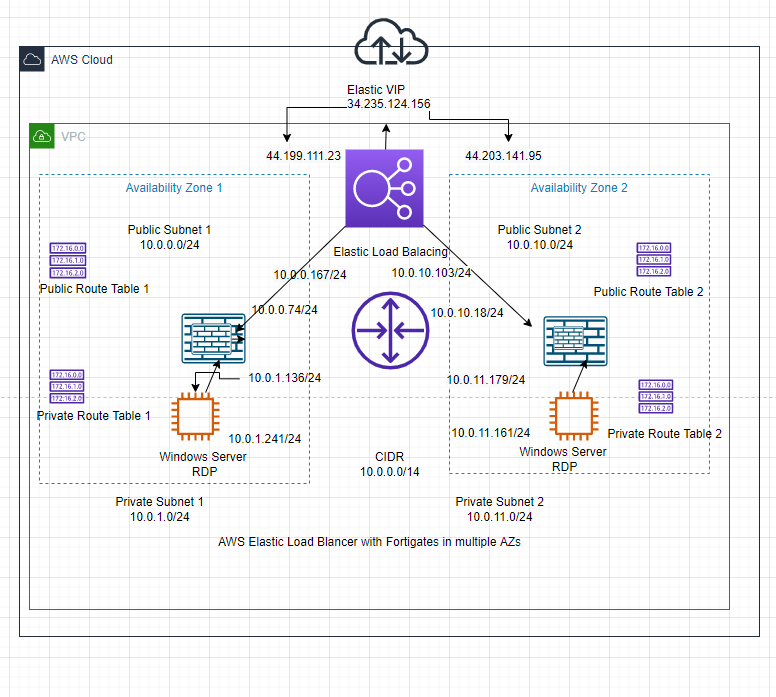
In this lab, we will use Elastic Load Balancer to distribute RDP traffic via Windows 2016 VM instances among the FortiGate in different AZs on AWS.
Below are a couple of steps that are used to deploy this lab.
- Create your VPC, subnets, and route tables.
- Launch FortiGate 1 on AZ 1 and FortiGate 2 on AZ 2.
- Create both Windows 2016 VM on AZ 1 and AZ 2.
- Configure DNAT to allow RDP traffic from the Internet to Windows Server 2016 instance on each AZ.
- Configure Elastic Network Load Balancing on both FortiGates on multiple AZ.
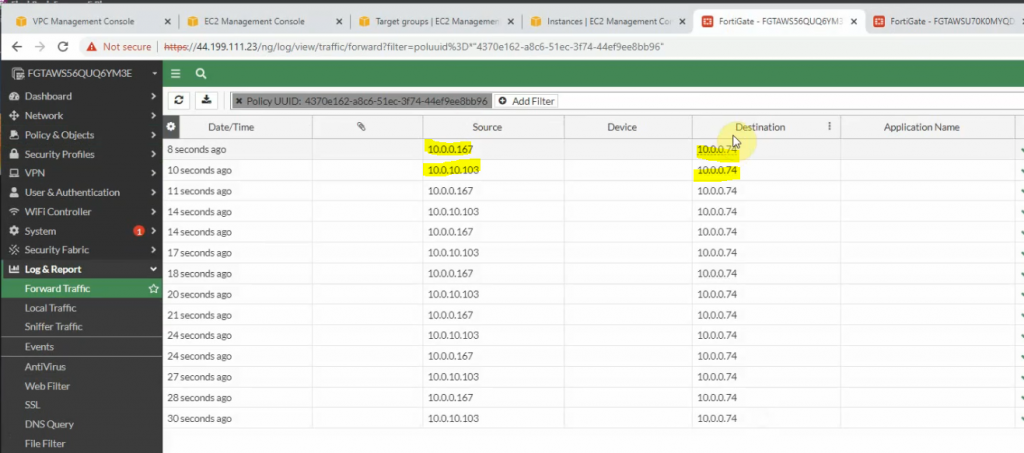
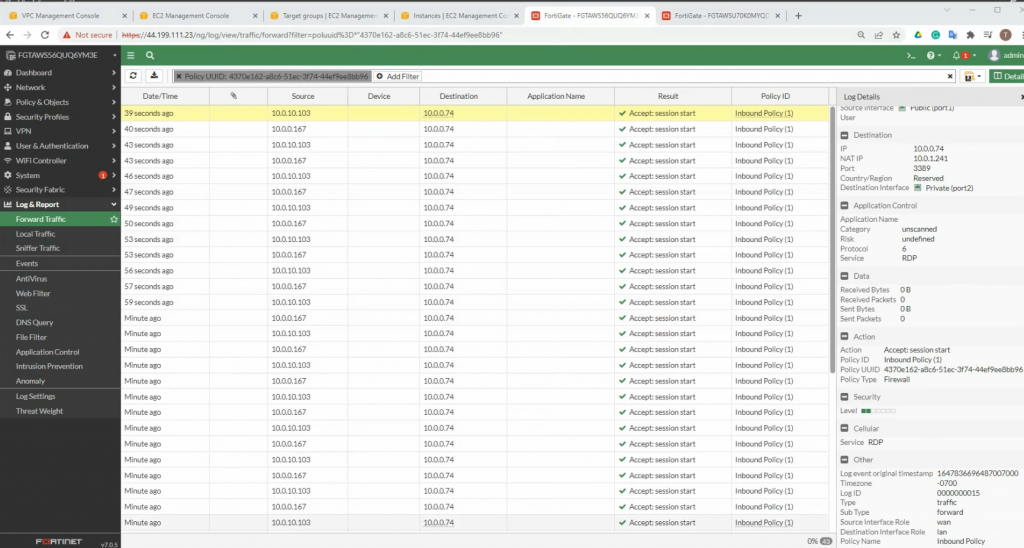
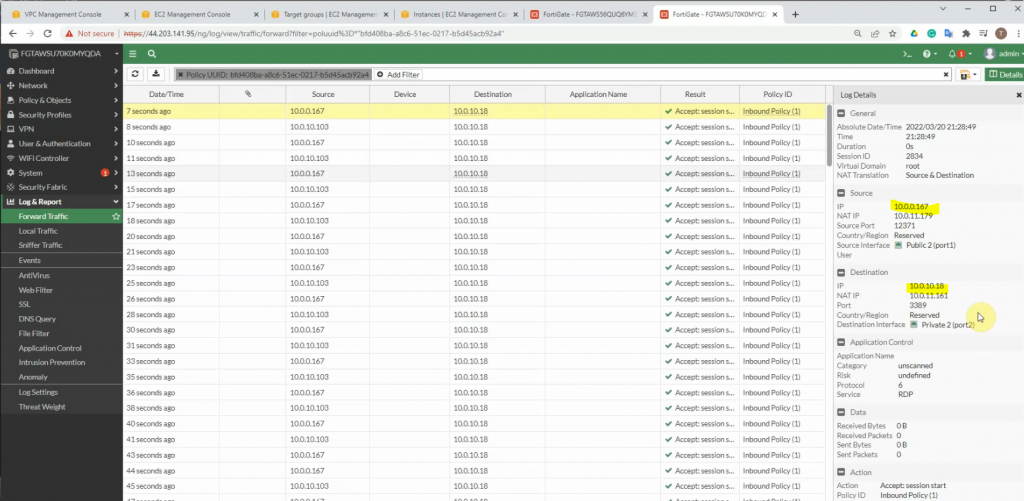
- RDP traffic has been distributed to Windows 2016 VM1 and VM2 via Elastic Network Load Balancing
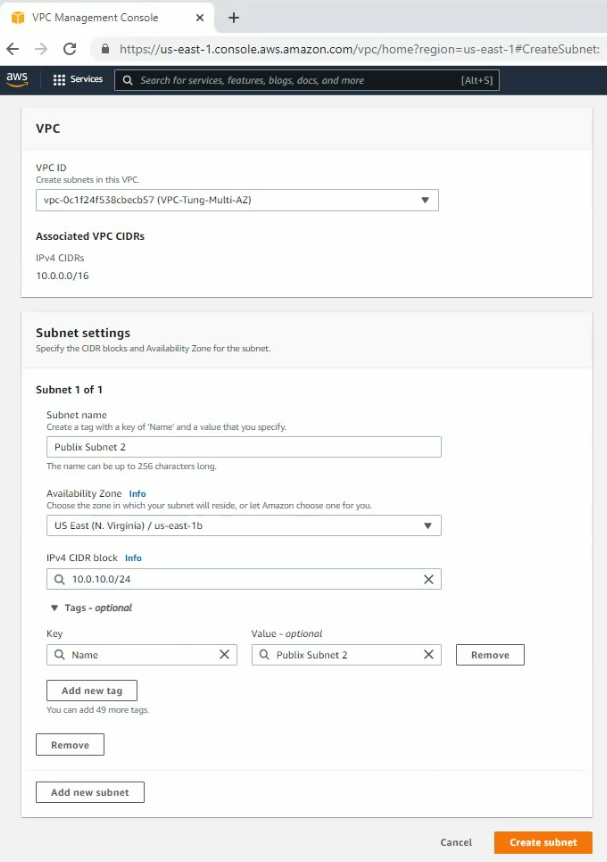
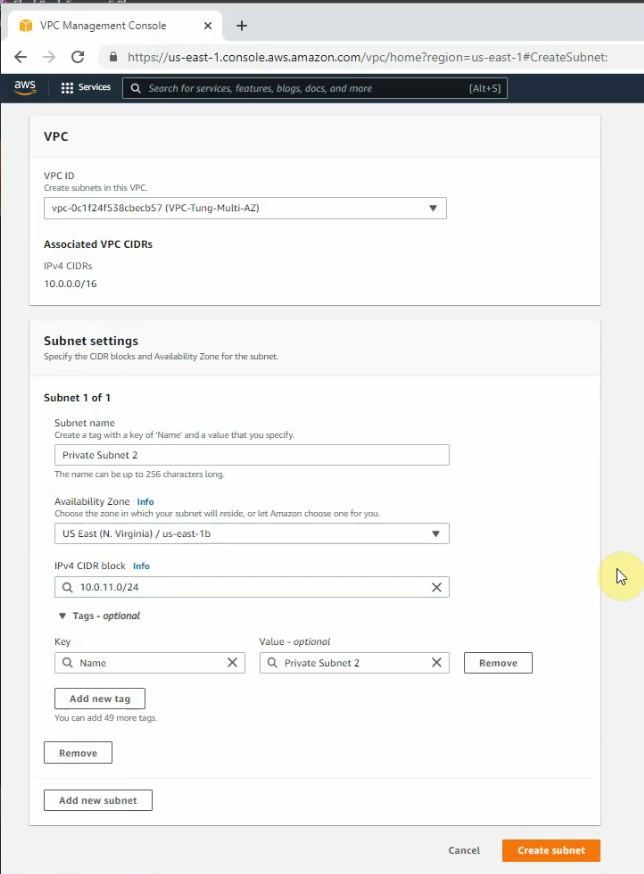
Create a new VPC.


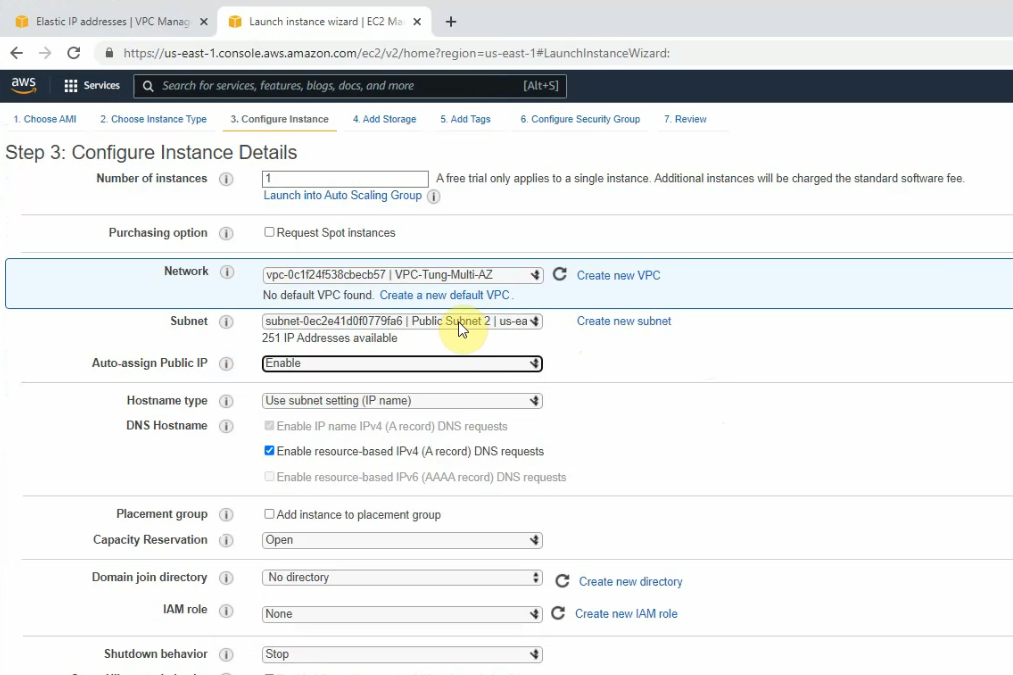
Create new both Public subnet 2 and Private subnet 2 on the Availability zone 2

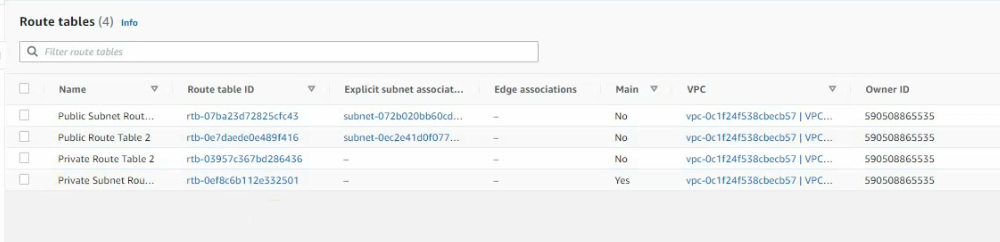
Create 4 route tables as in the diagram above.
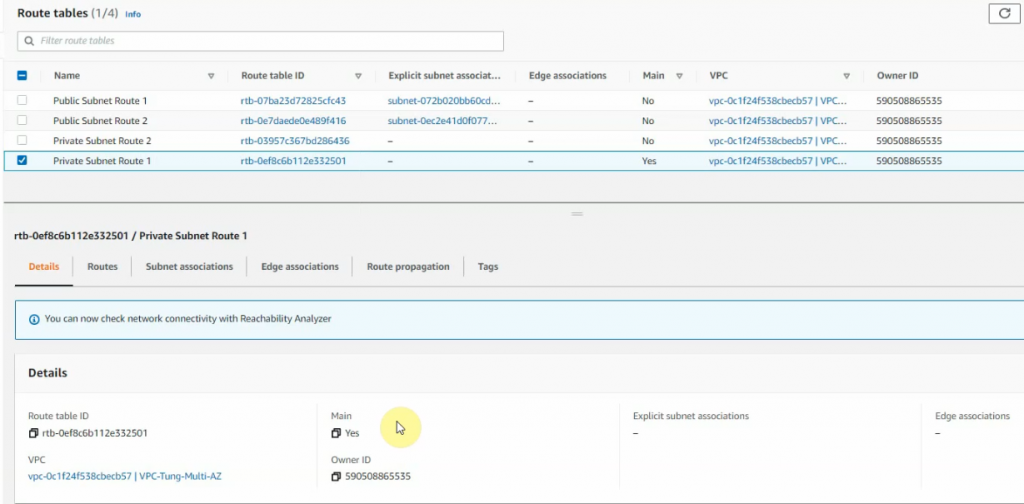
Link the subnets to corresponding route tables.
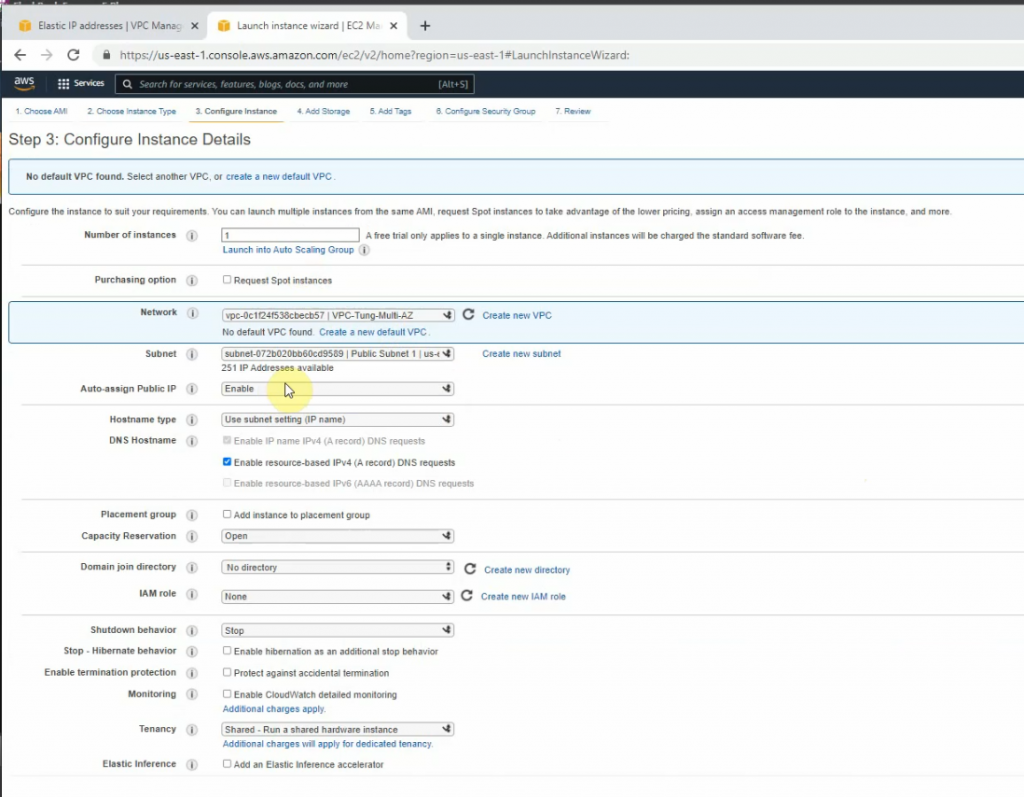
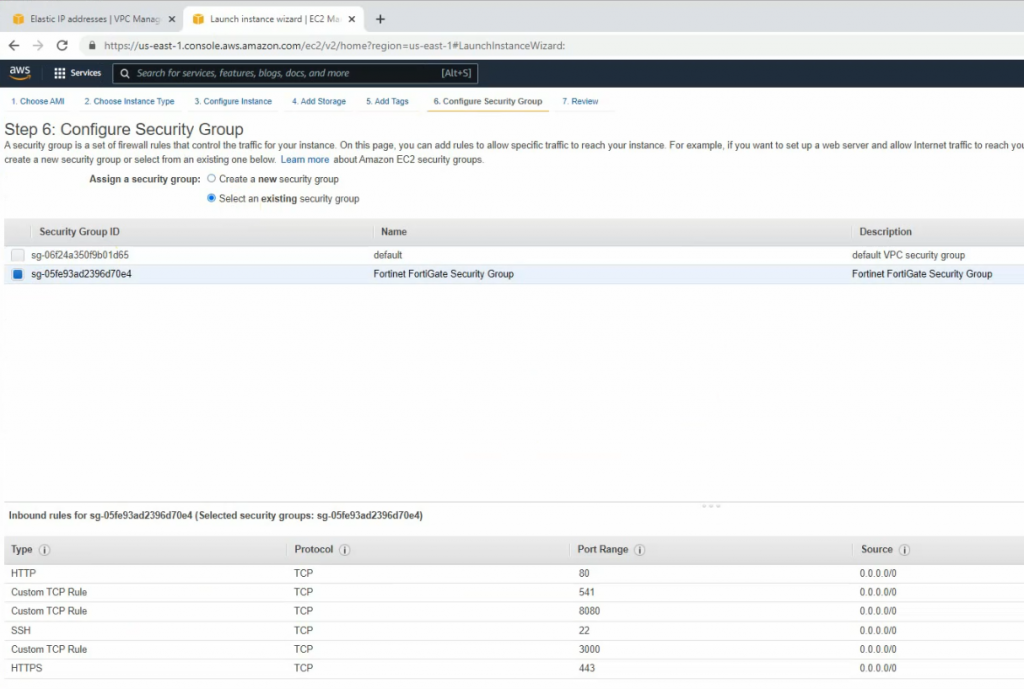
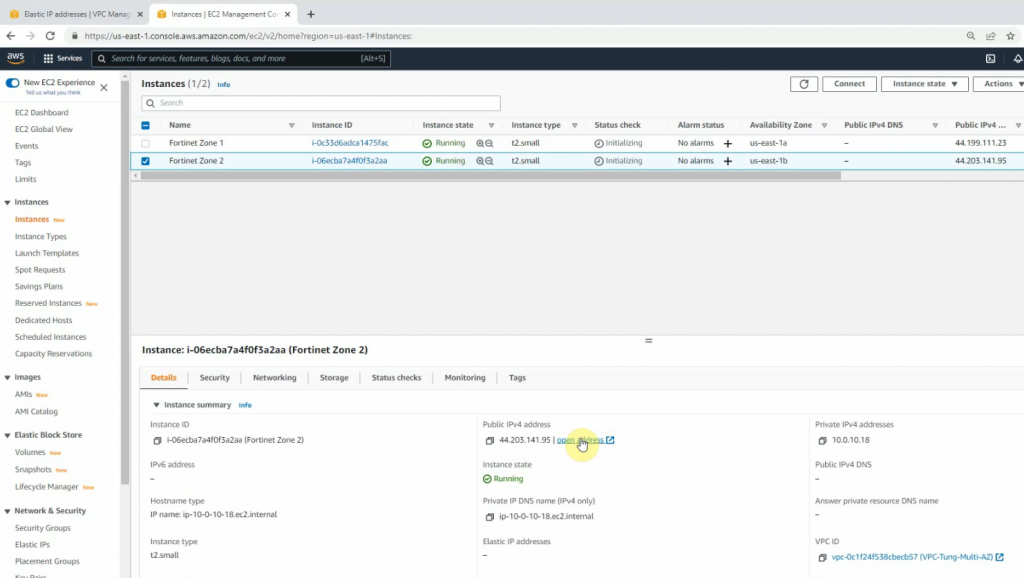
Create a new FortiGate on AZ 1.
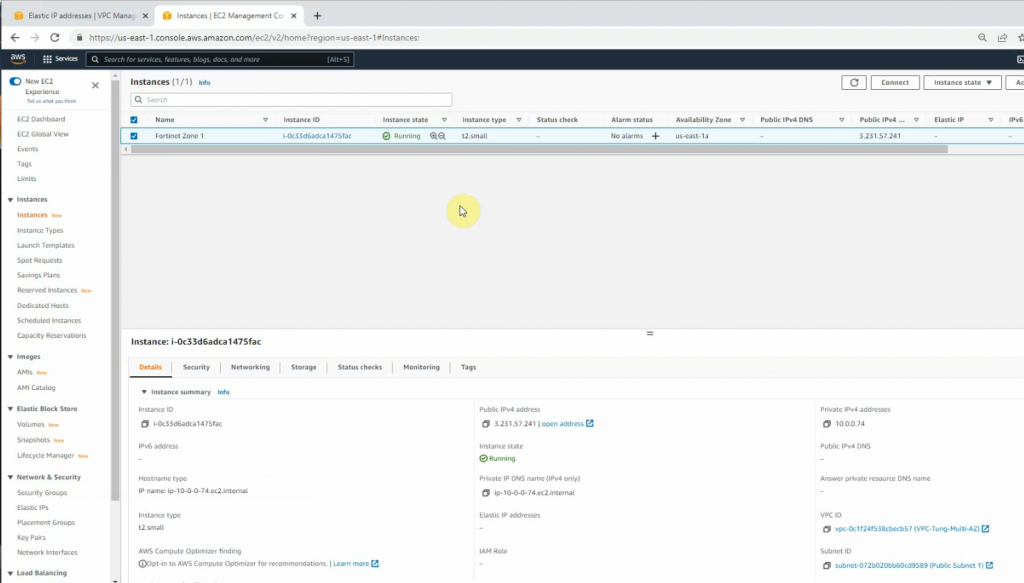
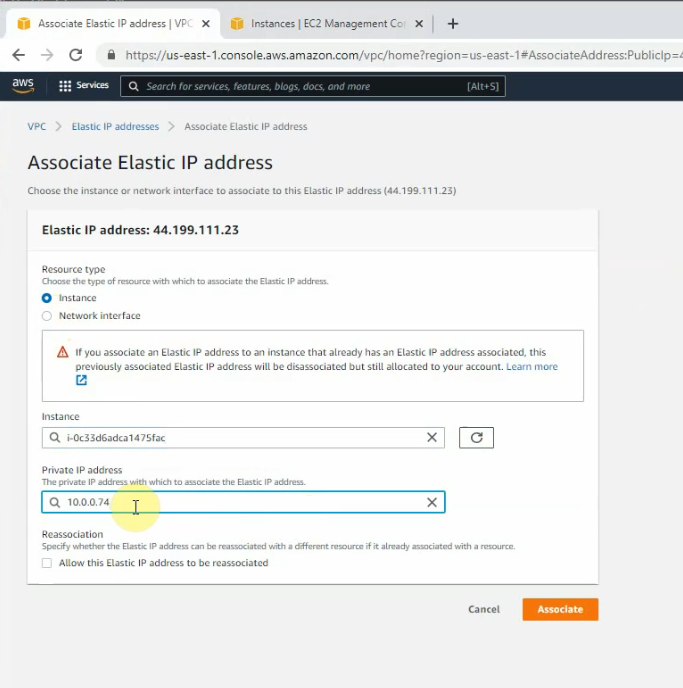
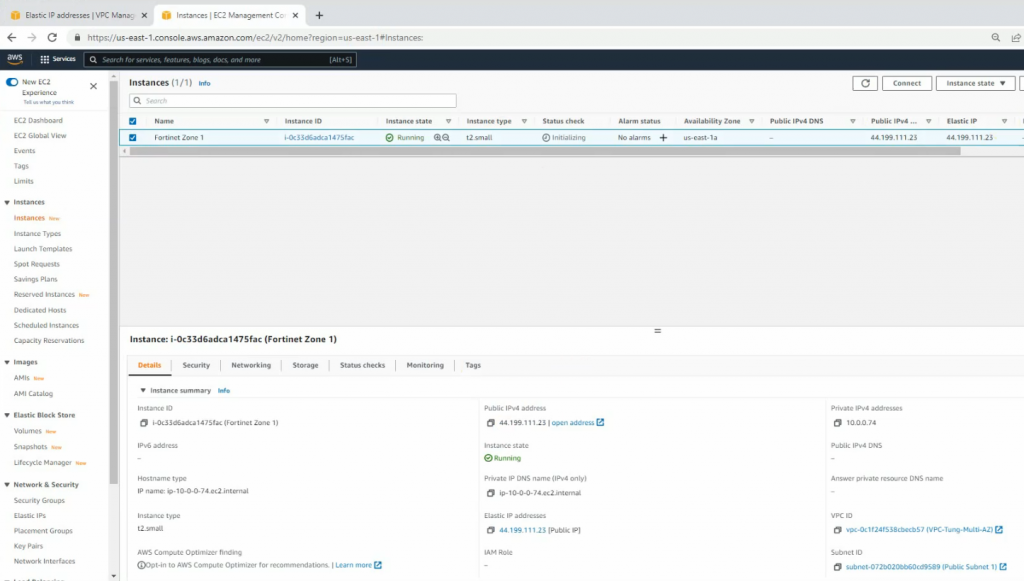
Create a new Elastic IP address and associate for the first FortiGate.
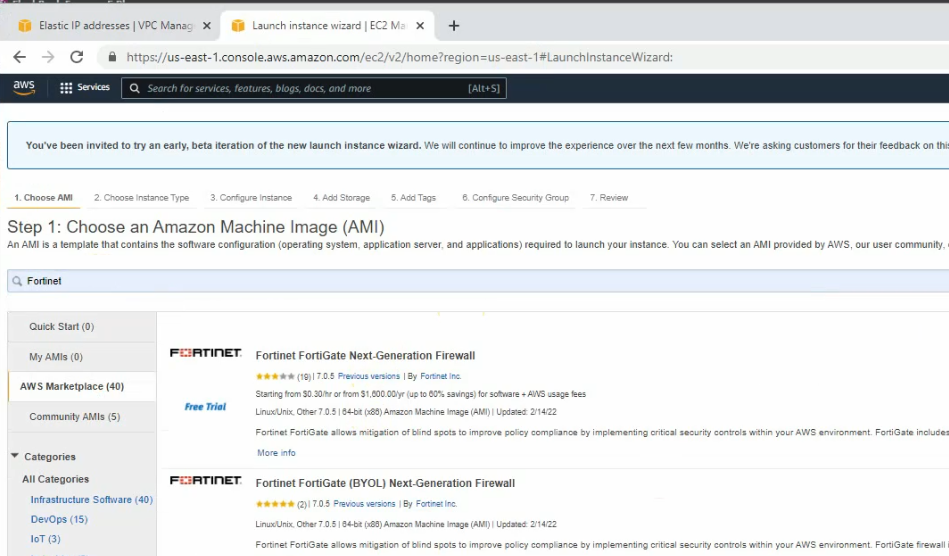
Launch the new FortiGate instance on AZ 2.
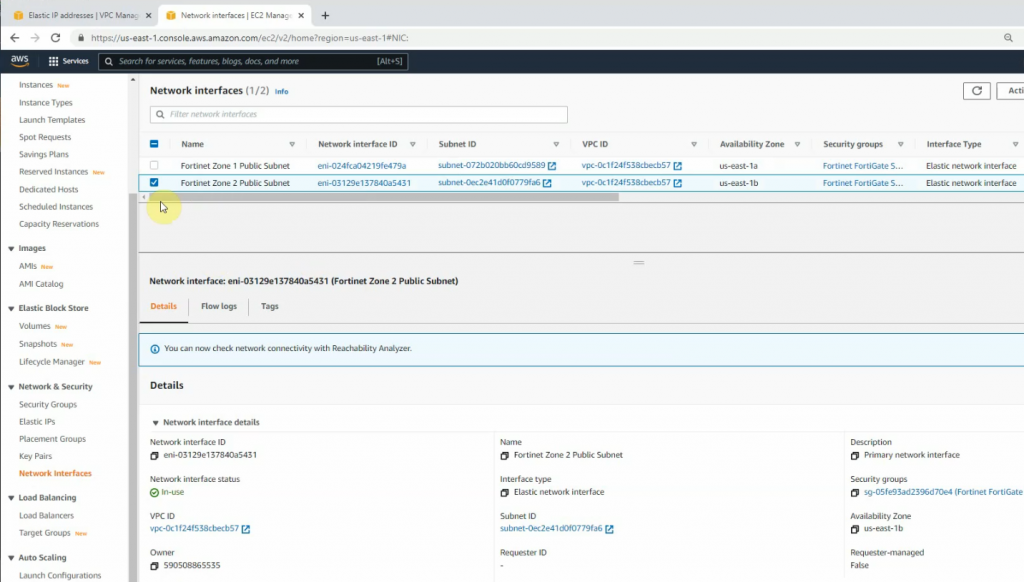
Rename to Fortinet Zone 1 Public subnet and Fortinet Zone 2 Public Subnet.
Create a new Fortinet Zone 1 Private subnet.
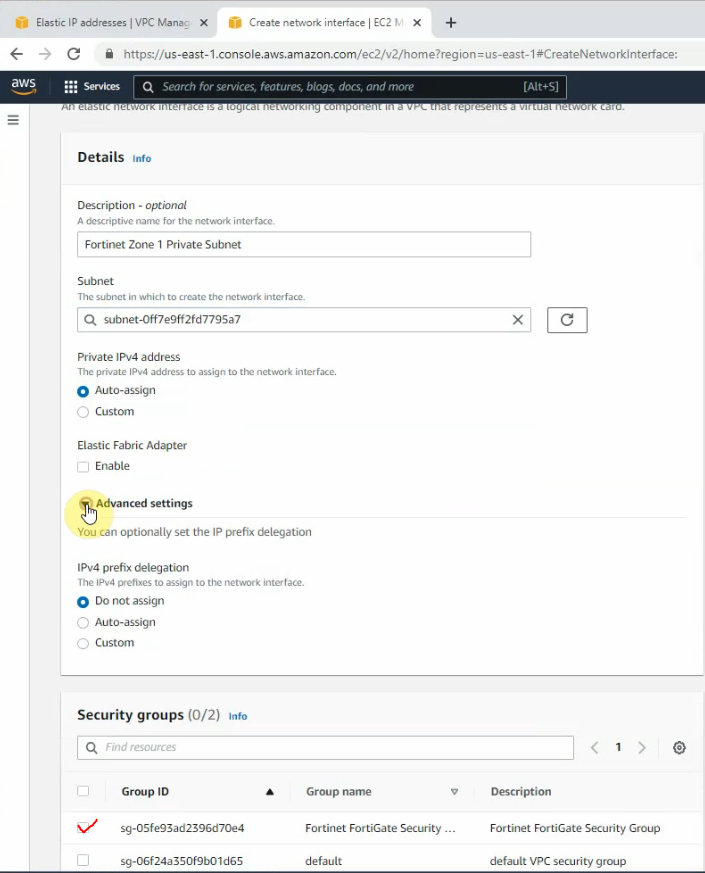
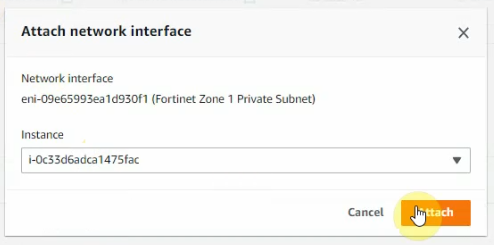
Attach this into the first FortiGate.
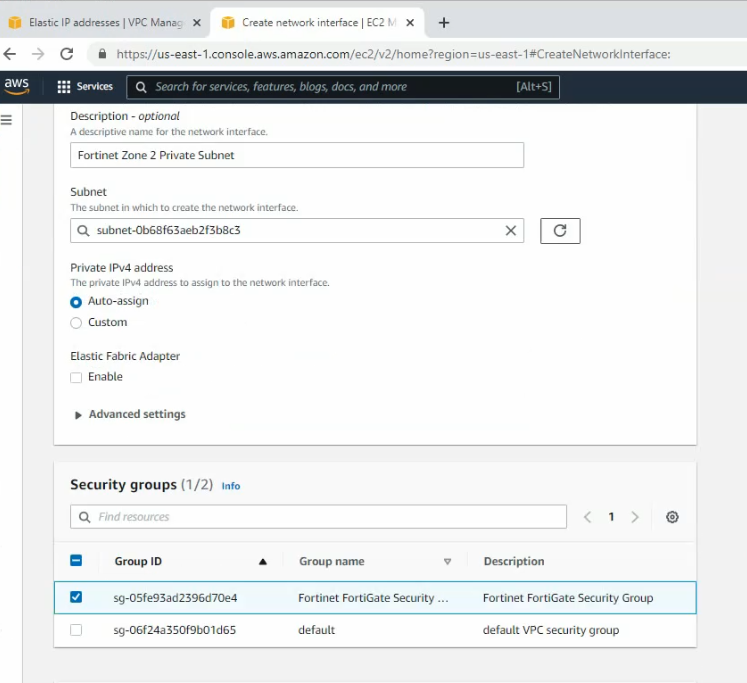
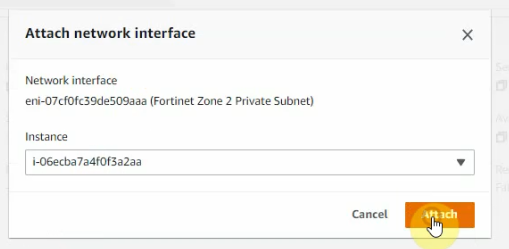
Create a new Fortinet Zone 2 Private subnet and attach it to FortiGate 2.
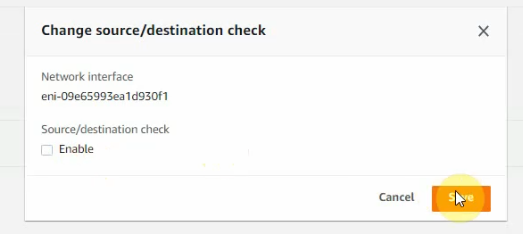
Uncheck “Change source/destination check” on all FortiGate interfaces.

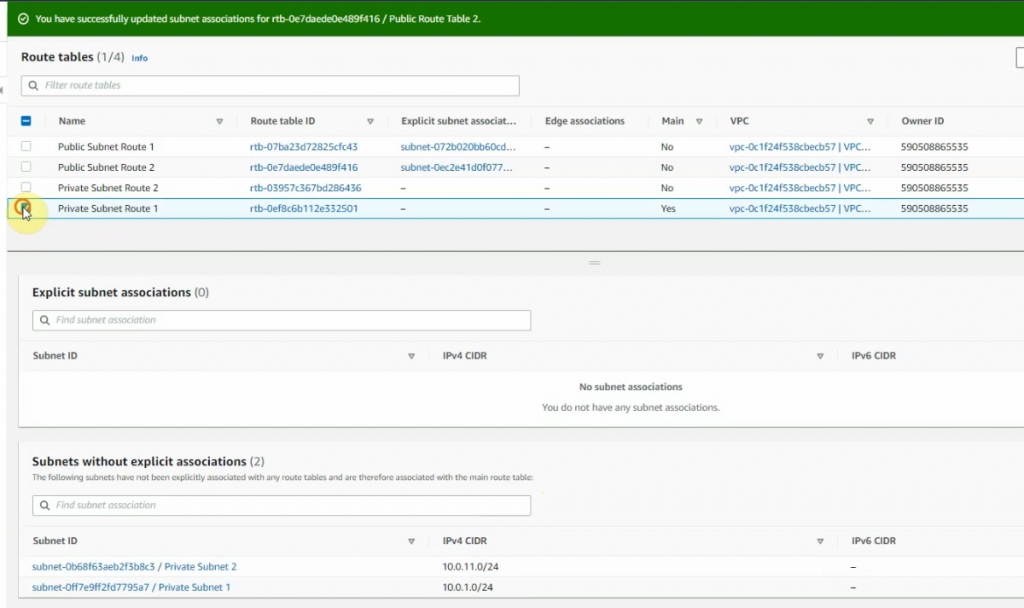
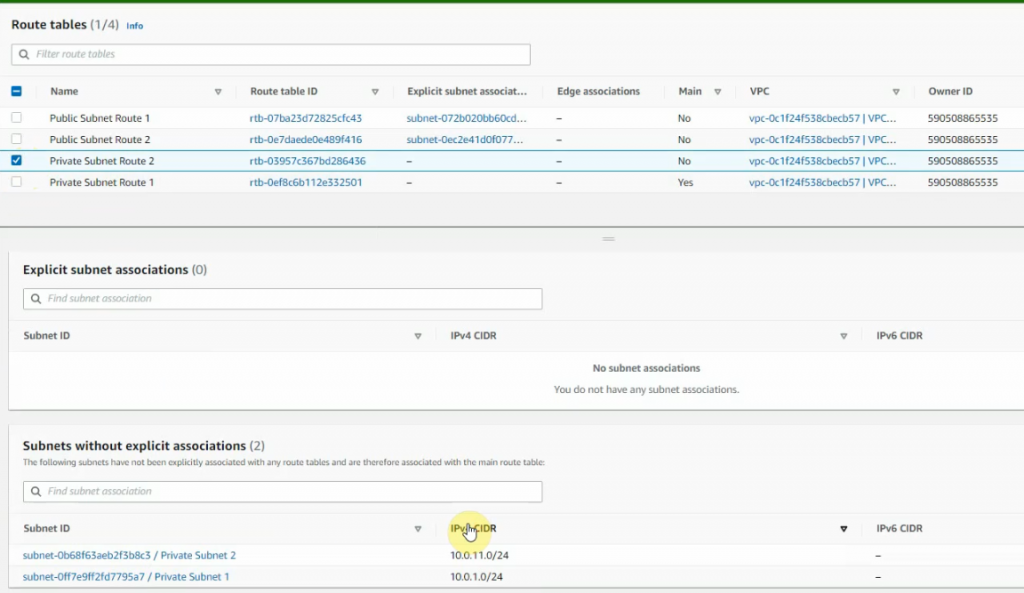
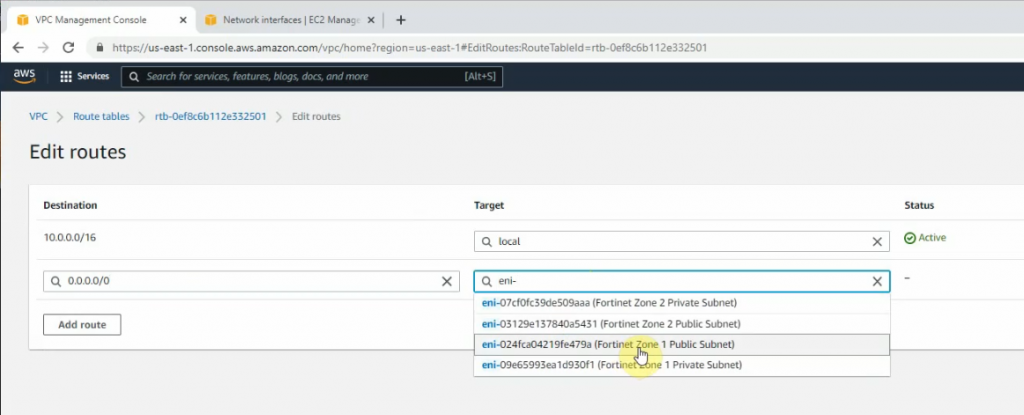
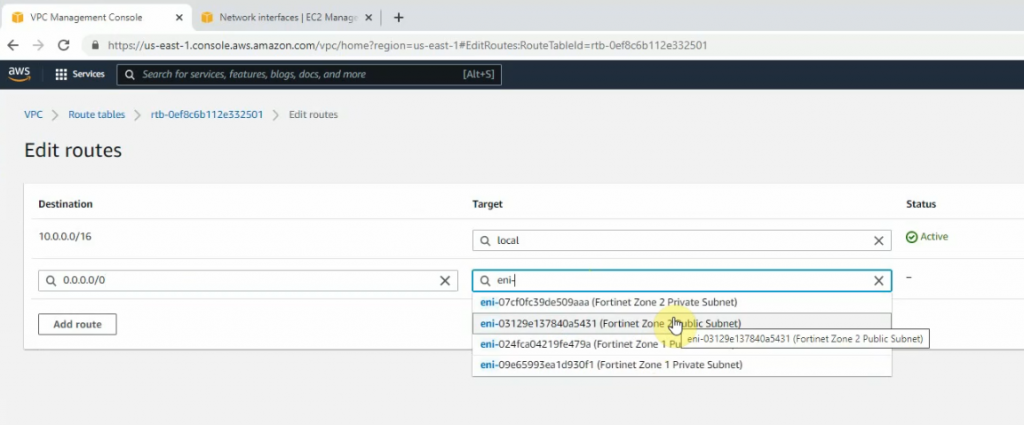
Back to Route tables.
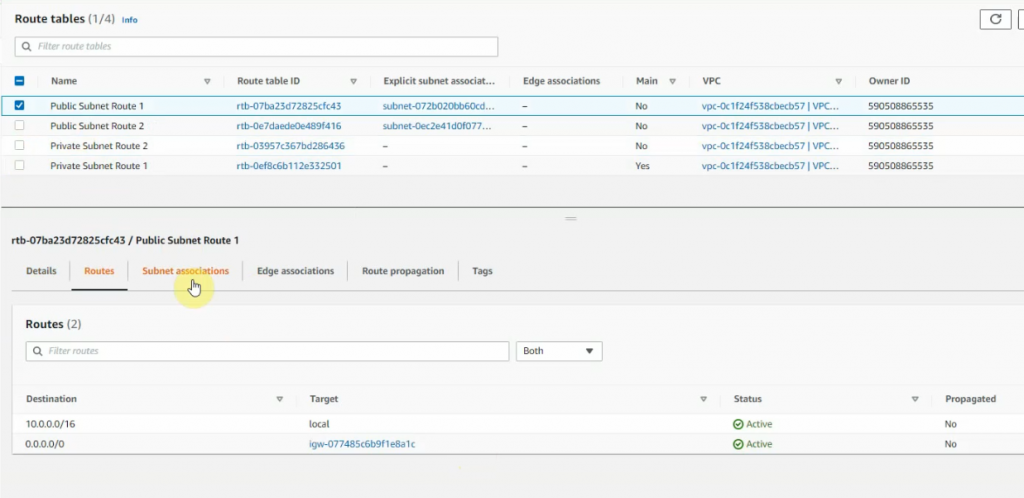
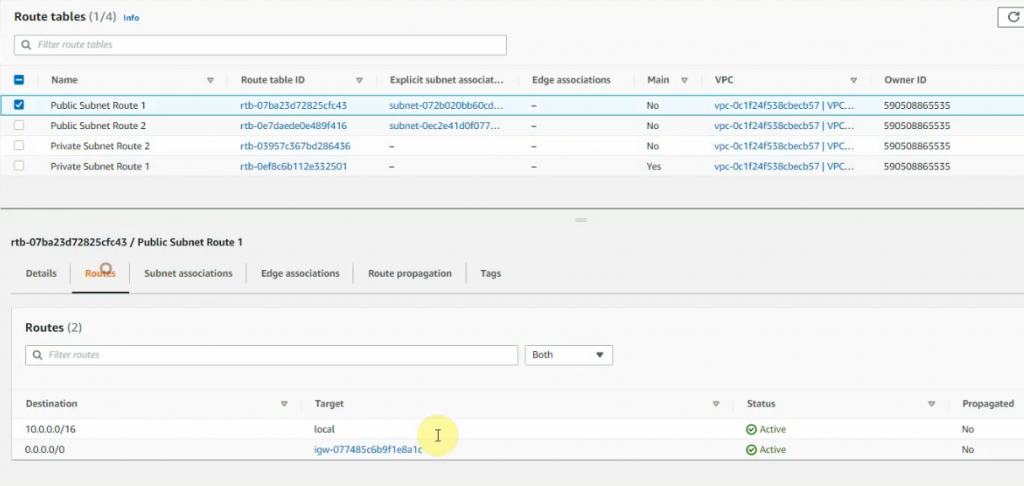
Create a new route 0.0.0.0/0 on Public Route table 1 via Fortinet Zone 1 Public subnet interface.
Create a new route 0.0.0.0/0 on Public Route table 2 via Fortinet Zone 2 Public subnet interface.
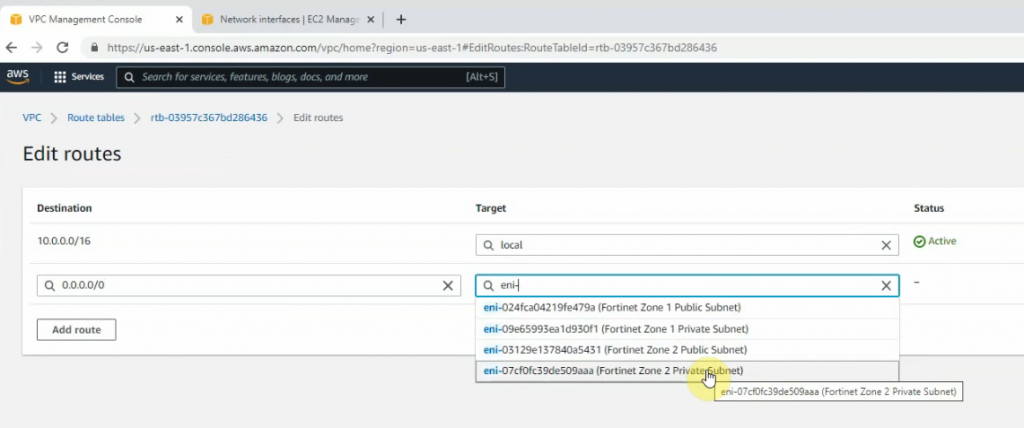
Create a new route 0.0.0.0/0 on Private Route table 1 via Fortinet Zone 1 Private subnet interface.
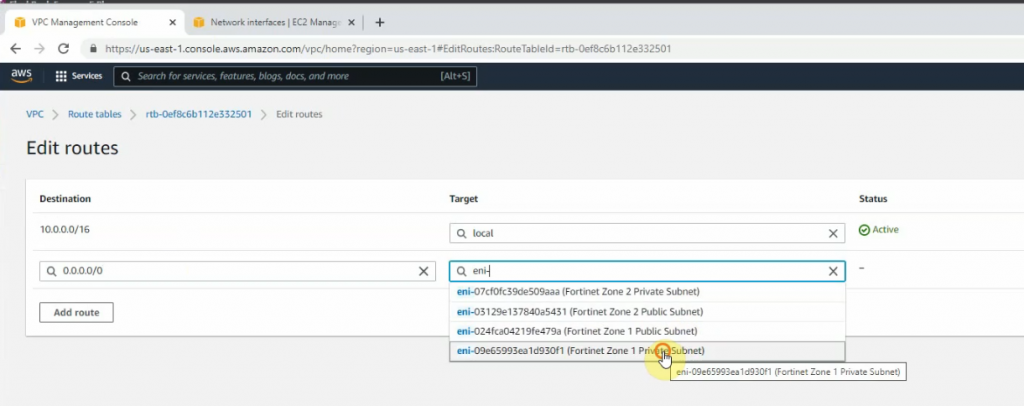
Create a new route 0.0.0.0/0 on Private Route table subnet 2 via Fortinet Zone 2 Private subnet interface.
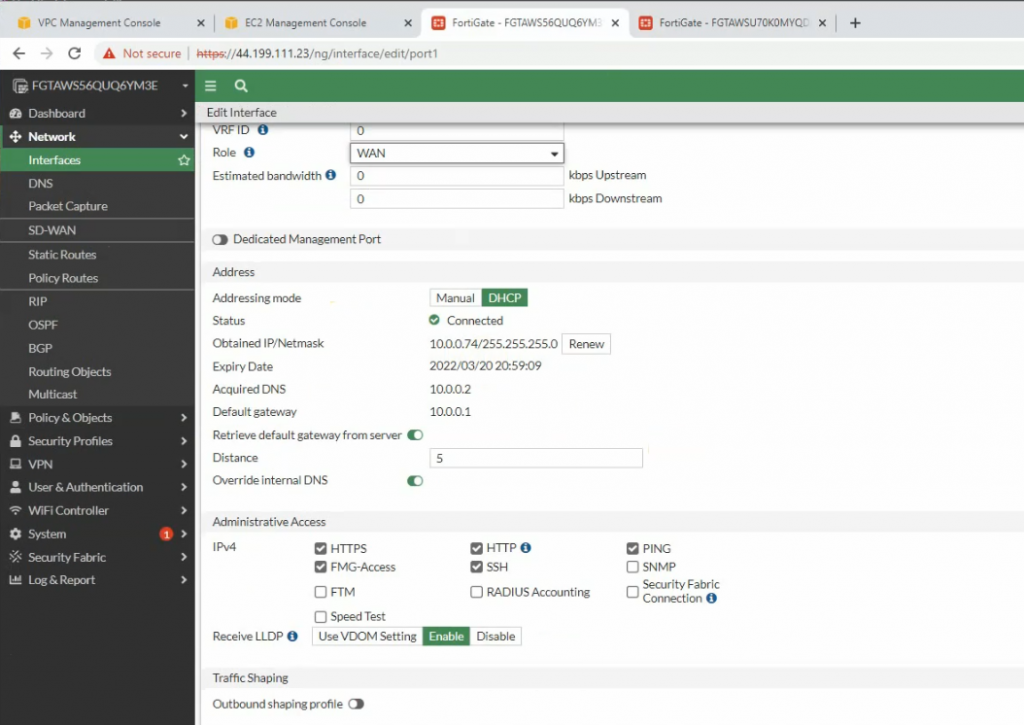
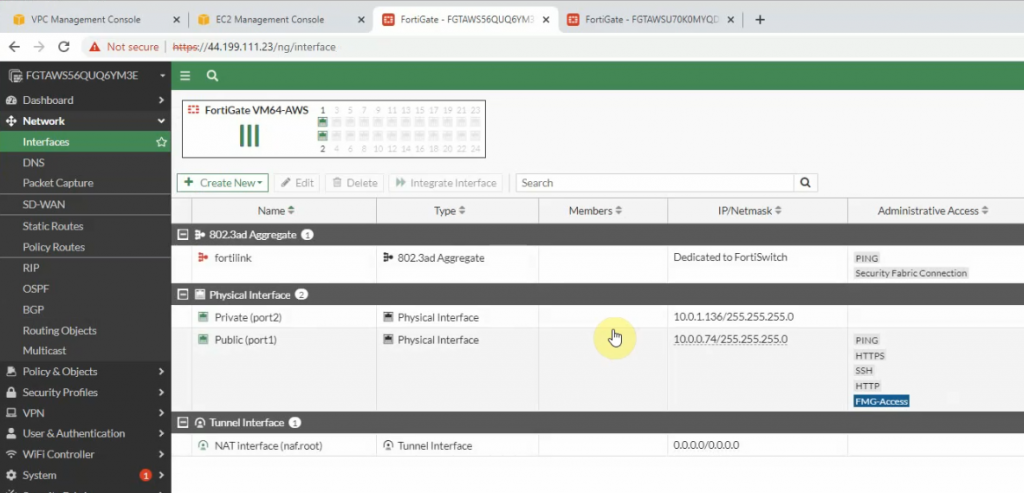
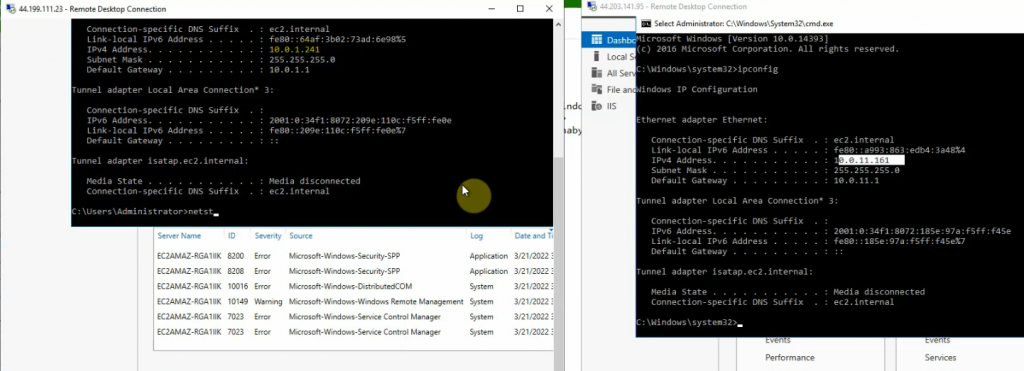
Access FortiGate management interface.
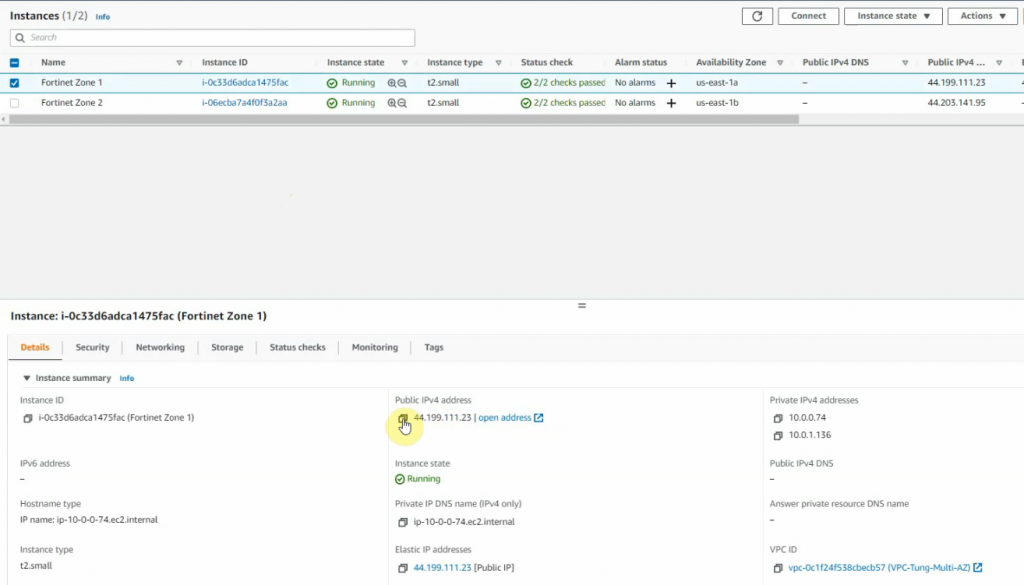
The FortiGate 1.
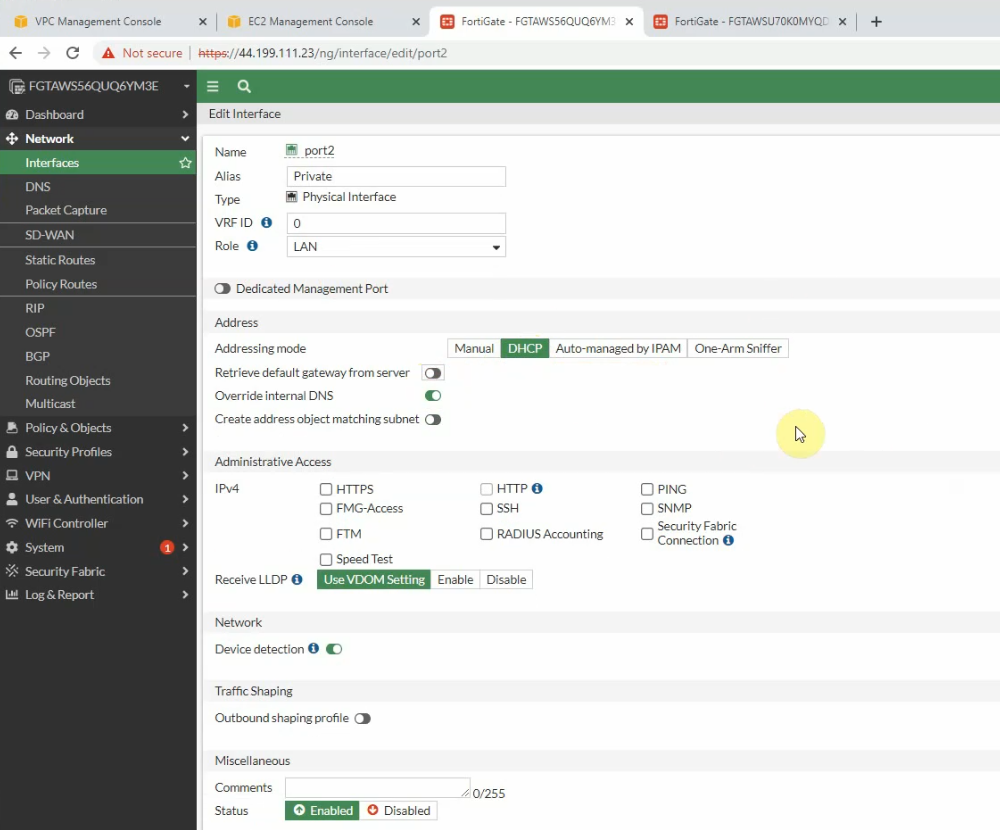
Change the LAN setting for port 2.
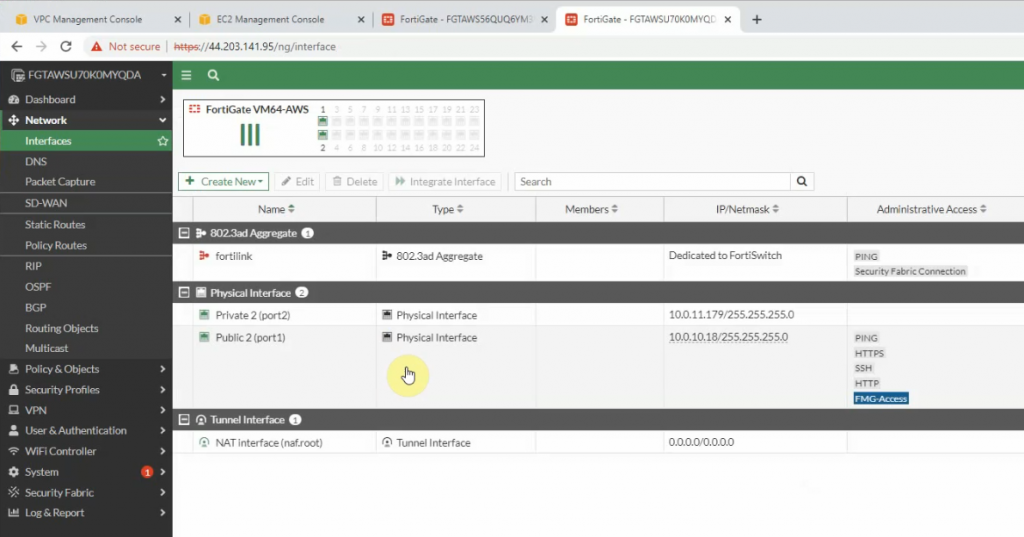
Do the same with FortiGate 2.
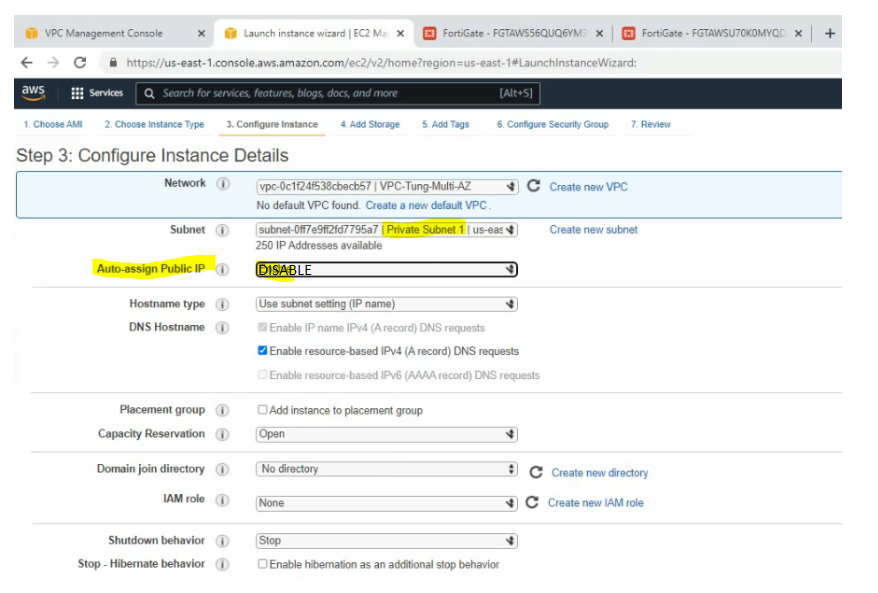
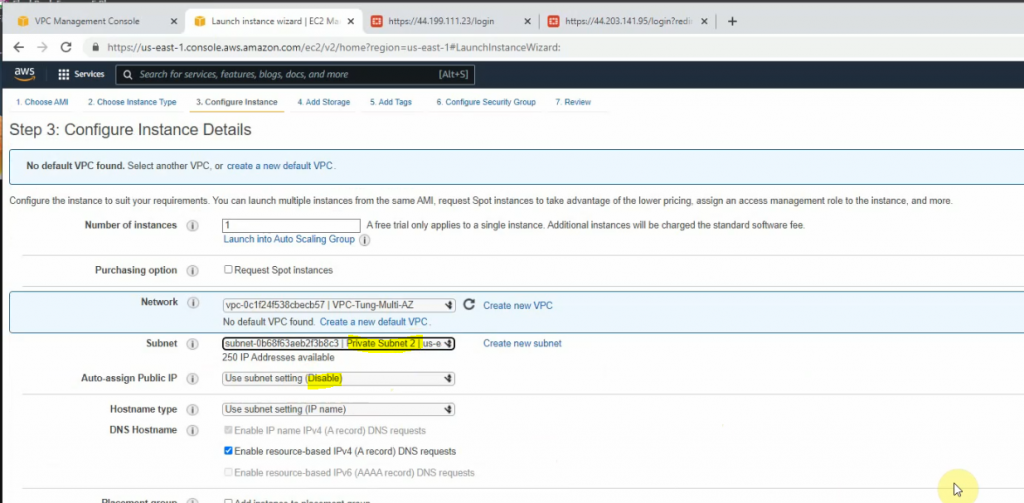
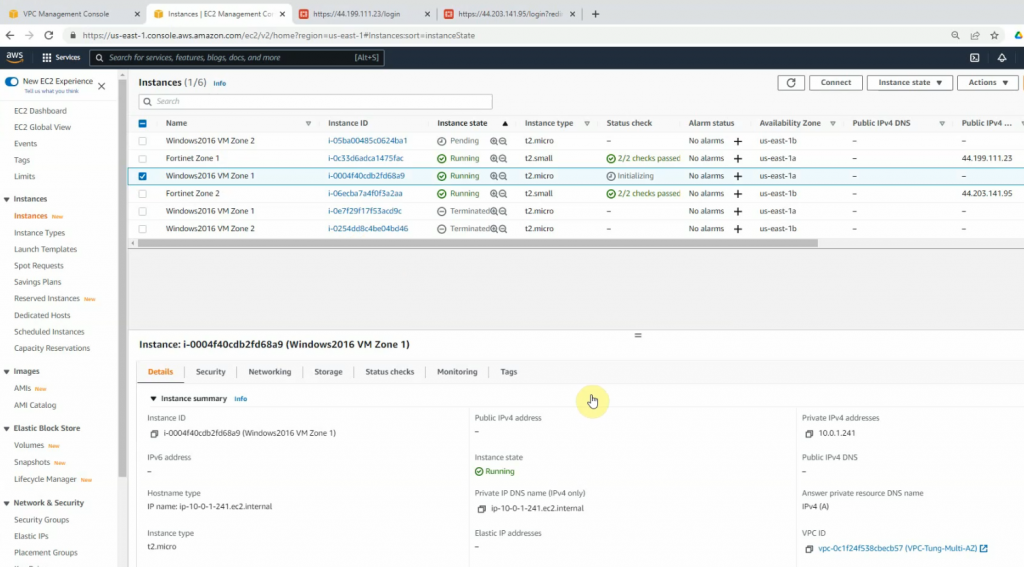
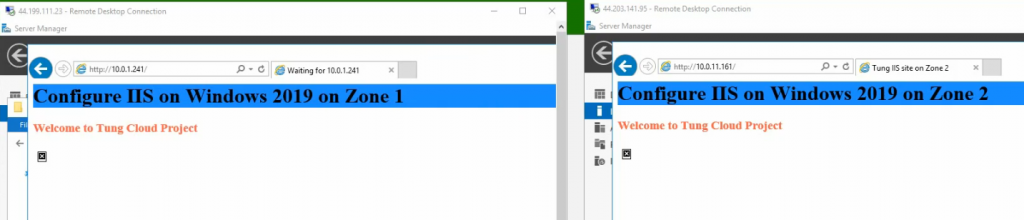
Create two new Windows Server 2016 instances on AZ1 and AZ2.
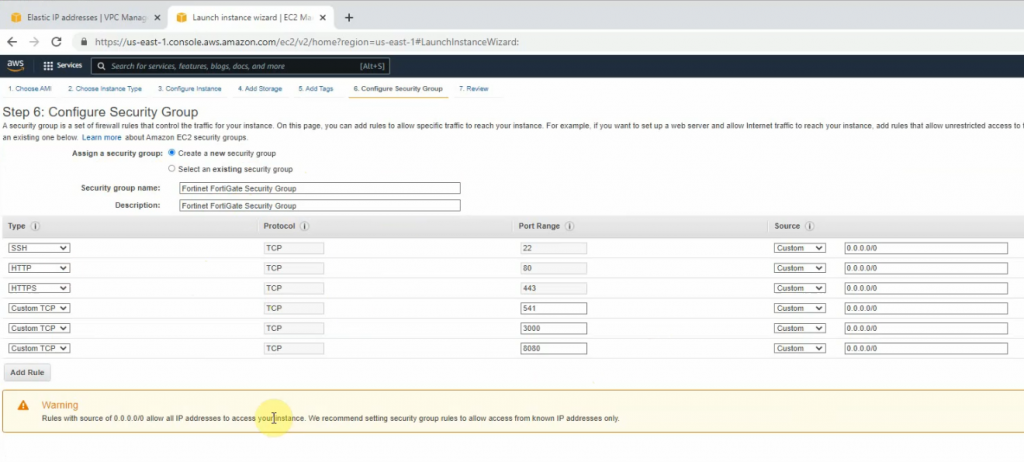
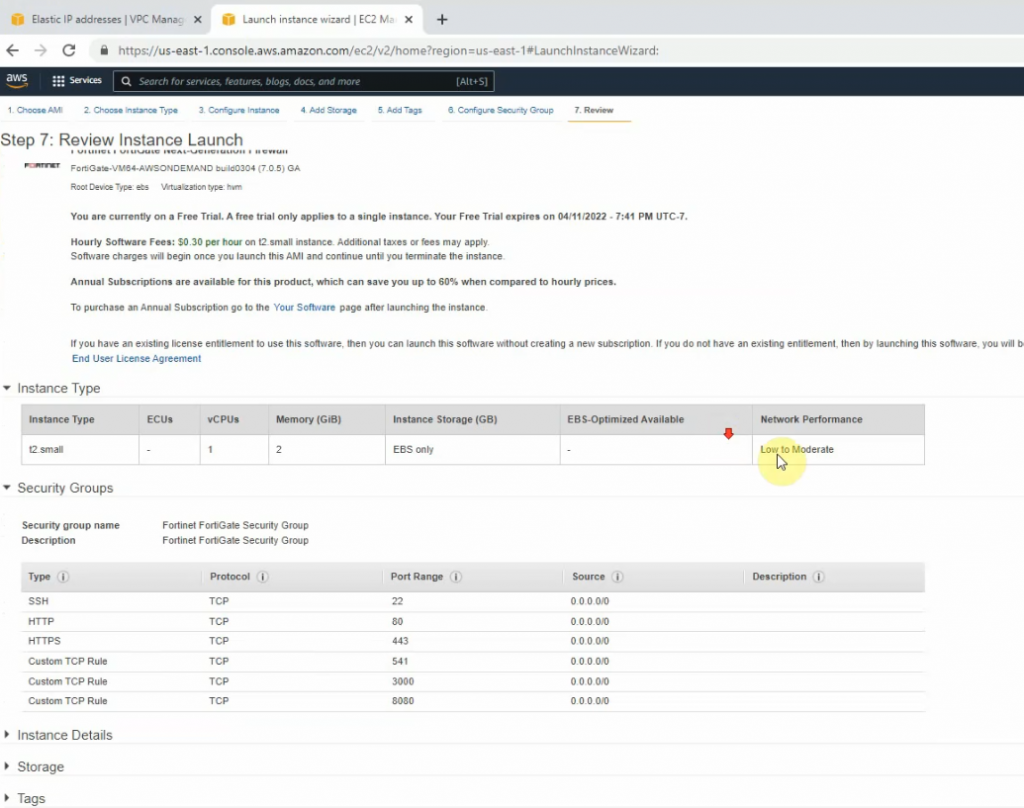
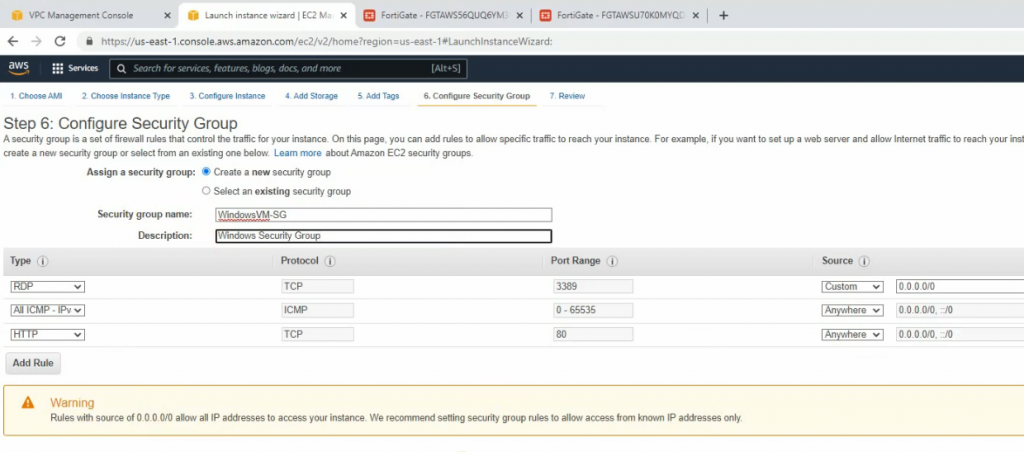
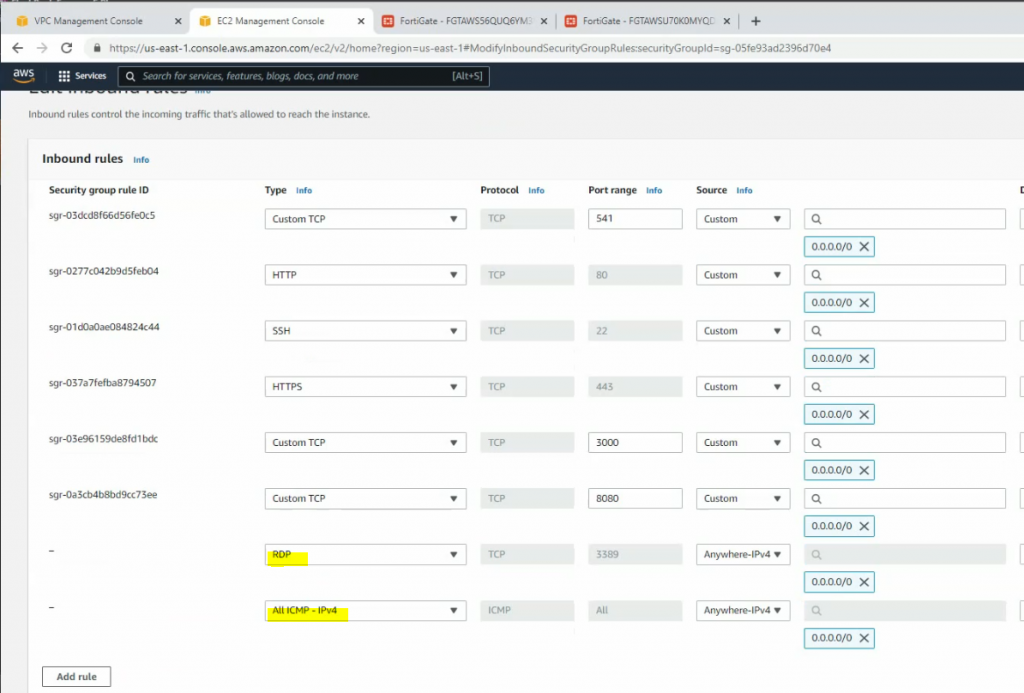
Windows Security Group.
Launch the new one.

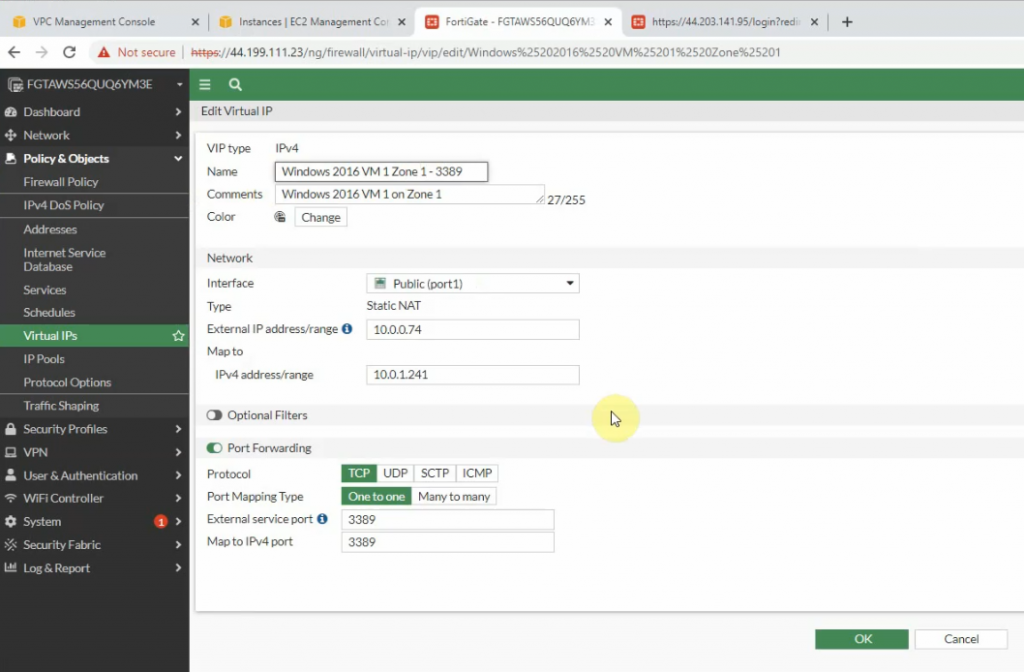
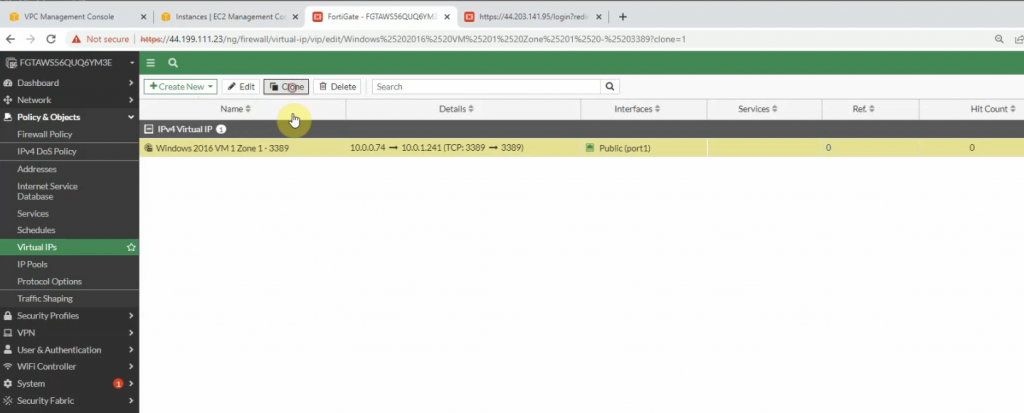
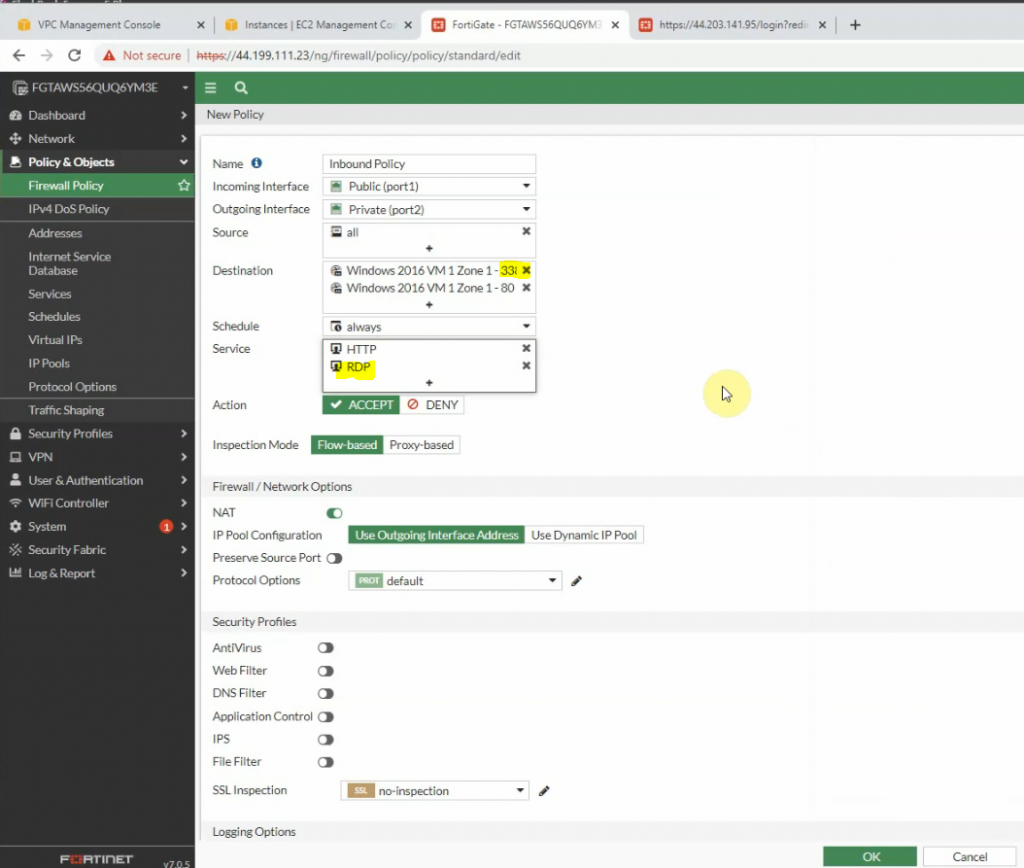
Go to FortiGate 1, and DNAT port 3389 to Windows Server 2016 VM 1 instance.
Create a new inbound policy to allow traffic from the Internet to Windows 2016 instance.
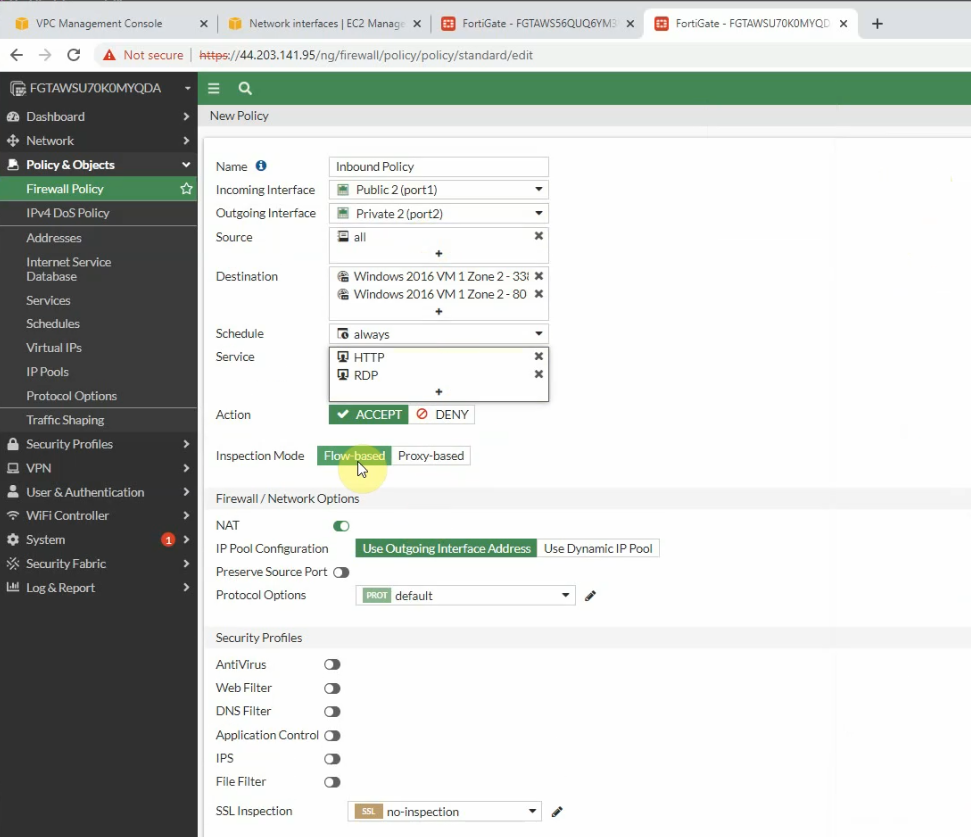
On FortiGate 2.
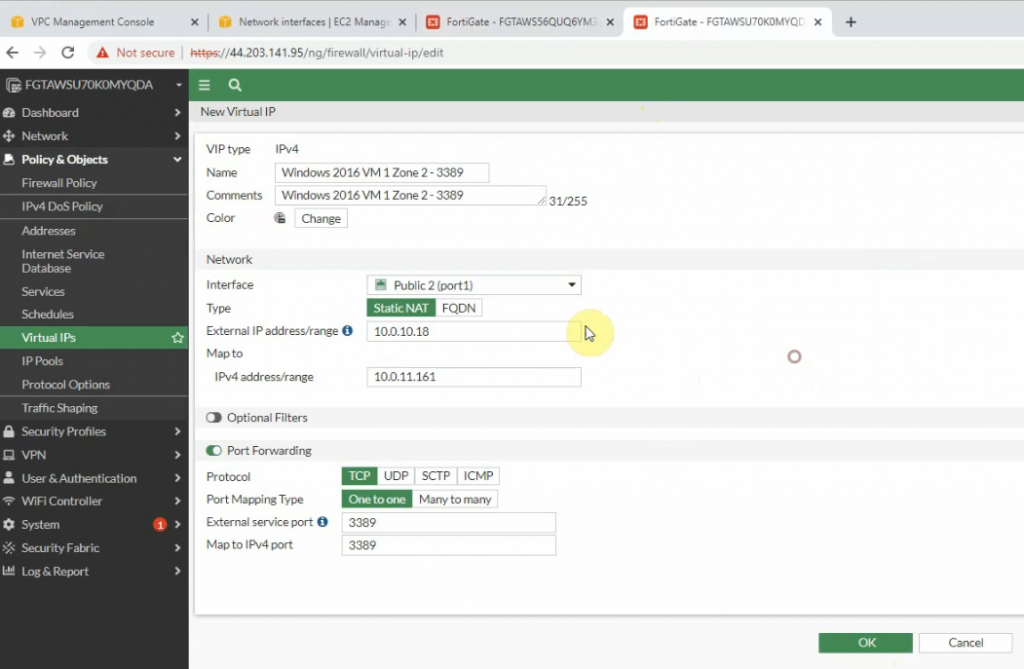
Create a new Firewall Policy.
Edit the Security Group to allow RDP to Windows 2016 VM 2 instance.
Access Windows VM 1.
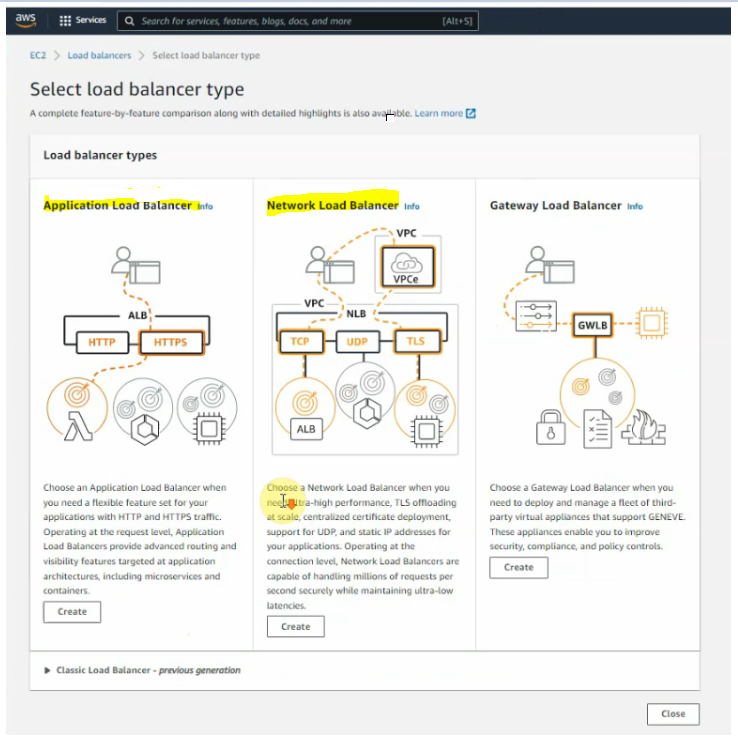
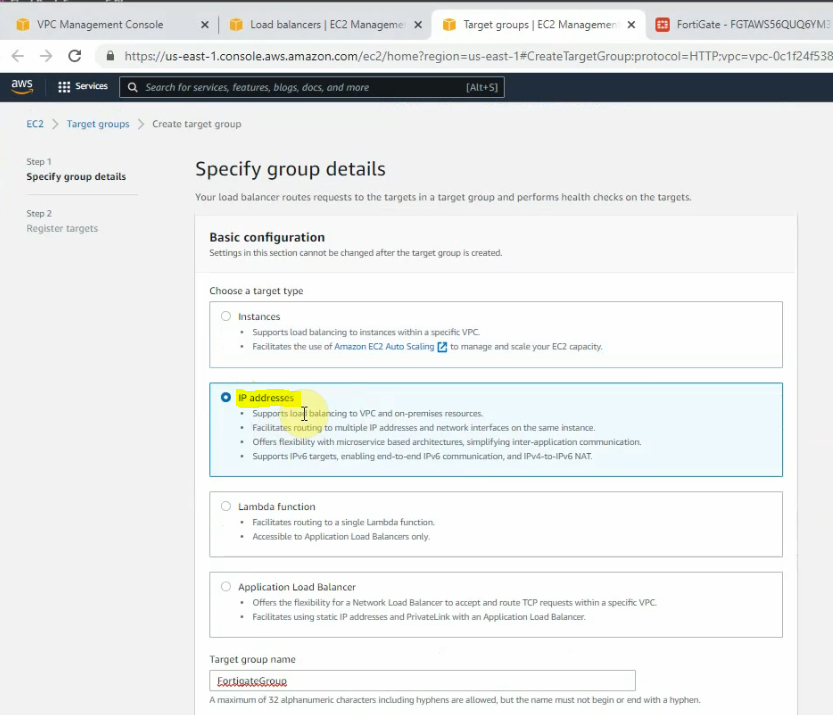
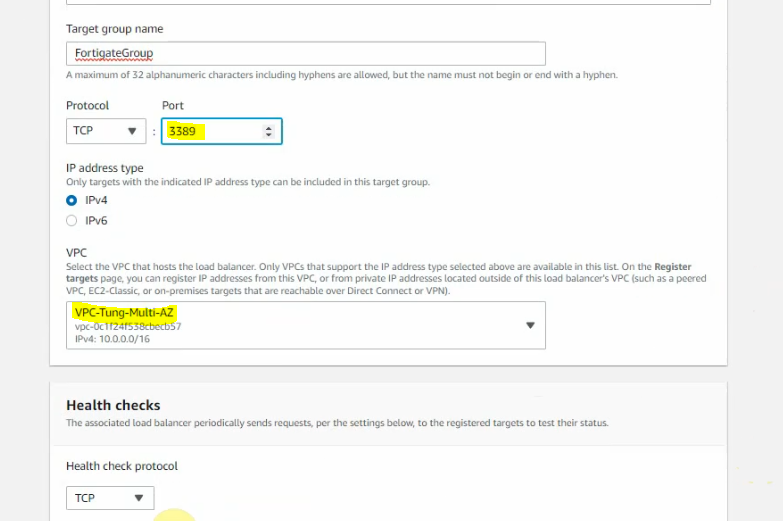
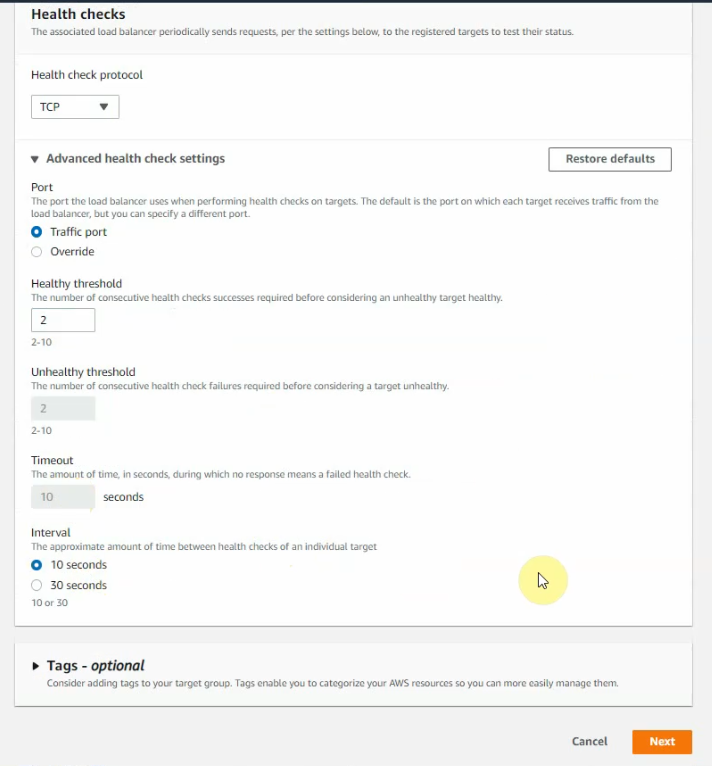
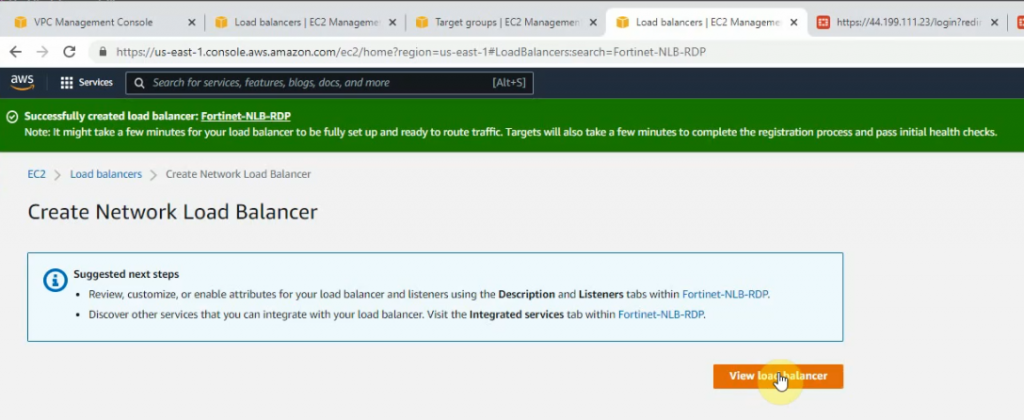
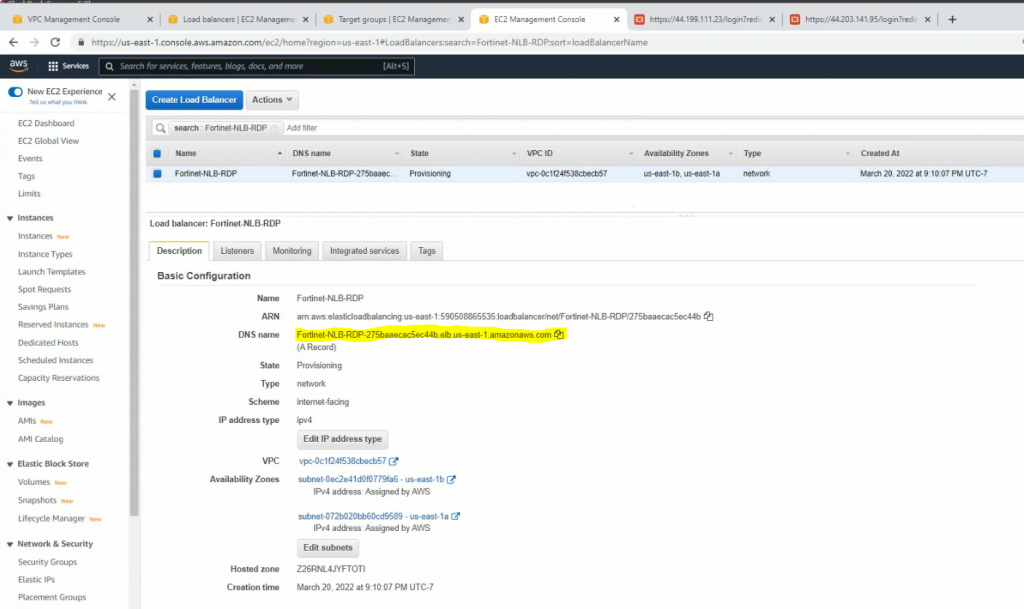
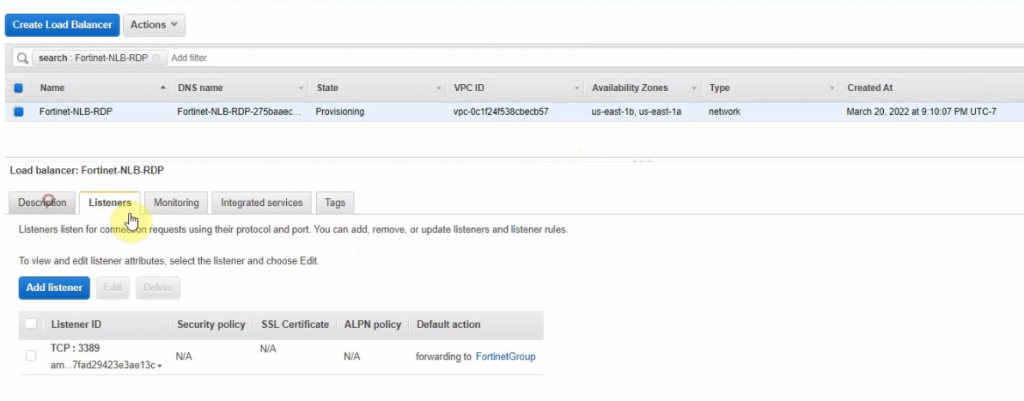
Create Network Load Balancer on AWS for RDP traffic to Windows Server 2016 instance.
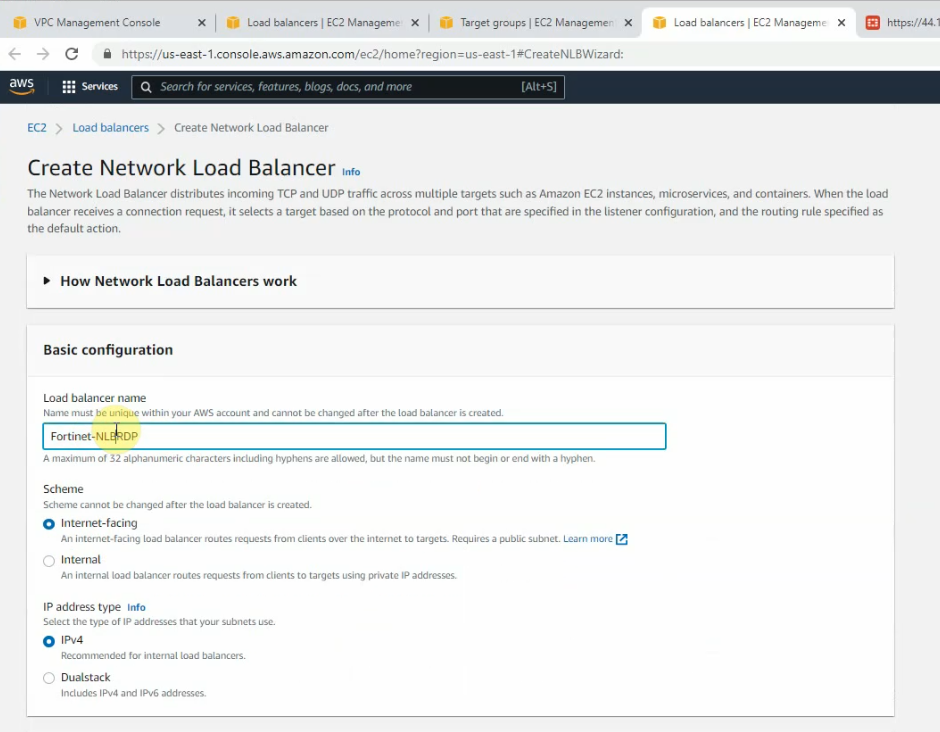

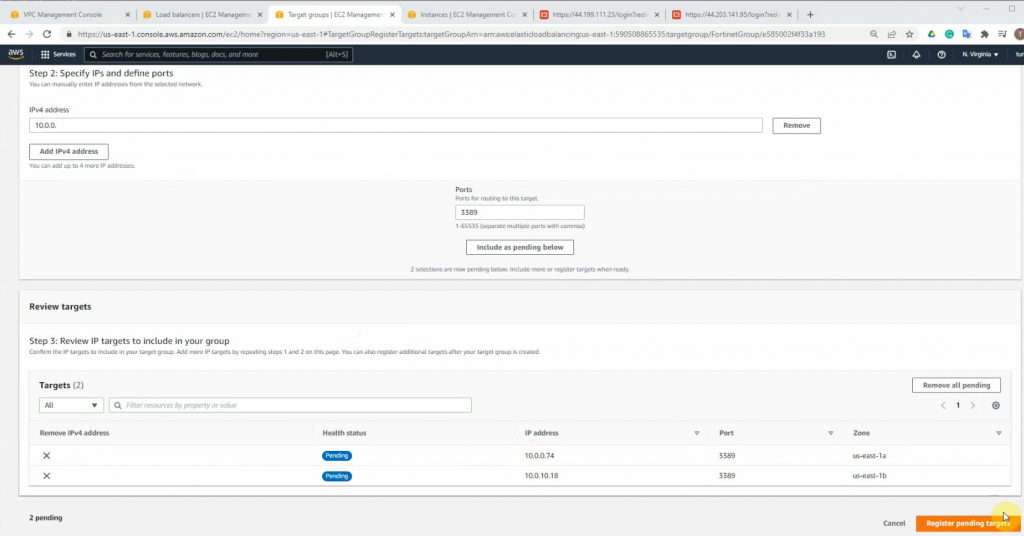
Select “IP address”.
Add IP addresses on the public subnet of both FortiGates on “register targets”.
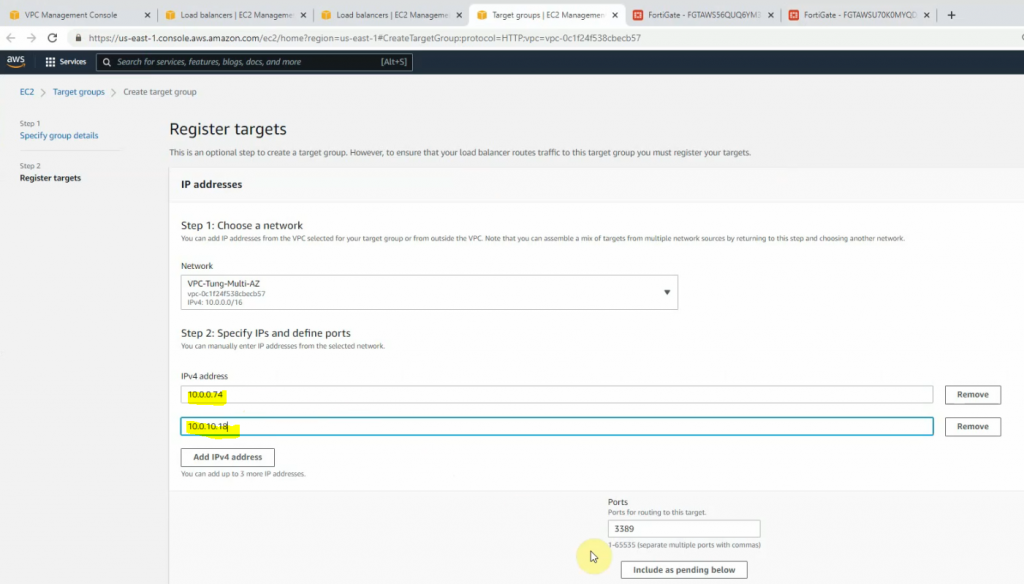
Click Register targets.
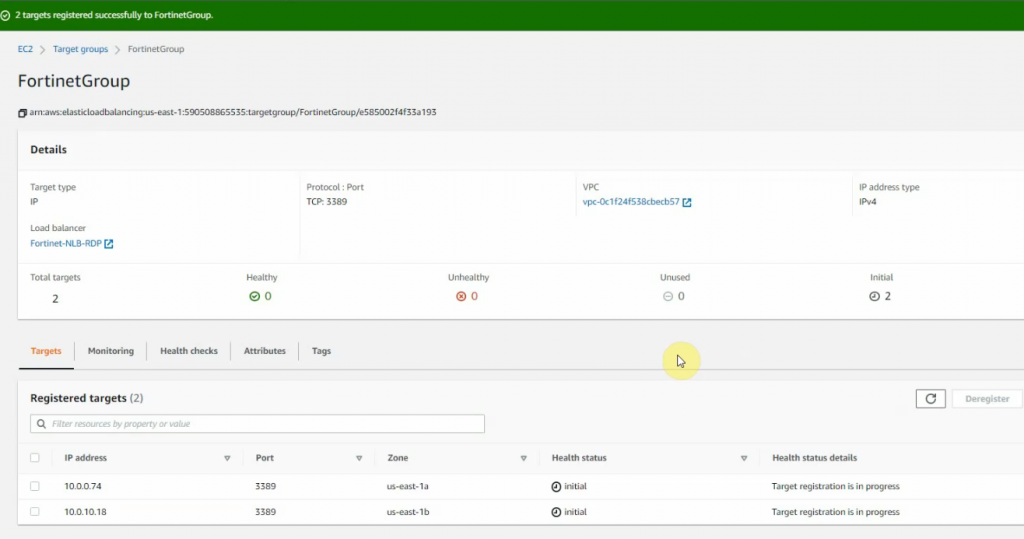
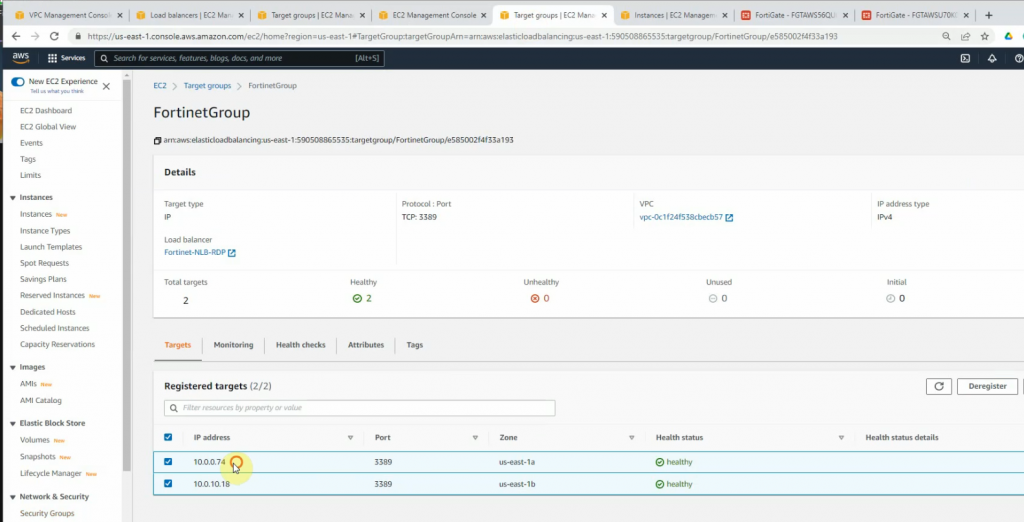
Wait until the health states on both IP addresses are healthy.
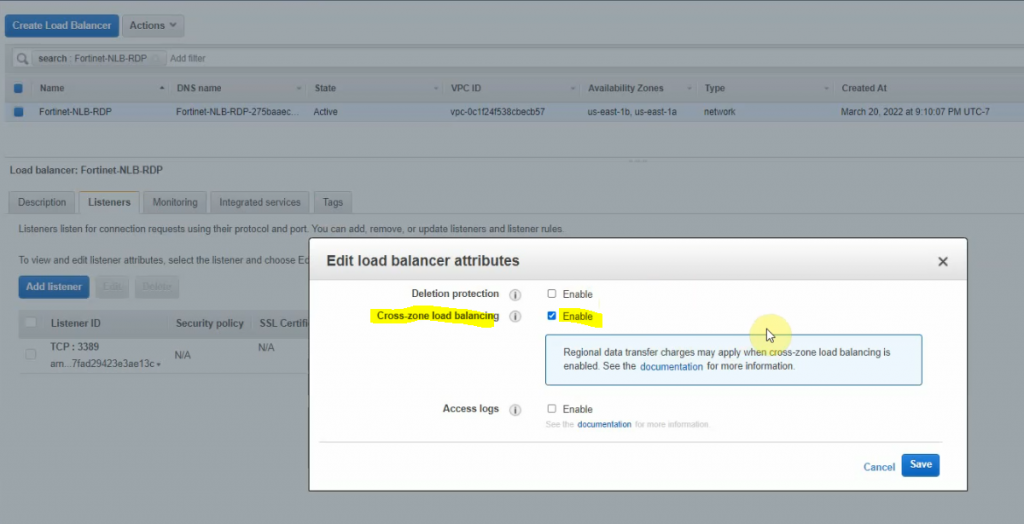
Right-click on FortiGate-NLB-RDP and enable “Cross zone load balancing” to allow load balancing on multiple AZ.
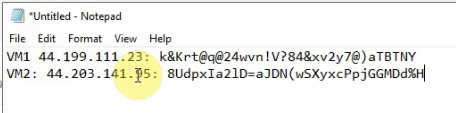
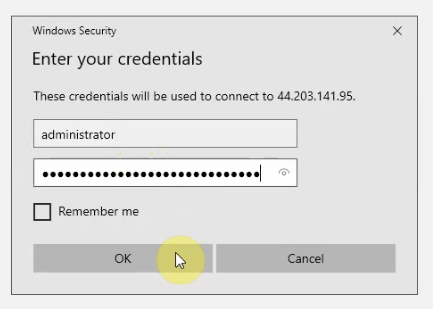
Set the same Windows password for both Windows 2016 instances.
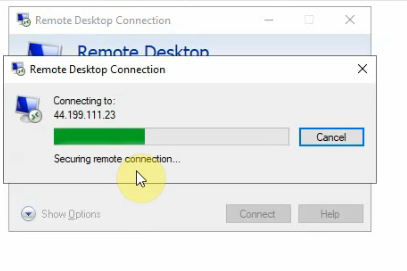
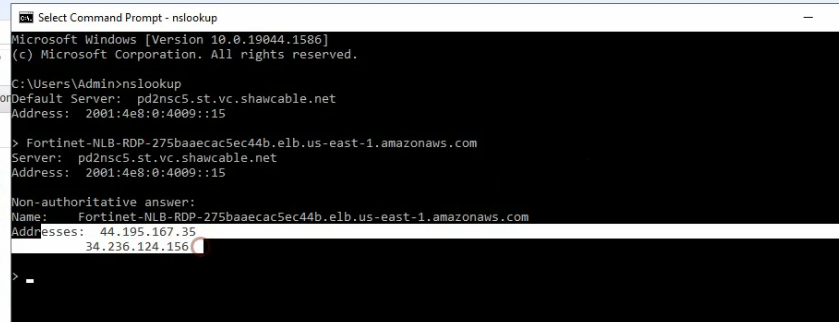
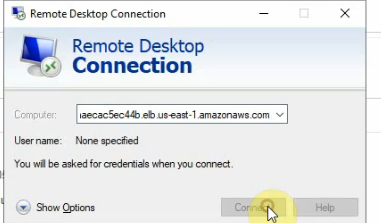
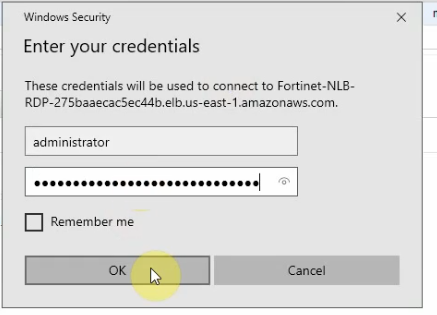
Access RDP to the highlighted DNS name on NLB.
An RDP session will access Windows Server VM 1 or VM 2 via Elastic Load Balancing.
We are able to configure both web servers on Windows server 2016 VMs and distribute web traffic via Windows 2016 VM instances among the FortiGate in different AZs on AWS.