There are several steps to enable WinRM on domain environment.
- Allow remote server management through WinRM service and create a WinRM listener in WinRM service.
- Enable WinRM service
- Allow WinRM connection via Windows FireWall
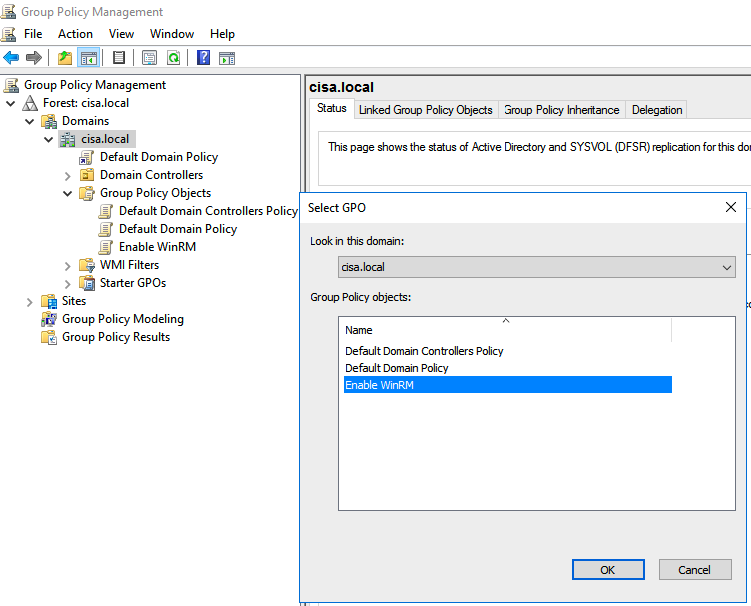
Create a new GPO (Enable WinRM) to enable WinRM on domain.
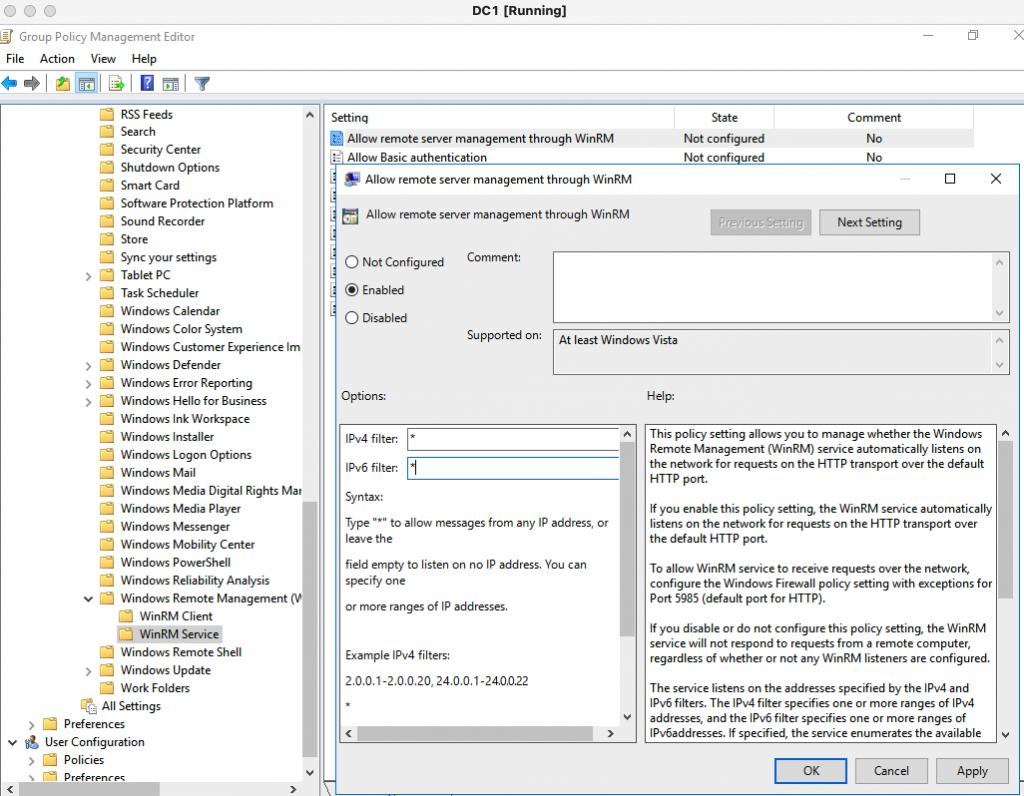
Right click the “Enable WinRM GPO”, select “Edit”. Go to Computer Configuration – Administrative Templates Windows Components – Windows Remote Management (WinRM) – WinRM Service. Then, select Enabled for the setting “Allow remote service management through WinRM”. Next, double click “Allow remote server management through WinRM” setting, enter asterisk (*) for both IPv4 filter and IPv6 filter as a screenshot below to create a WinRM listener for WinRM service. Click Apply and OK.
Next, move on to enable the WinRM Service on Windows domain-joined computer.
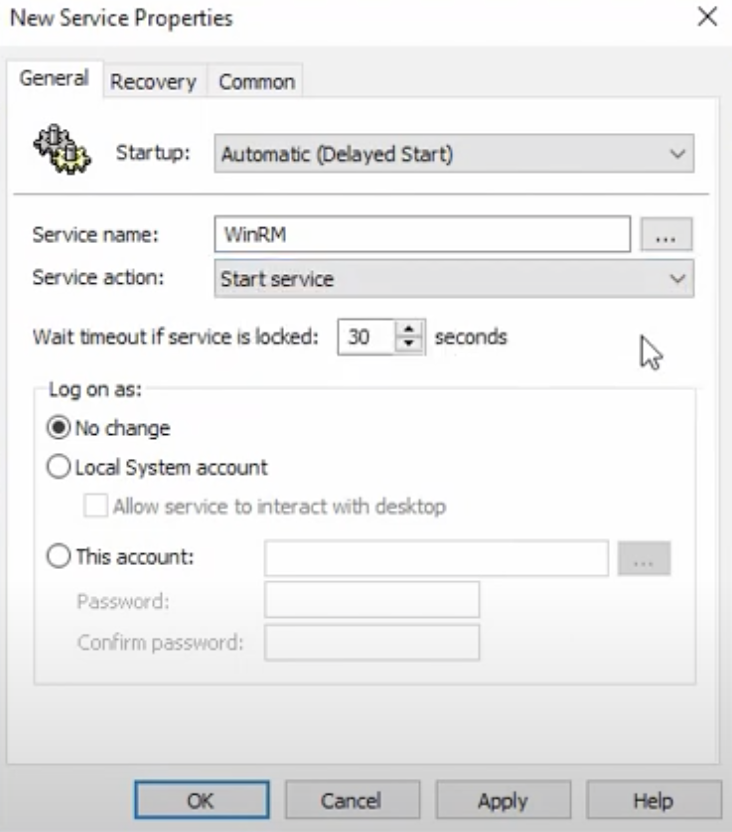
Go to Computer Configurations – Preferences – Control Panel Settings. Right-click in the Services window and click New – Service. Change Startup to Automatic (Delayed Start). Find and select the service name is WinRM. Select “Start service” from the “Service action” and then click OK.
Finally, configure Windows FireWall to allow traffic to WinRM service via TCP port 5985 (HTTP) or TCP port 5986 (over SSL).
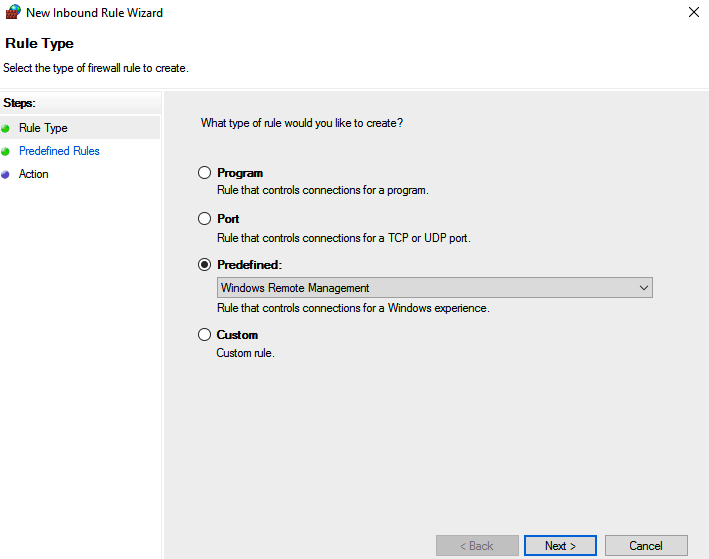
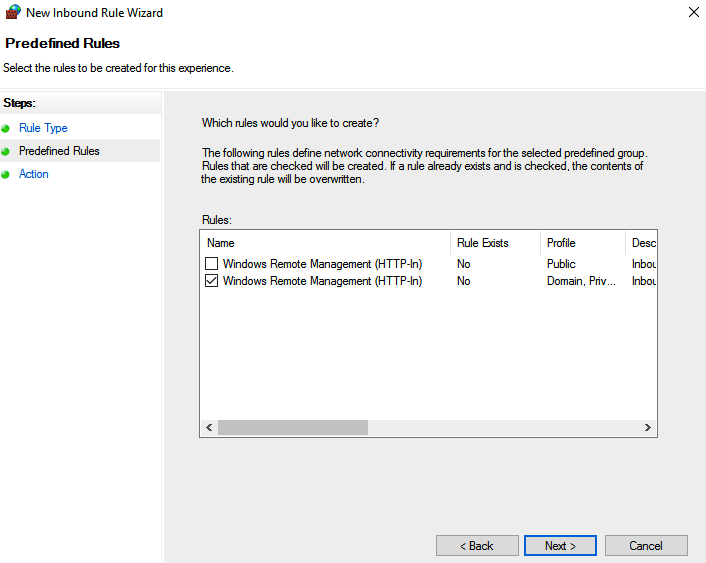
Go to Computer Configuration – Windows Settings – Security Settings – Windows Defender Firewall with Advanced Security. Click on the “New Inbound Rule”to create a new inbound rule and select Windows Remote Management as a following screenshot.
Select “Domain/Private network rule” under rules setting to allow remote connections from only Private and Domain profile.
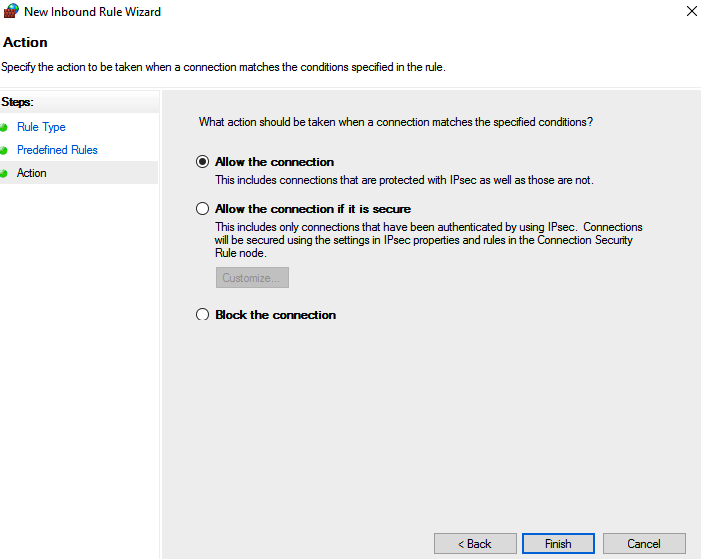
Leave the “Allow the connection” as a default setting in the next page. Then, click Finish to create the rule.
Link the GPO to Windows domain-joined computers.
Restarted Windows domain-joined computers to apply the GPO.
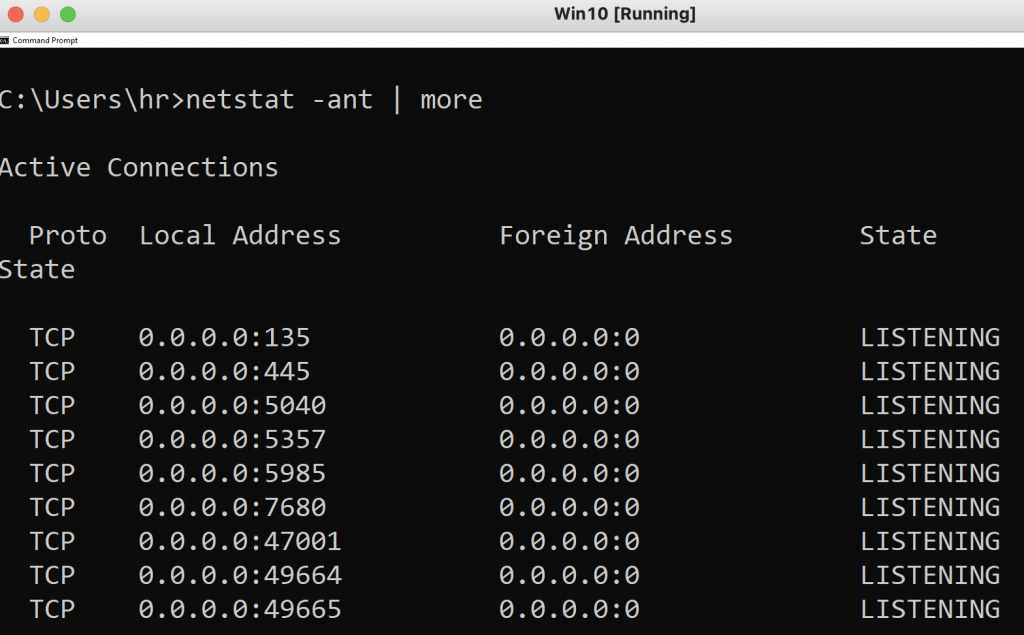
The port 5985 is enabled in Windows 10 machine.
From Windows 2016 server, test the port 5985 is reachable on Windows 10 PC.
Test-NetConnection -ComputerName Win10-PC -Port 5985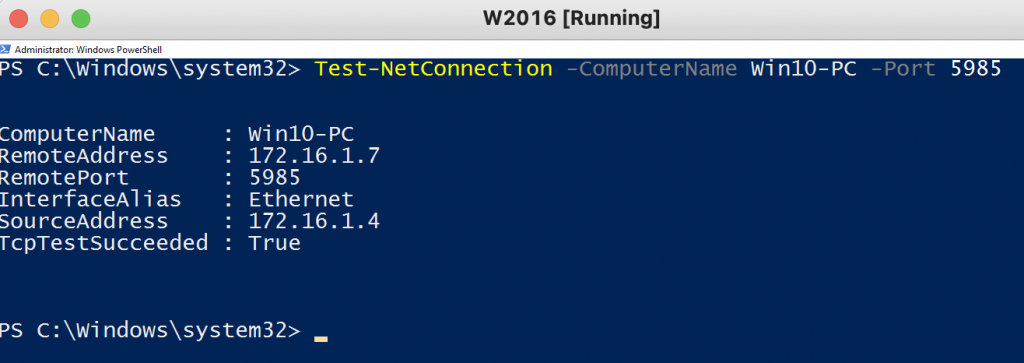
Test PowerShell Remoting is enabled on Windows 10 computer.
Invoke-command -ComputerNme Win10-PC -Scriptblock {hostname}
Enter-PSSession -computerName Win10-PC 
Invoke-command -ComputerName Win10-PC -Scriptblock {Restart-Computer}