This is a diagram to deploy FortiGate HA by using CloudFormation on AWS.
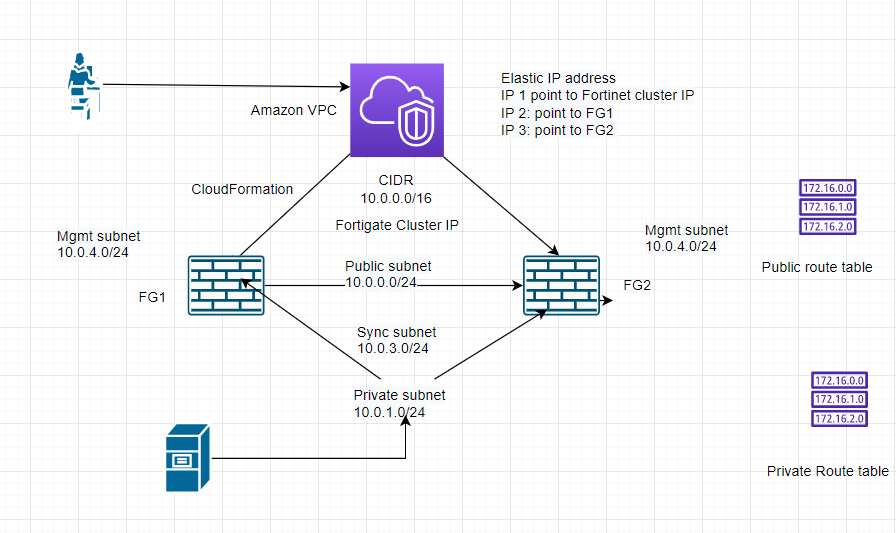
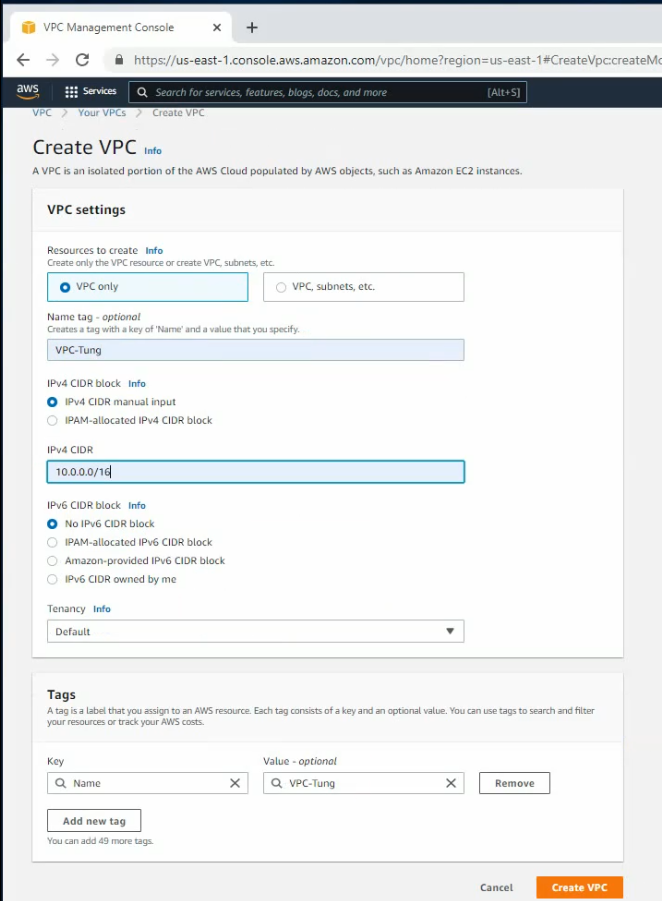
Create a new VPC.
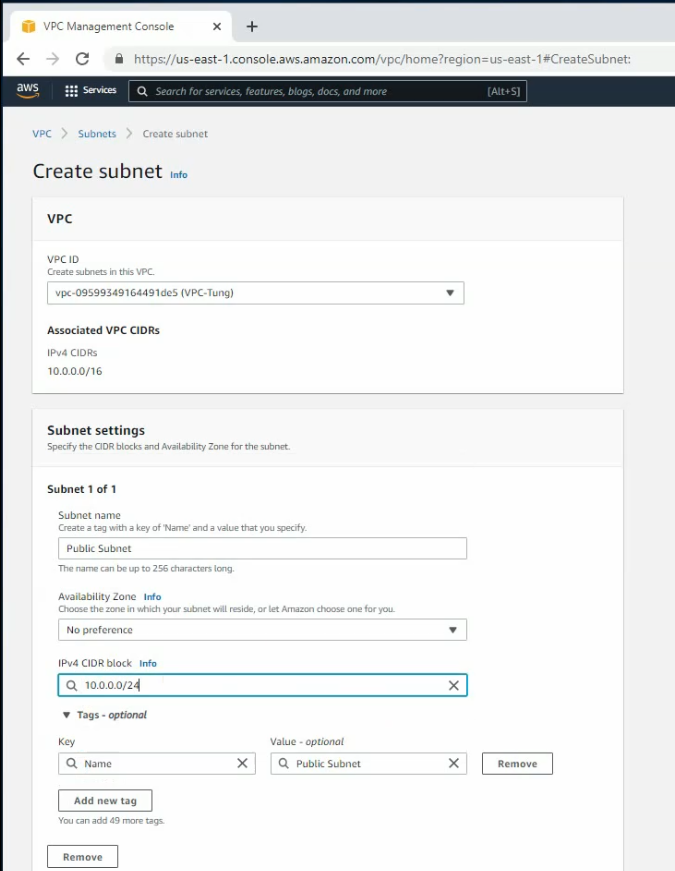
Create a public subnet.
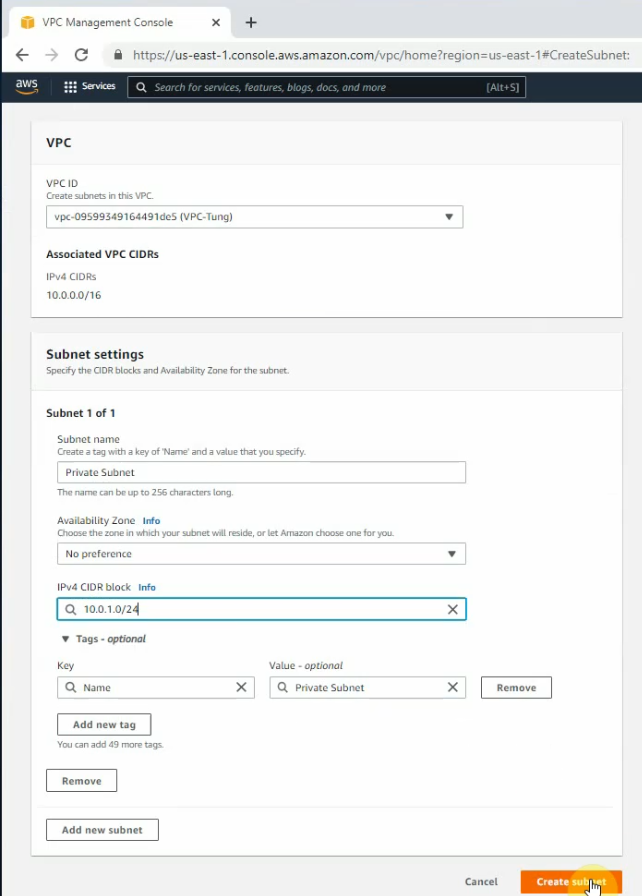
Create a private subnet.
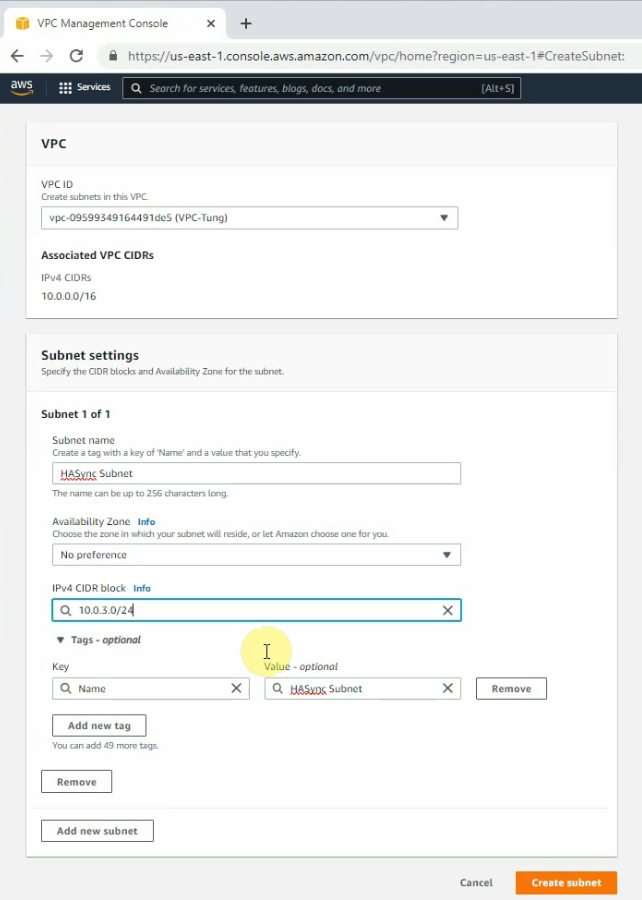
Create a subnet for Synchronization between both FGs.
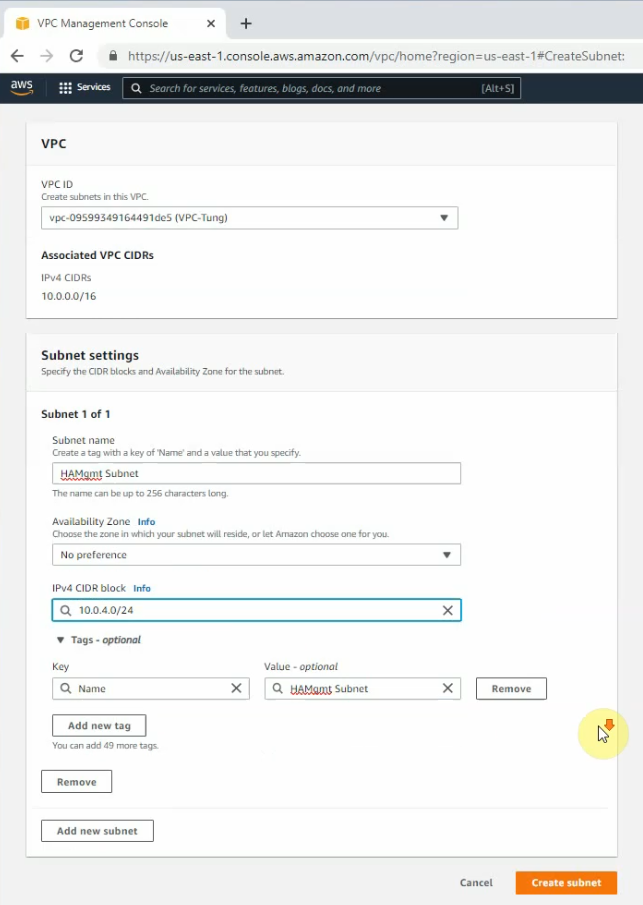
Create a new subnet for FortiGate management.
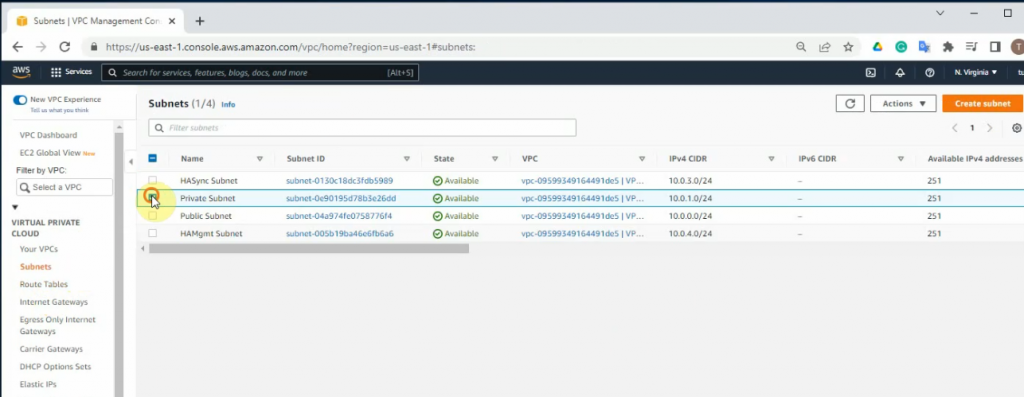
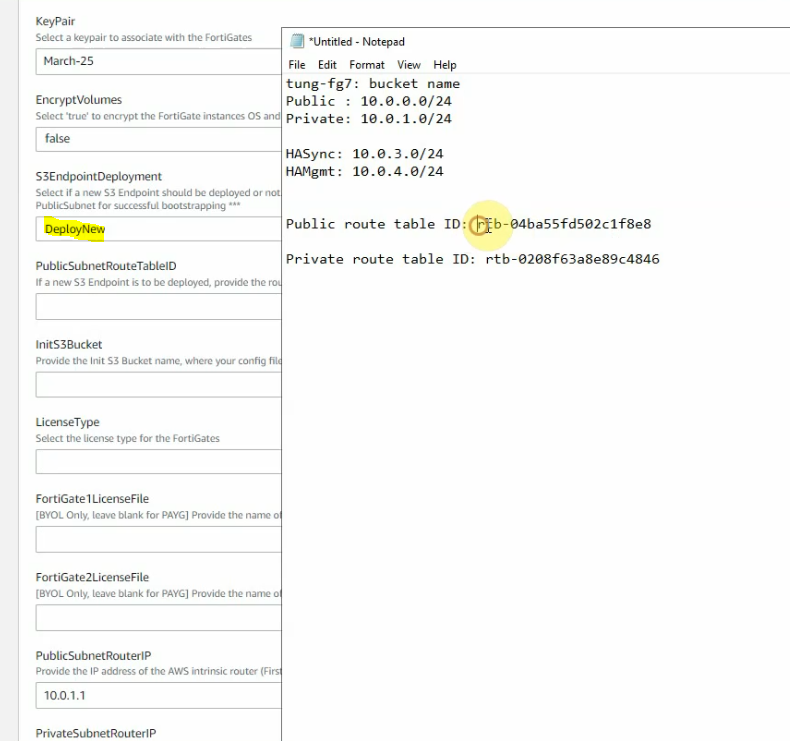
Public subnet: 10.0.0.0/24
Private subnet: 10.0.1.0/24
FGSync subnet: 10.0.3.0/24
FGHA mgmt subnet: 10.0.4.0/24
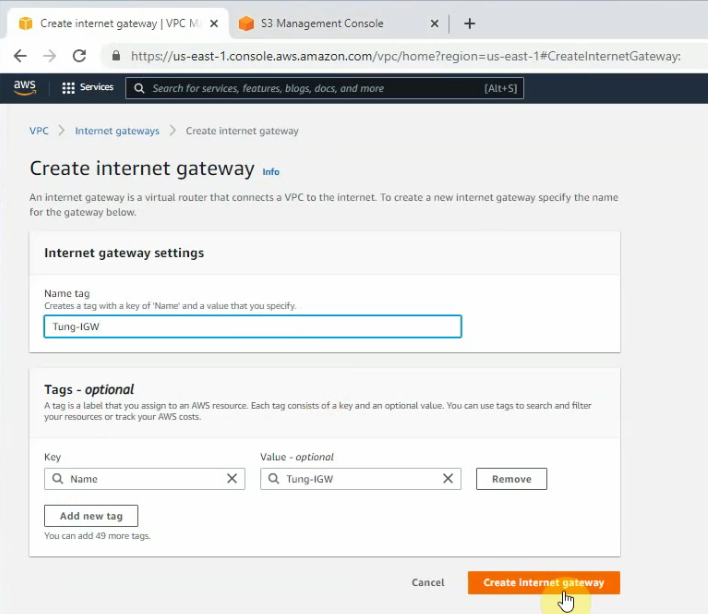
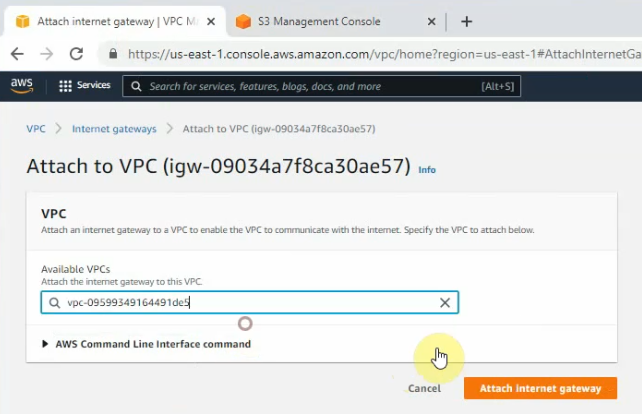
Create a new Internet gateway, and attach it to your VPC.
Create a new public route.
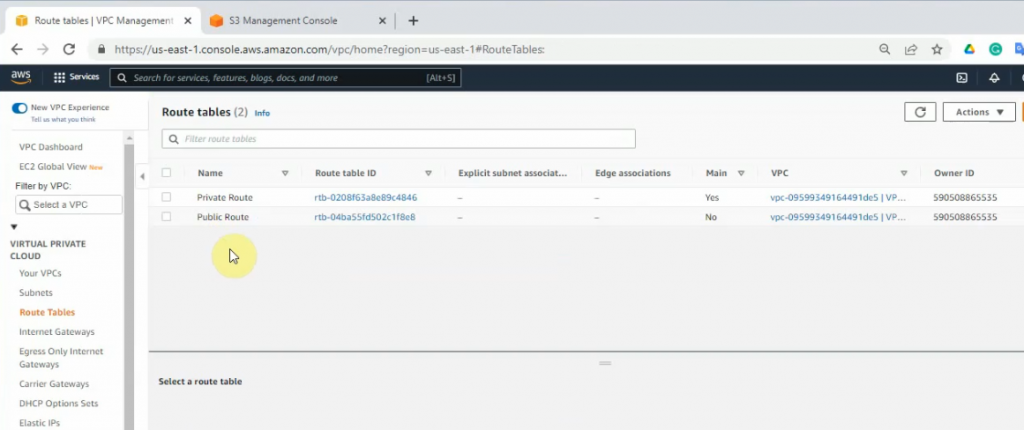
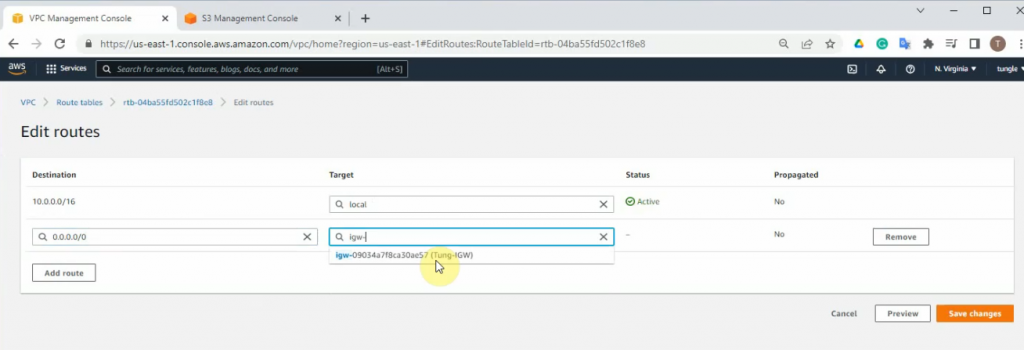
Edit the public route, and add a new default route to your internet gateway.
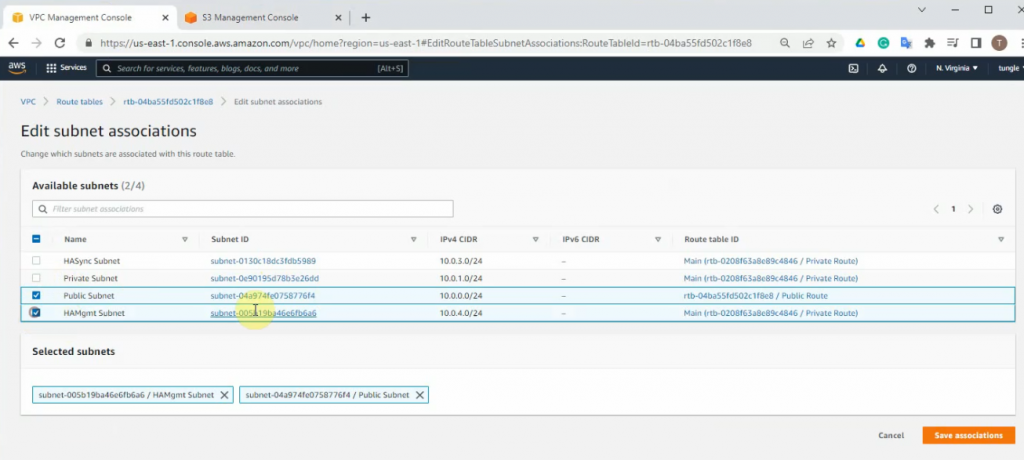
Associate both public and HAmgmt subnet into the public route.
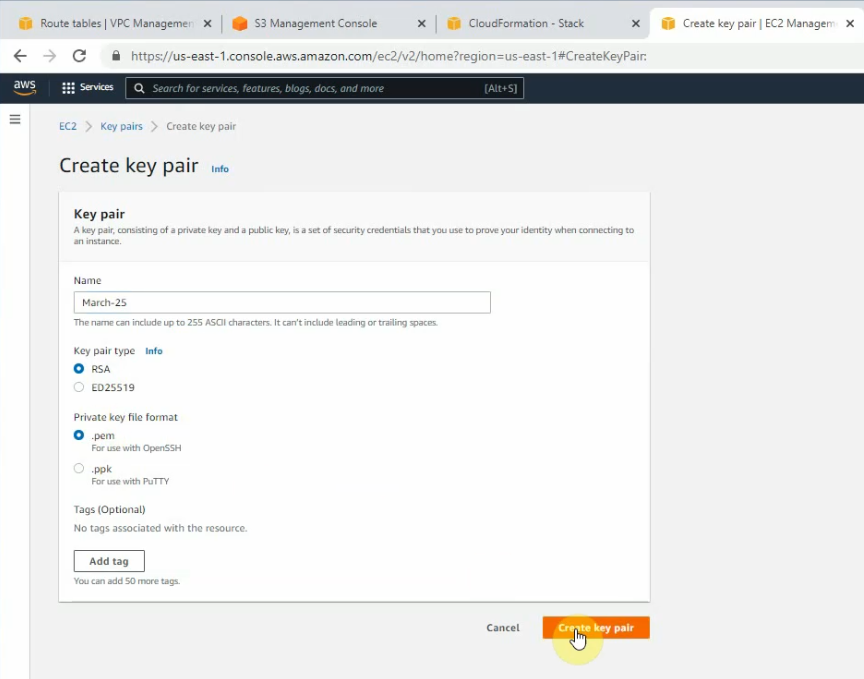
Create a new key pair.
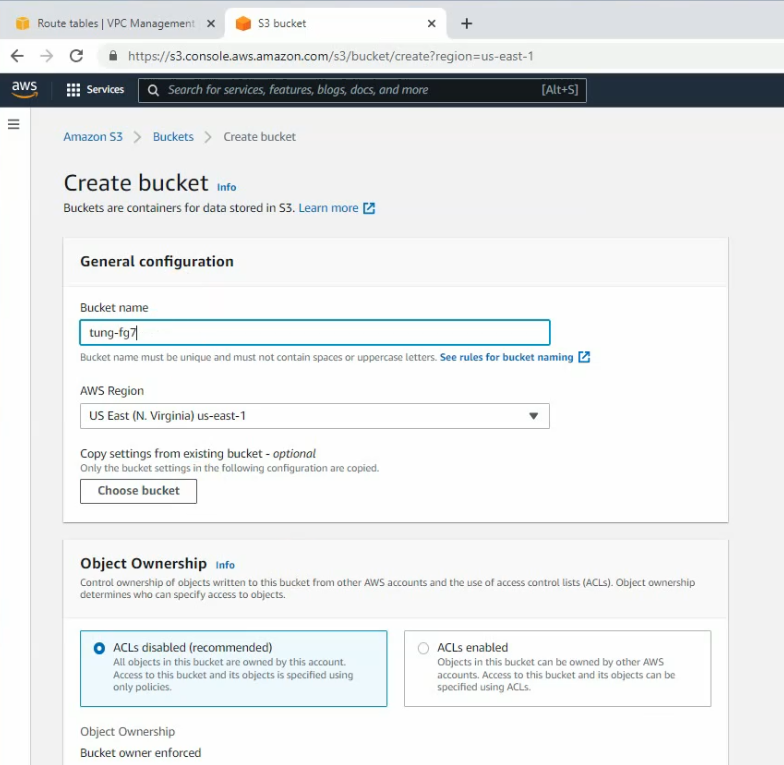
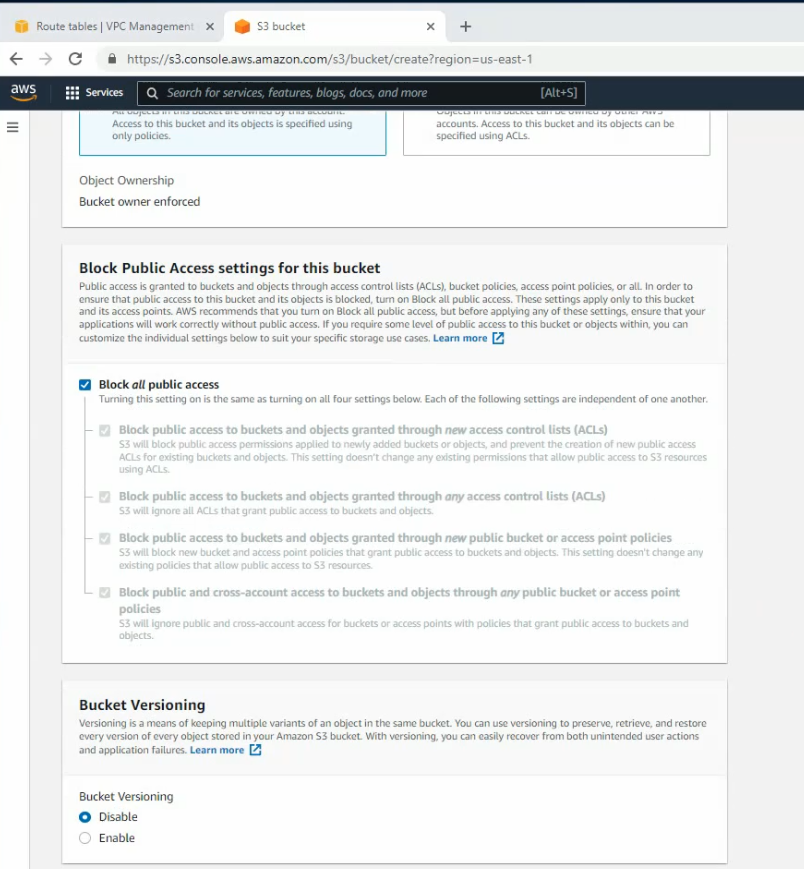
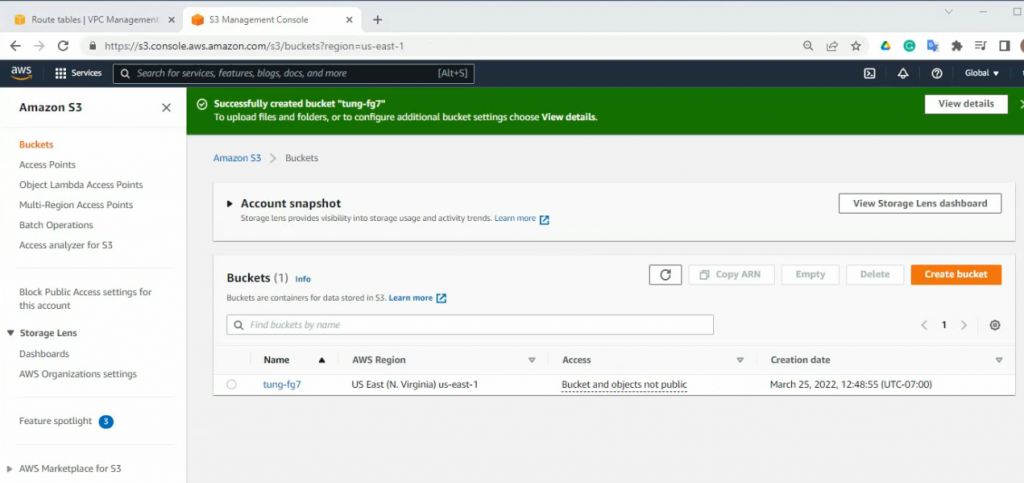
Create a new bucket, and leave the settings by default.
Go to the GitHub of Fortinet, and download a json file for the existing VPC as a screenshot below.
https://github.com/fortinet/aws-cloudformation-templates/tree/main/FGCP/7.0/SingleAZ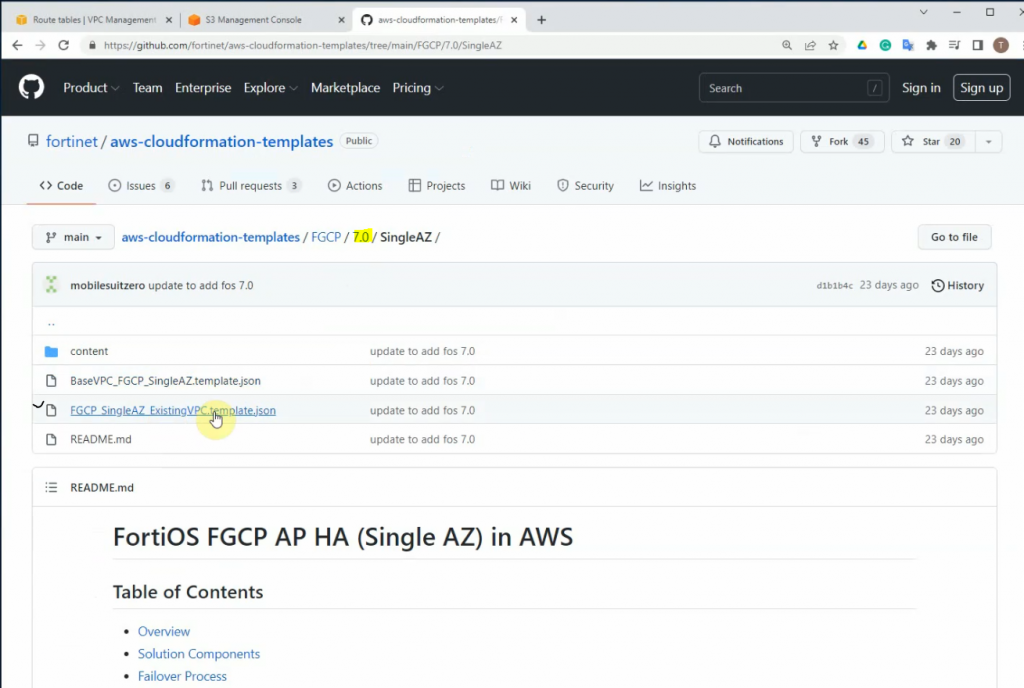
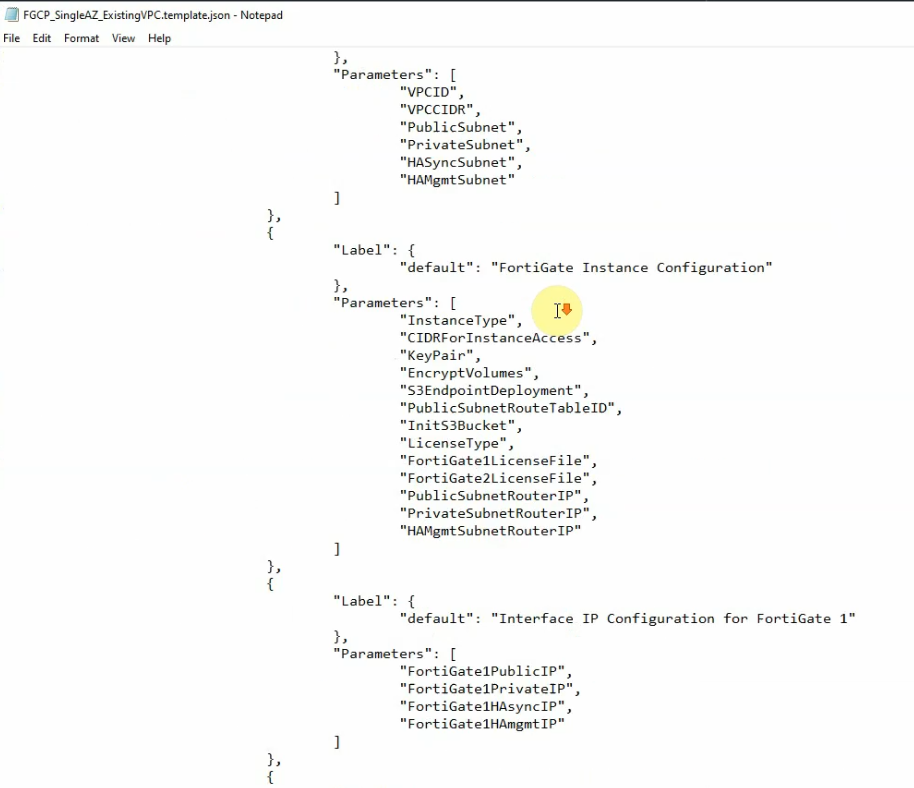
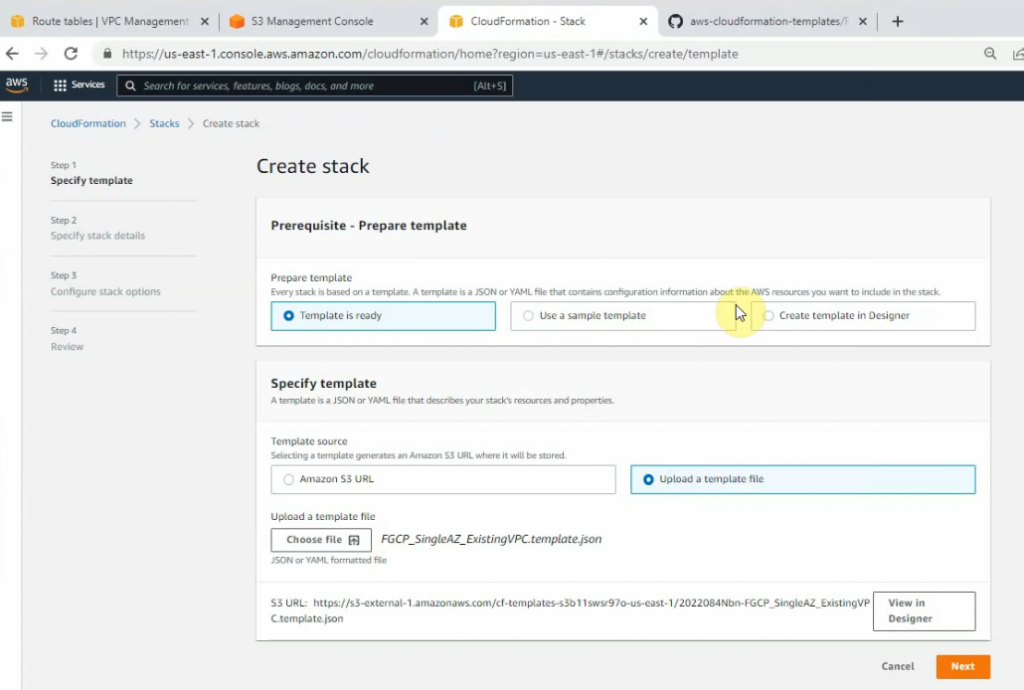
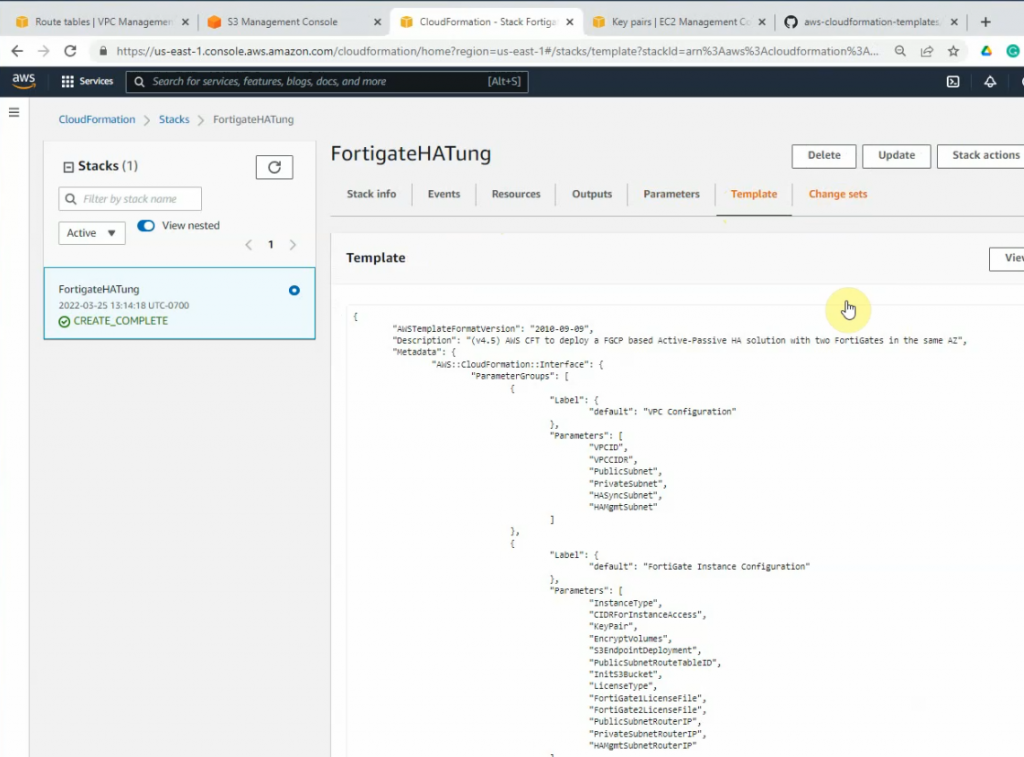
Upload the template into this stack.
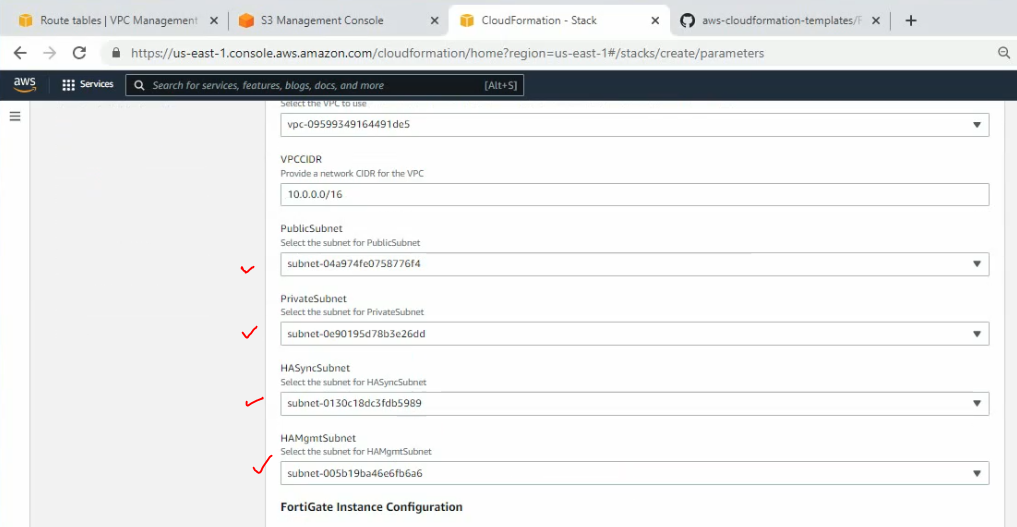
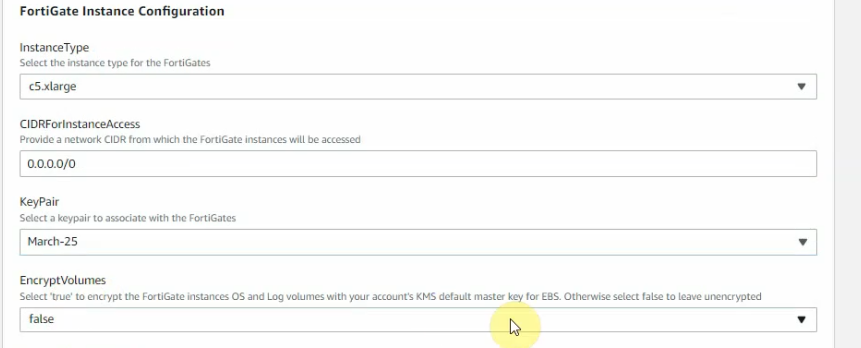
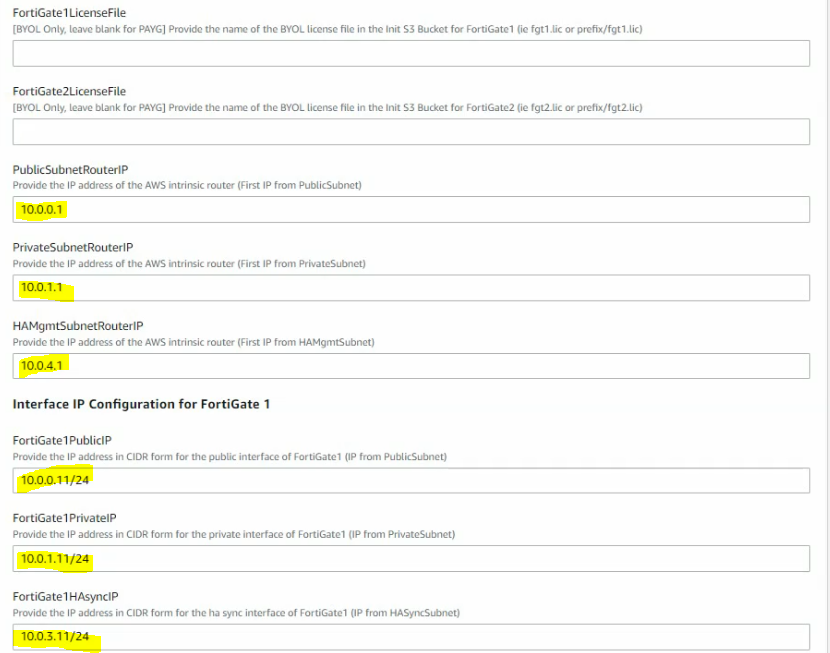
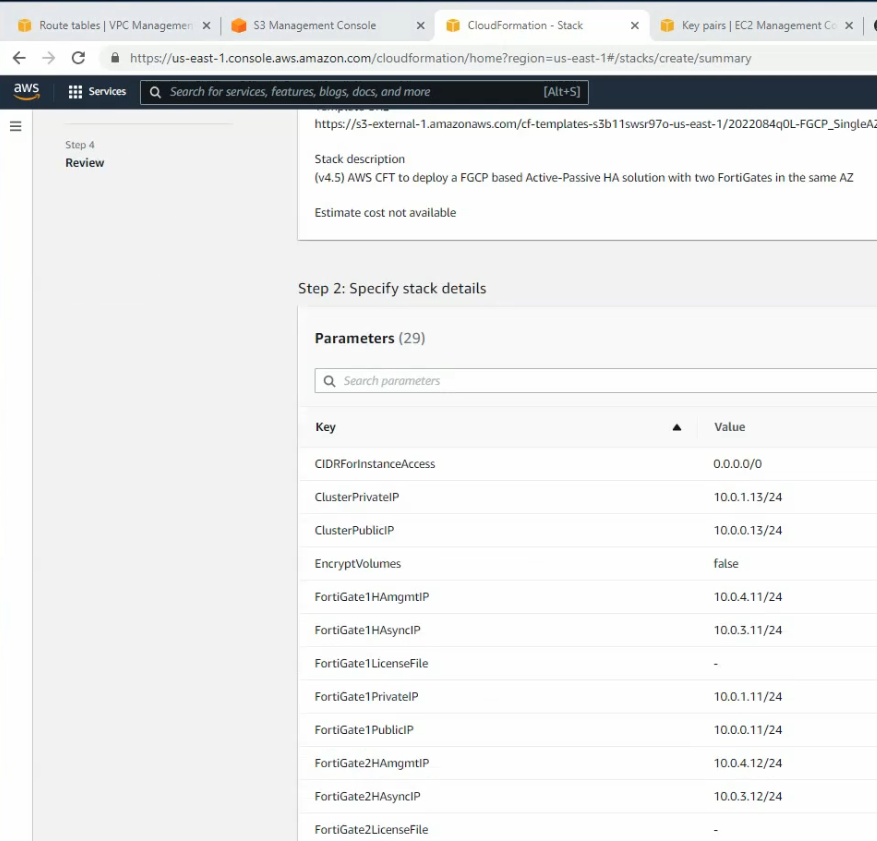
Enter your stack name, VPCID, VPCCIDR, and link public, private, sync, HAmgmt to corresponding subnets.

Will choose the minimize instance type for the lab is c5.xlarge.
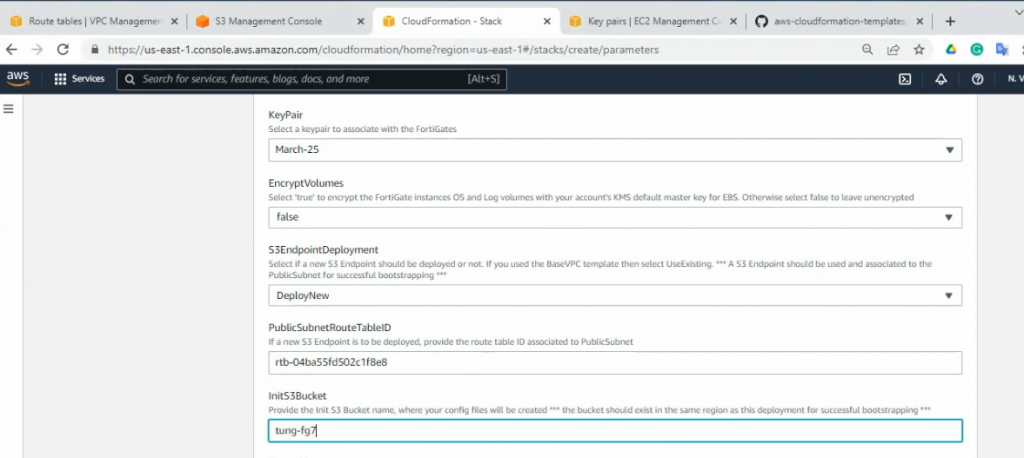
Copy Public route table ID into the publicsubnetroutetableID.
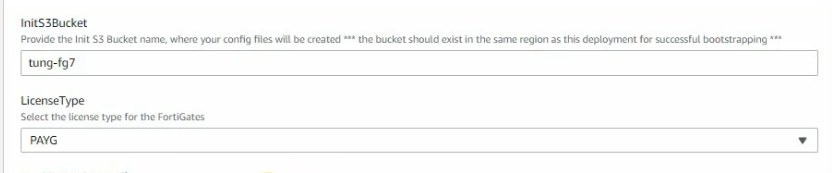
The license is PAYG.

Click Next and accept the settings by default.
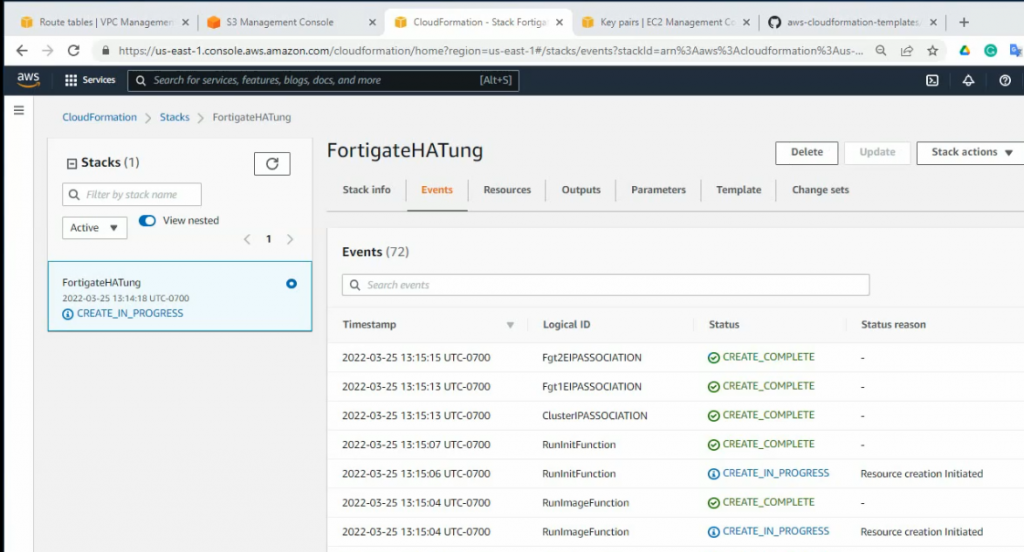
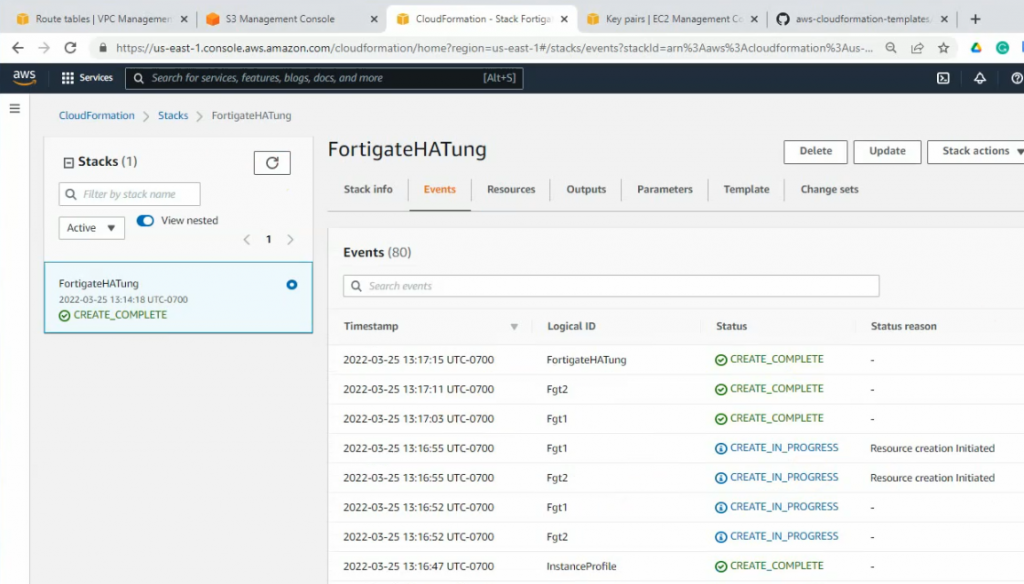
Click create stack. It will take a couple of minutes to complete.


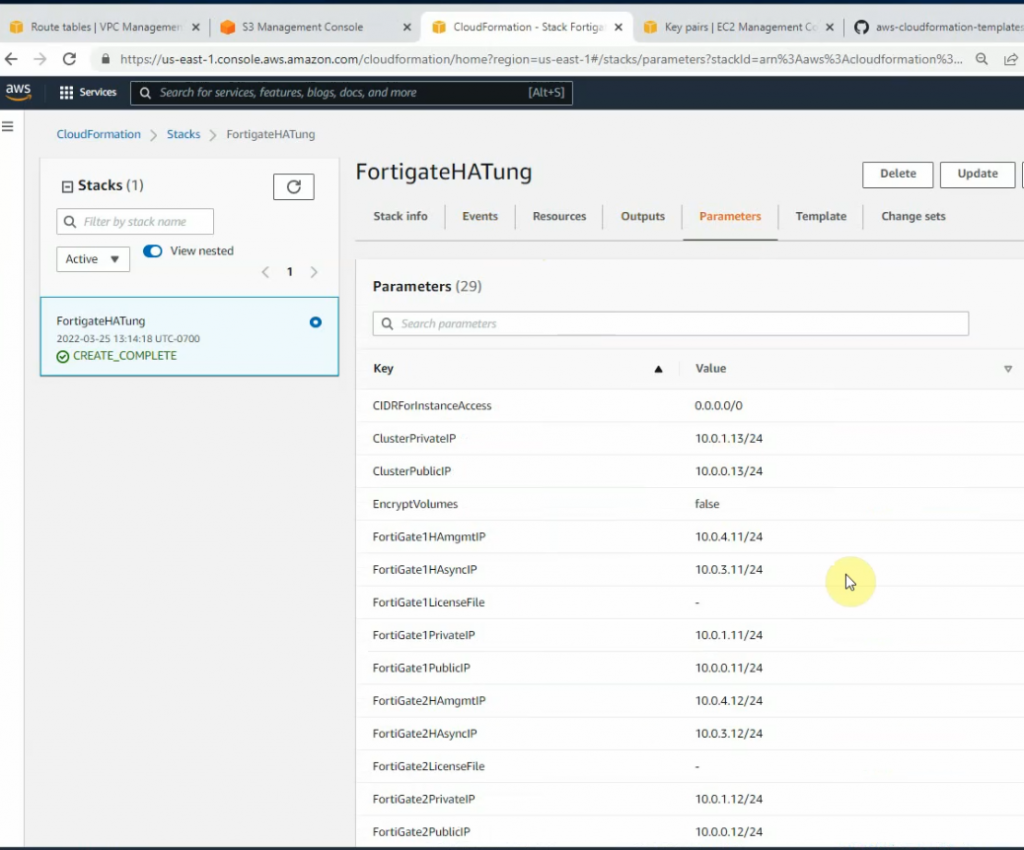
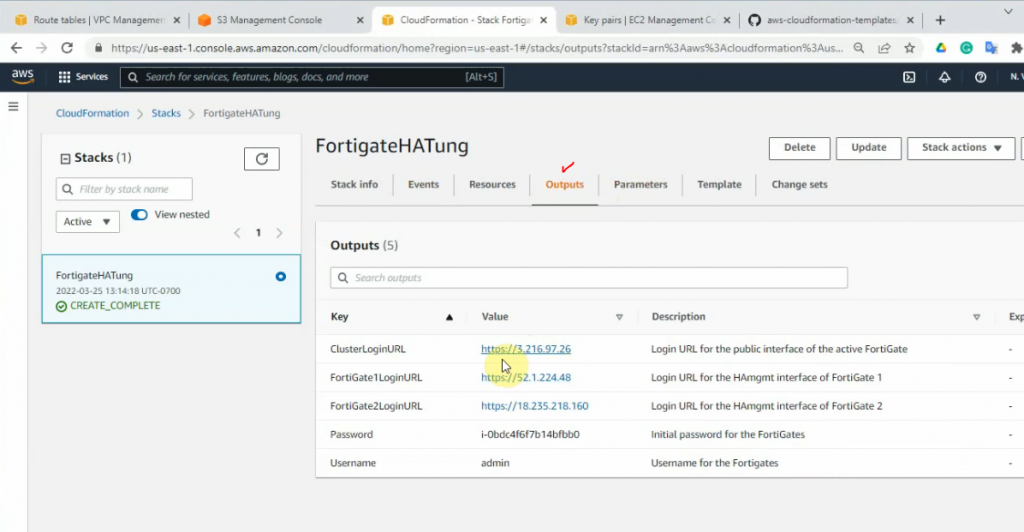
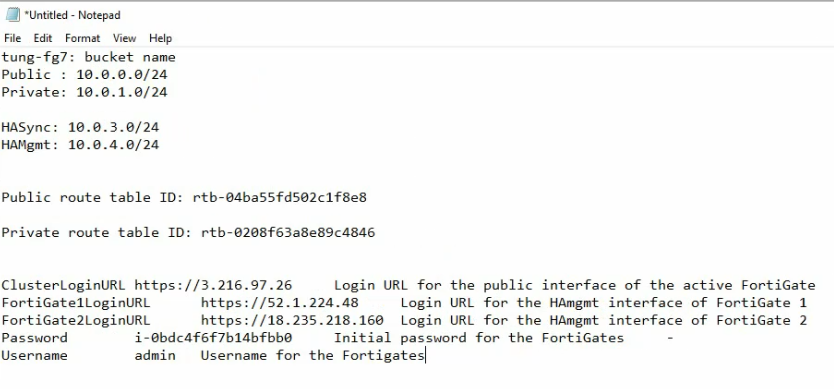
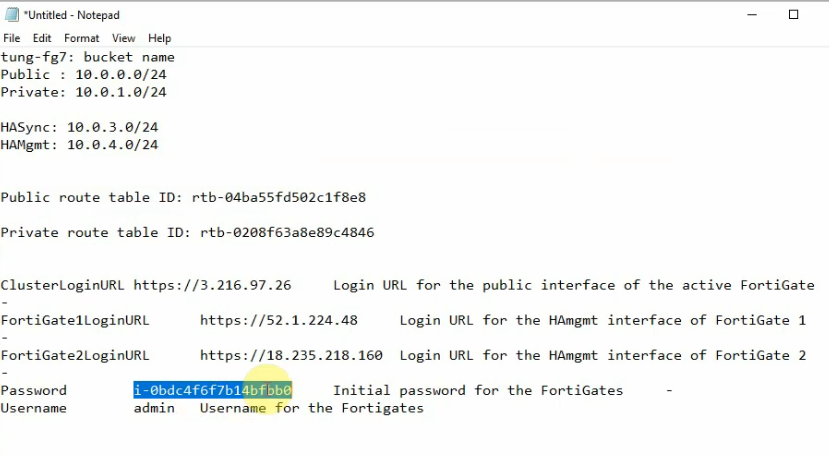
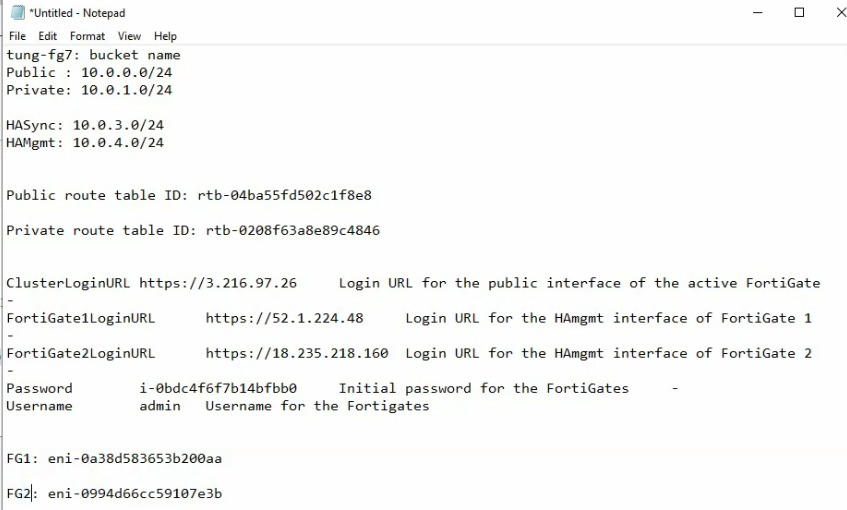
On Output, copy all information to notepad to keep track.
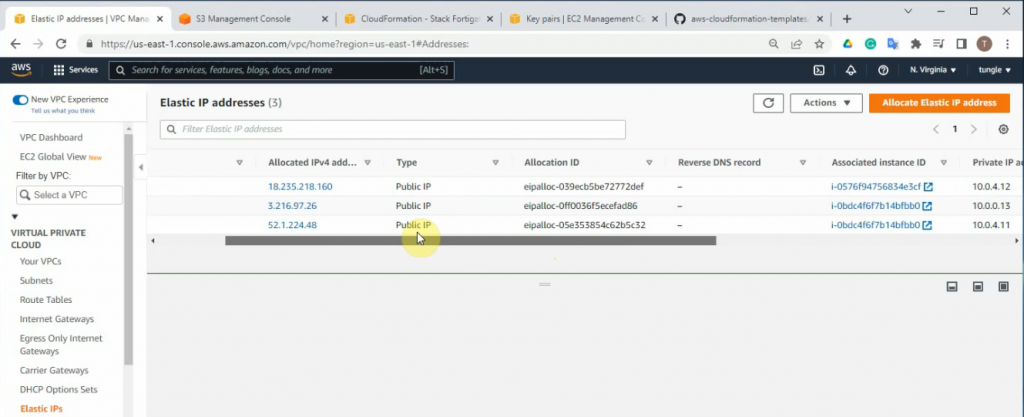
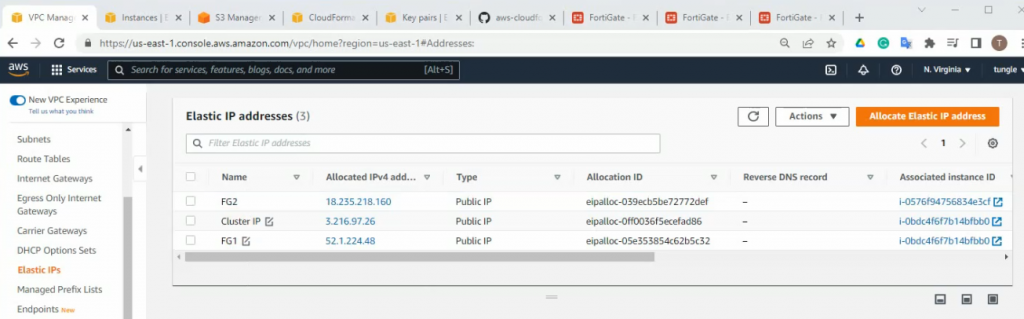
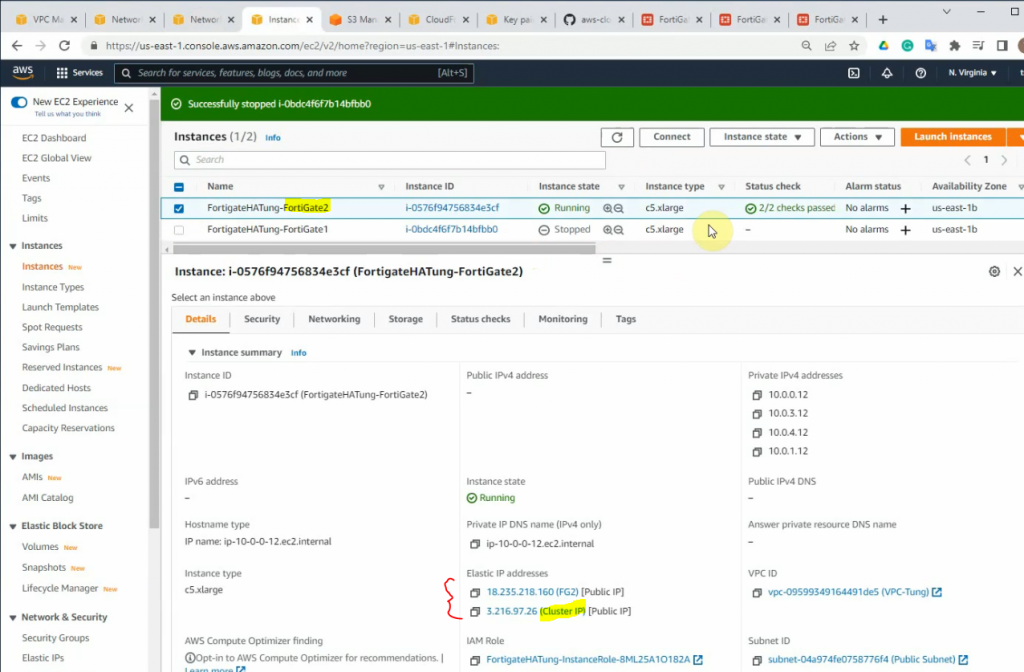
There are three Elastic IP addresses that have been created on your VPC.
This is a master FG.
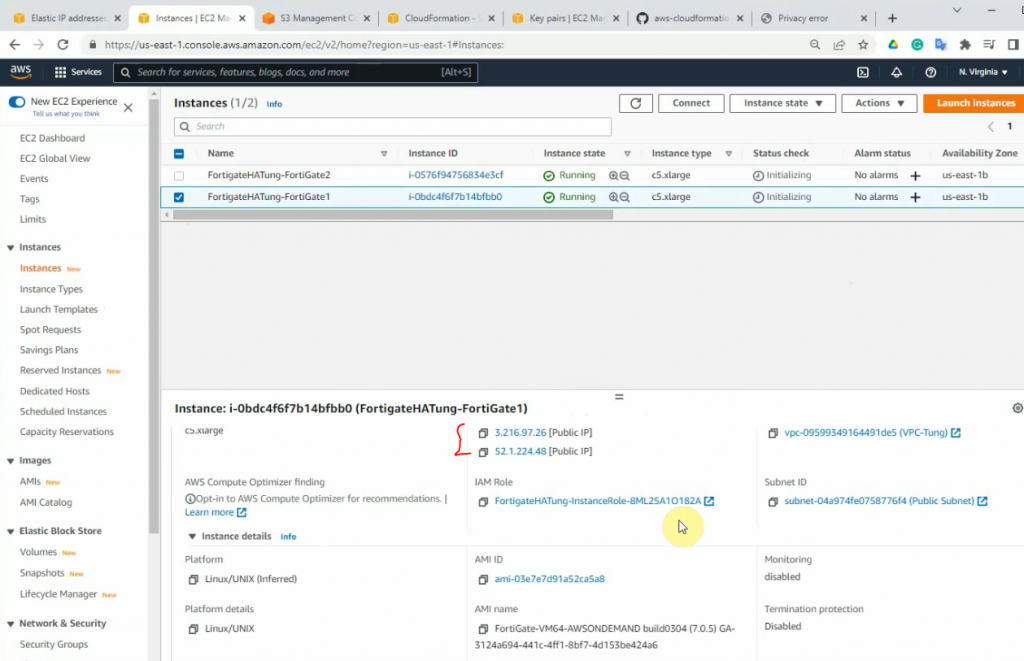
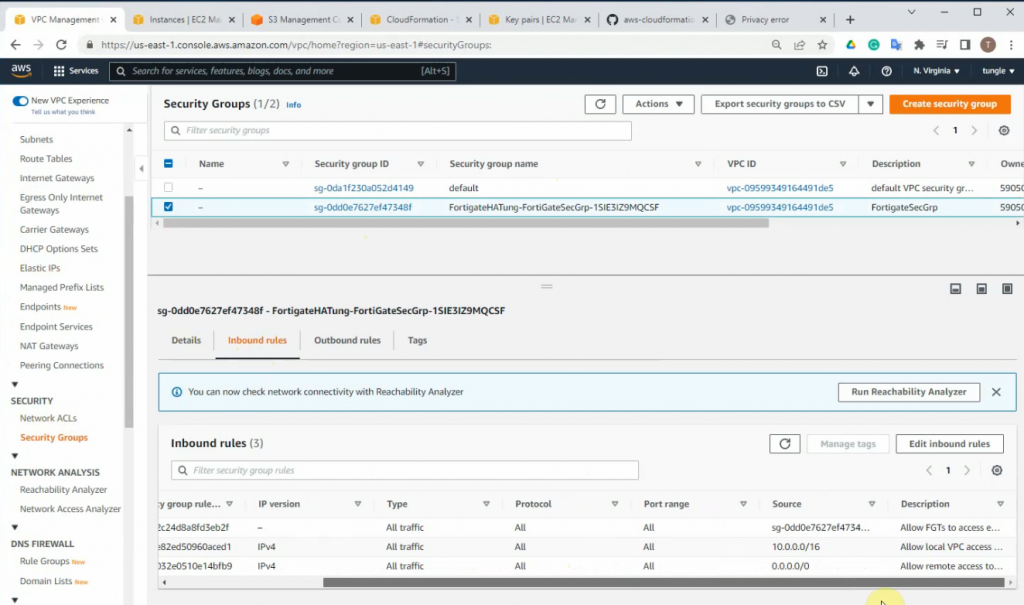
It will link to a default Security Group that has been created when creating a stack.
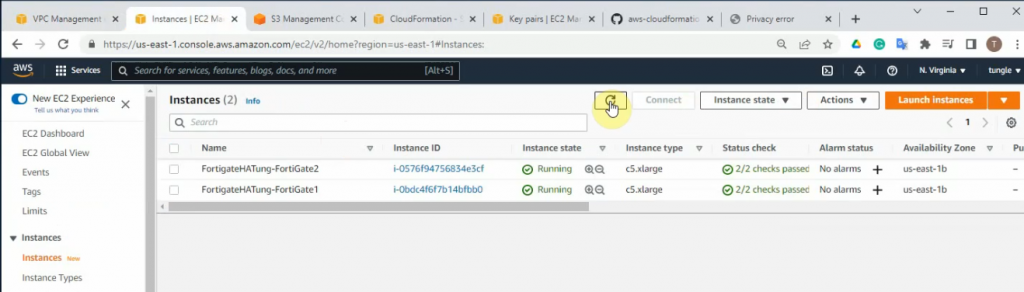
Wait until both FGs are checked passed.
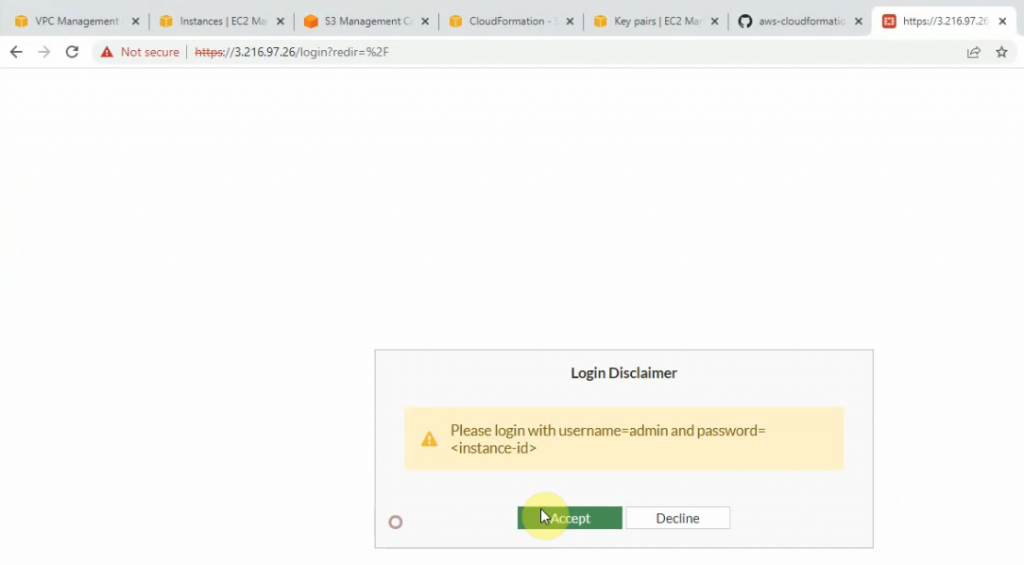
Access the Primary HA FG via cluster IP address.
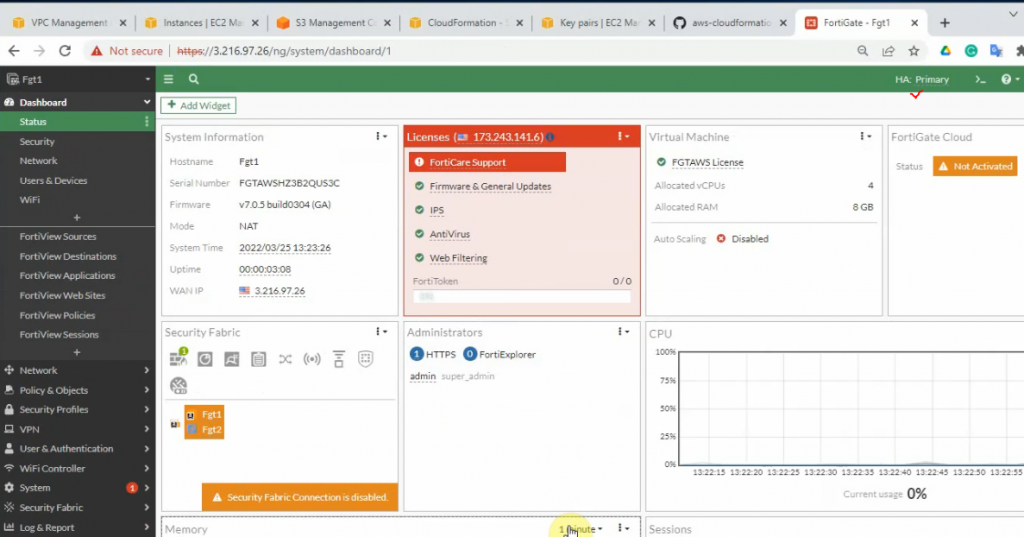
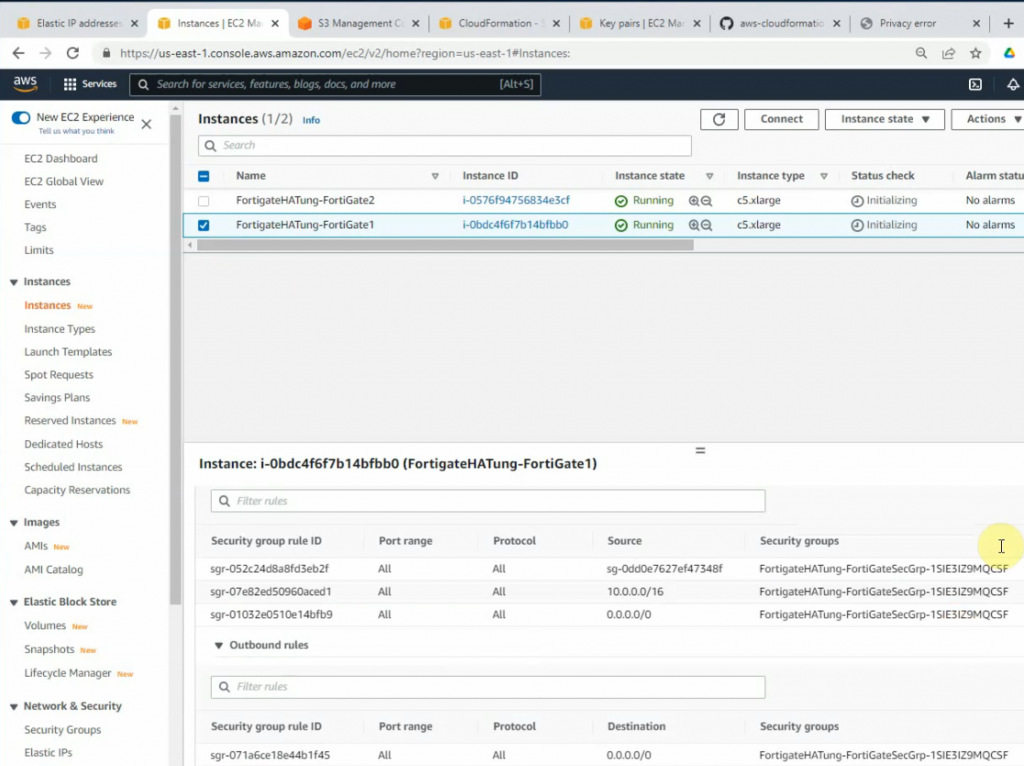
Both access rules have been automatically created when creating a stack.
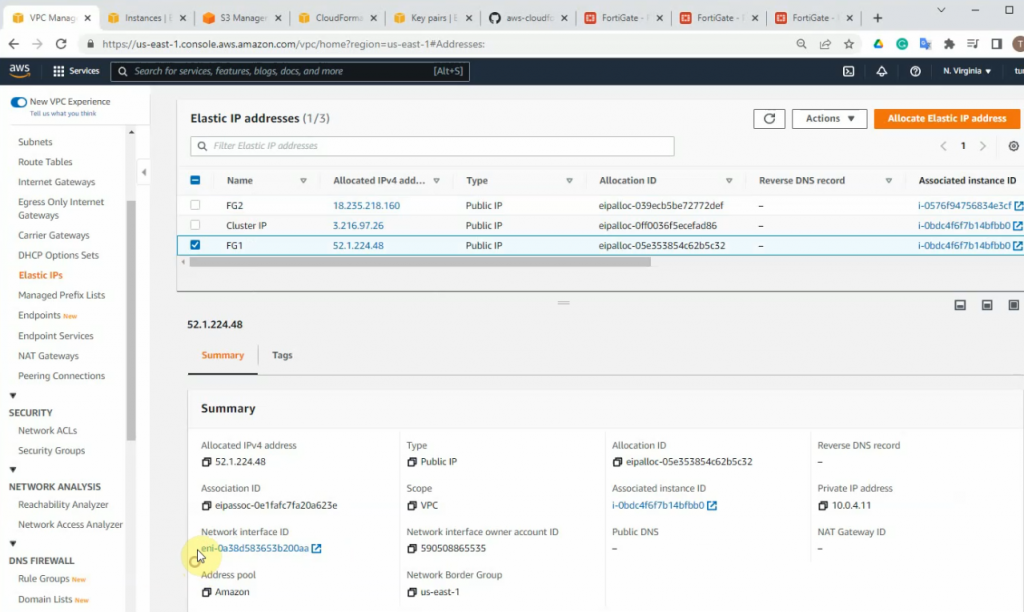
Access the FG1, FG2 via mgmt IP address.
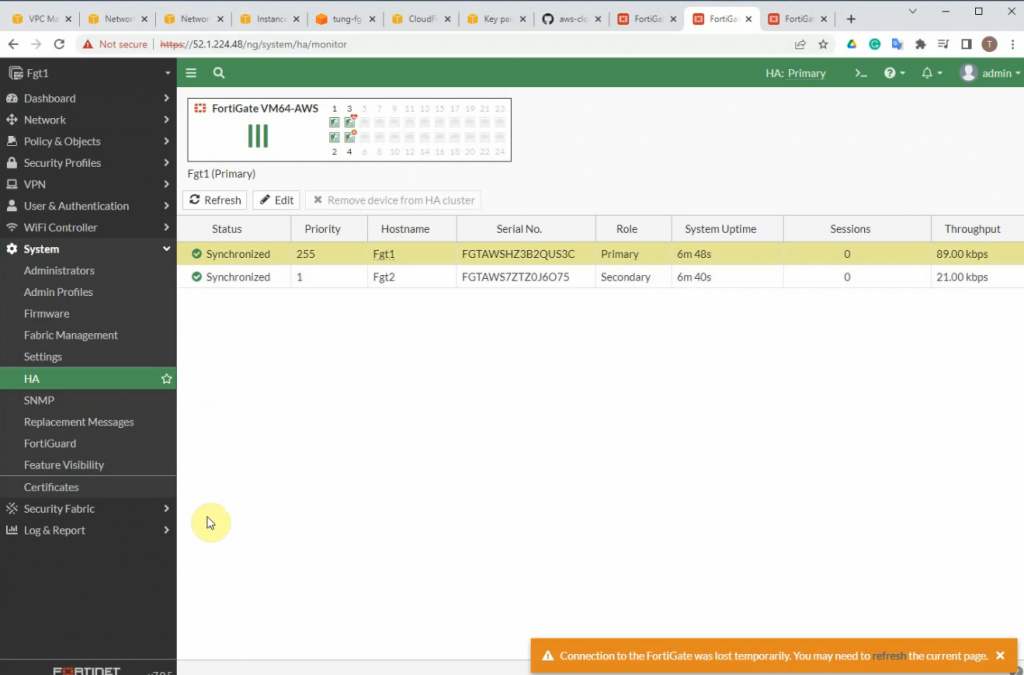
Check HA status.
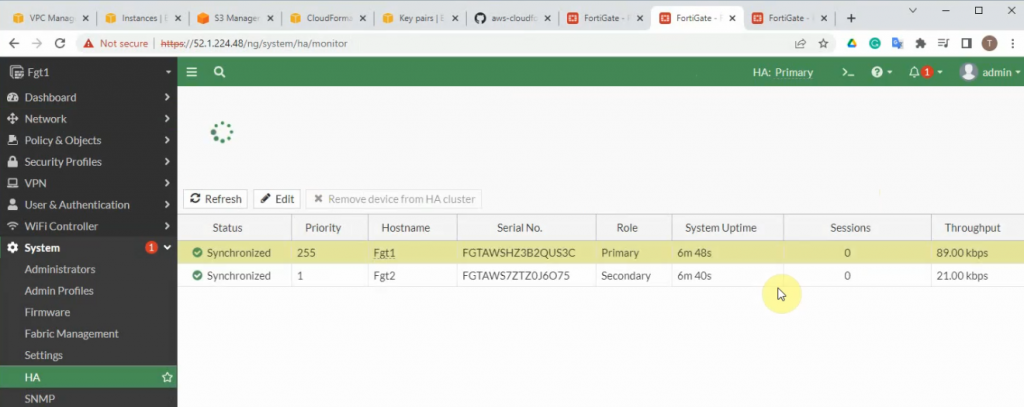
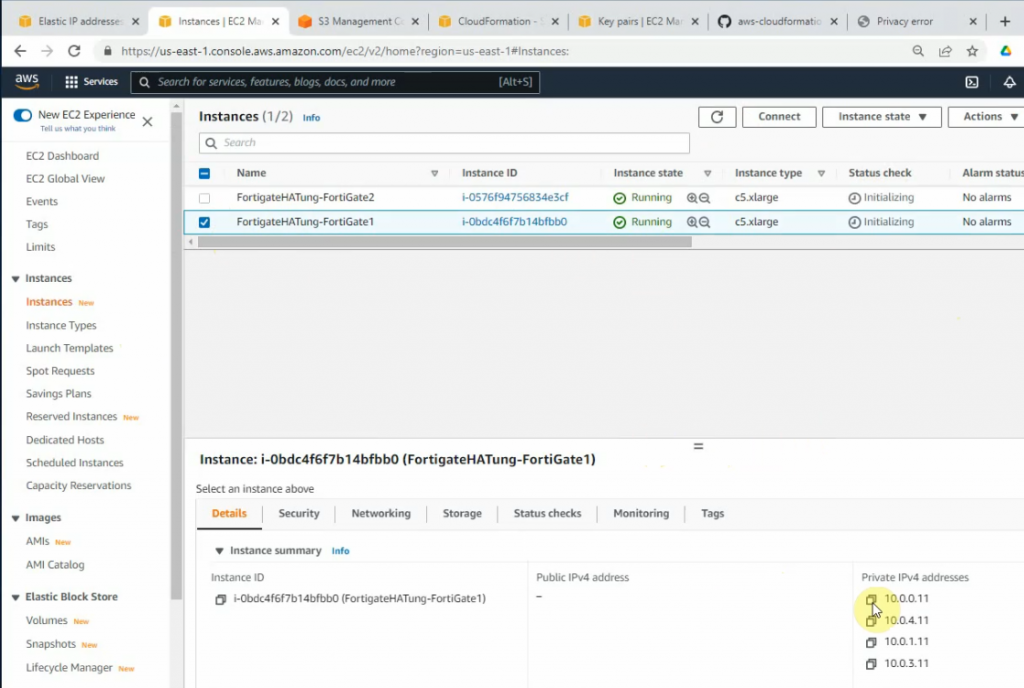
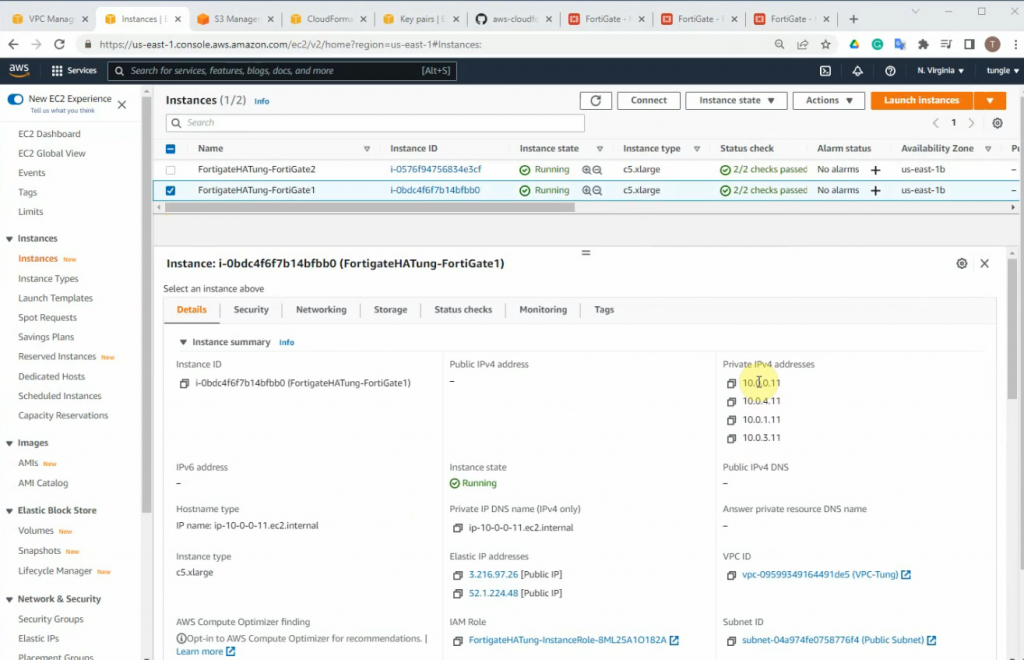
FG1.
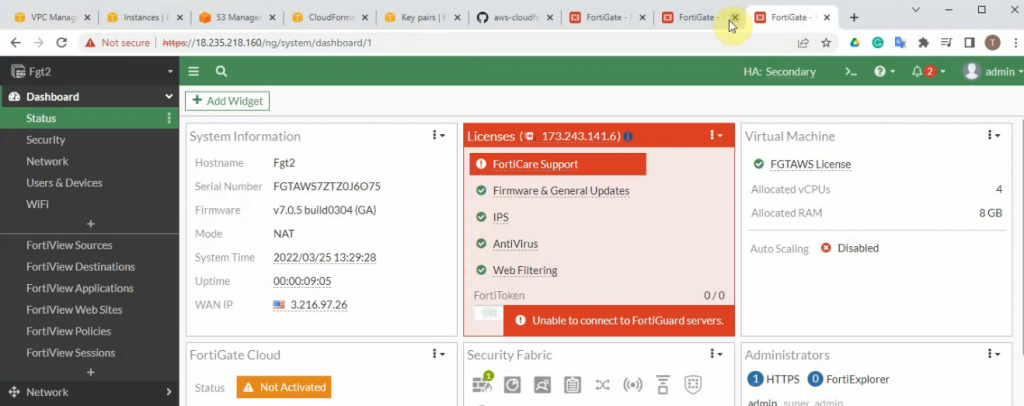
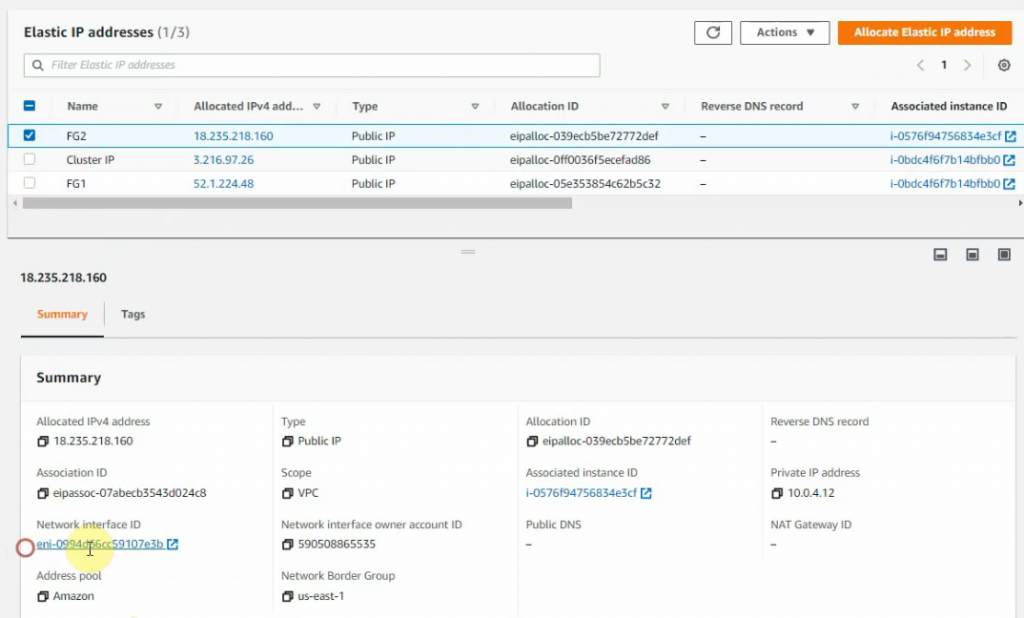
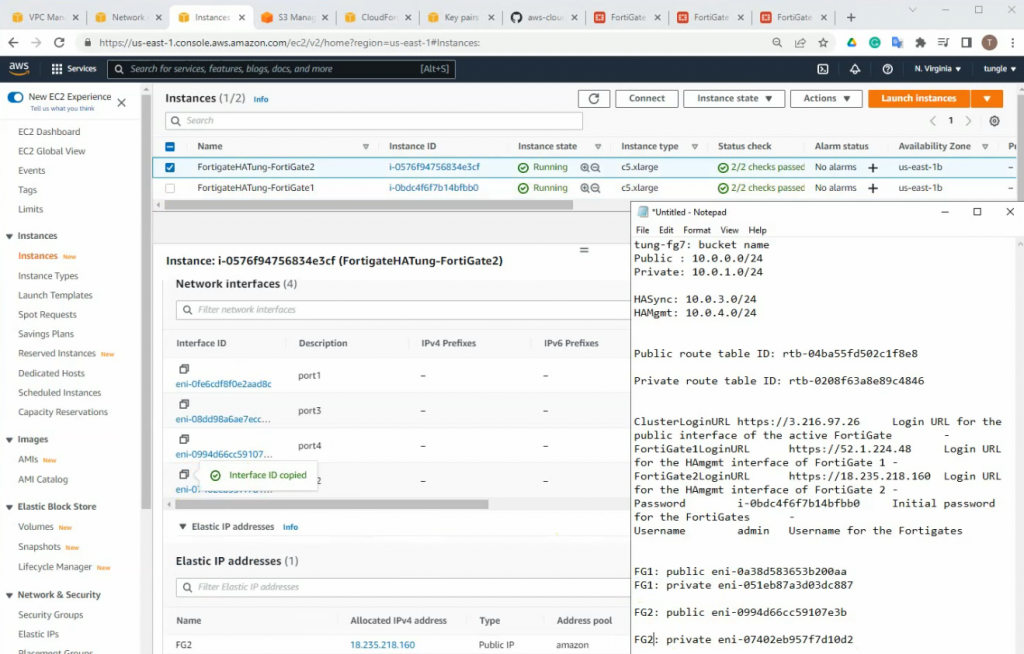
On FG2, there is only an elastic IP address.
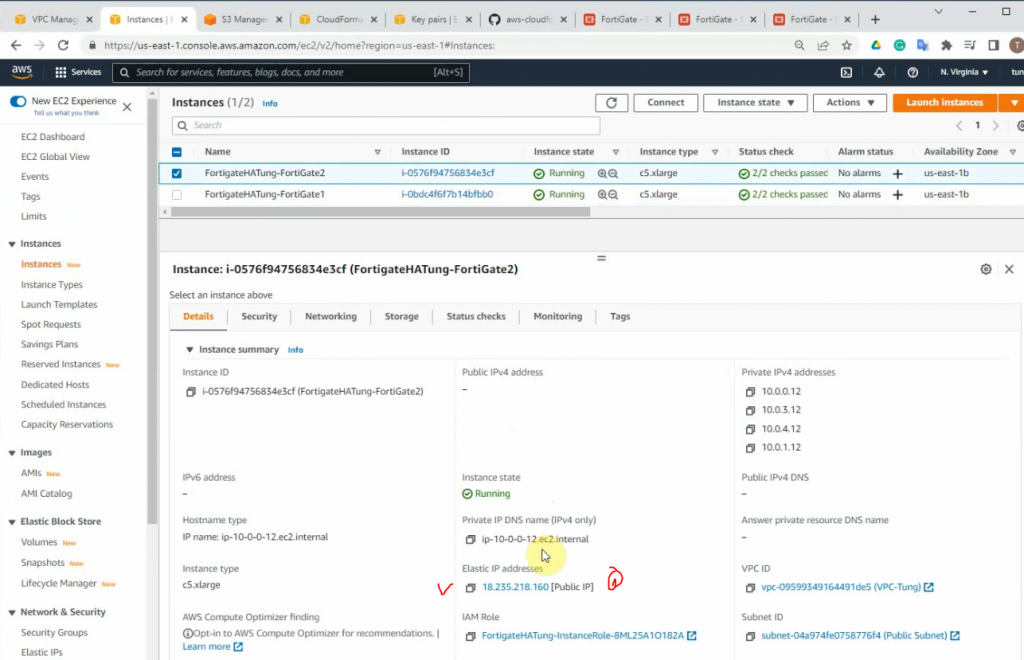
Update the Elastic IP address.
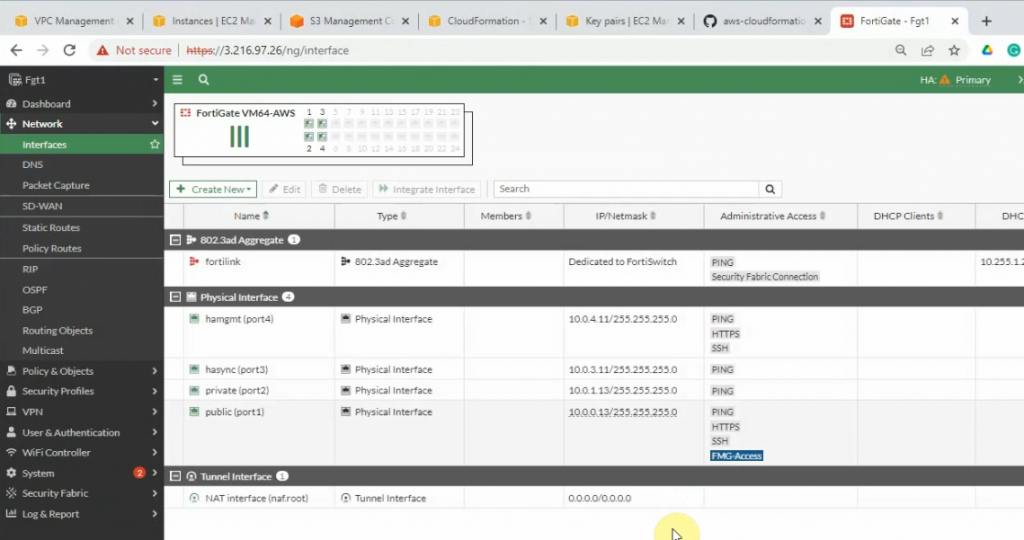
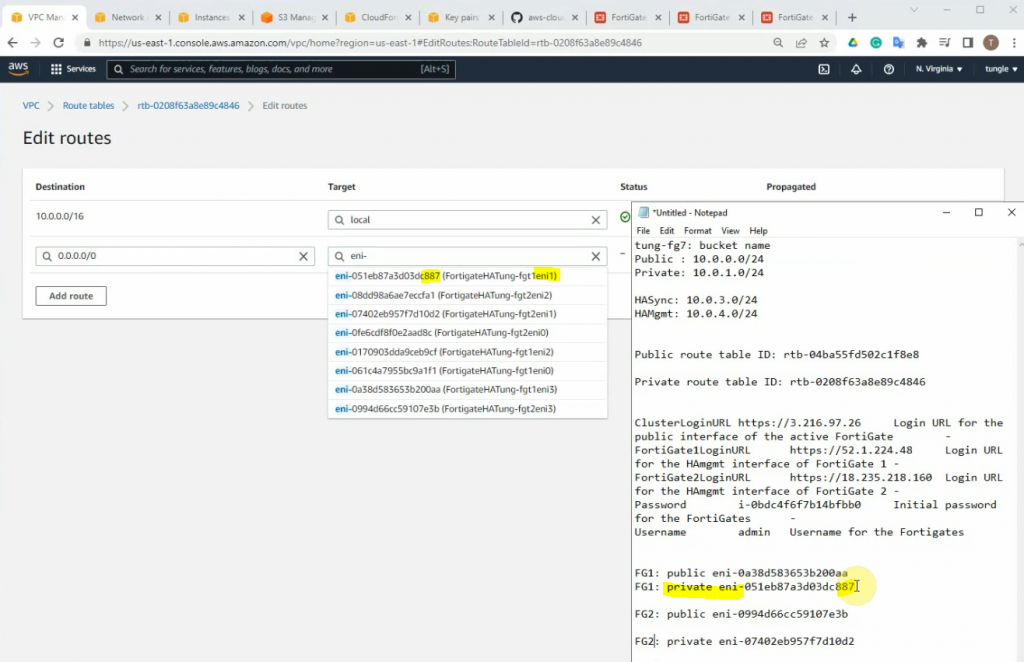
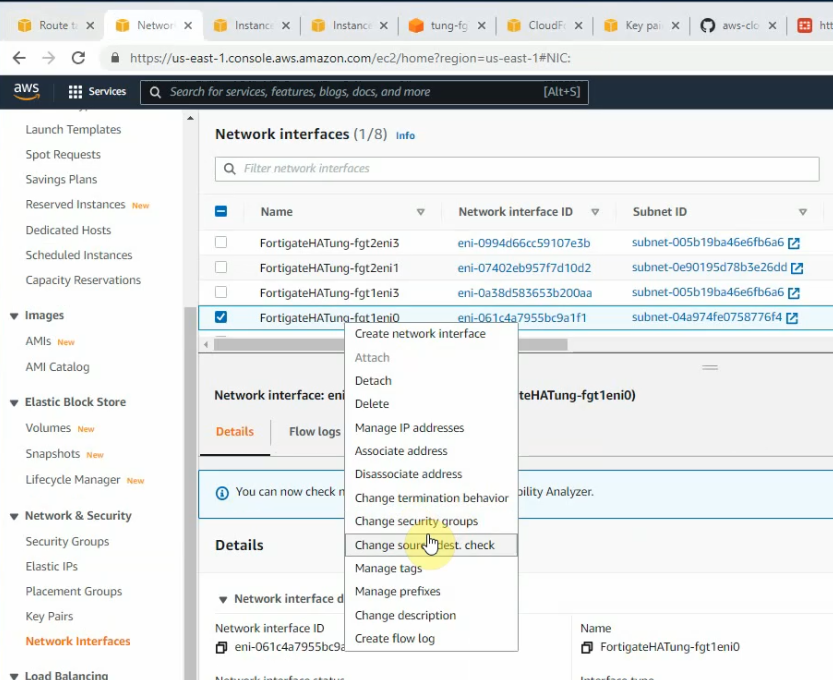
Notes Network interface ID of FortiGate.

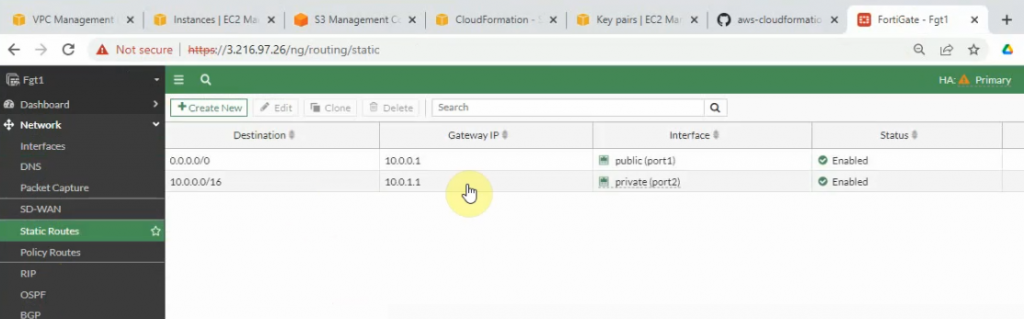
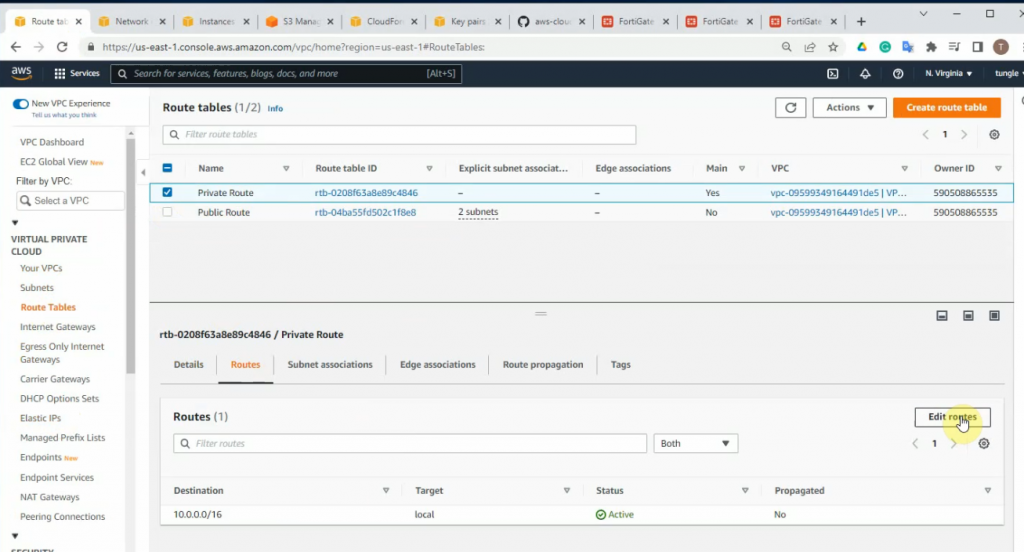
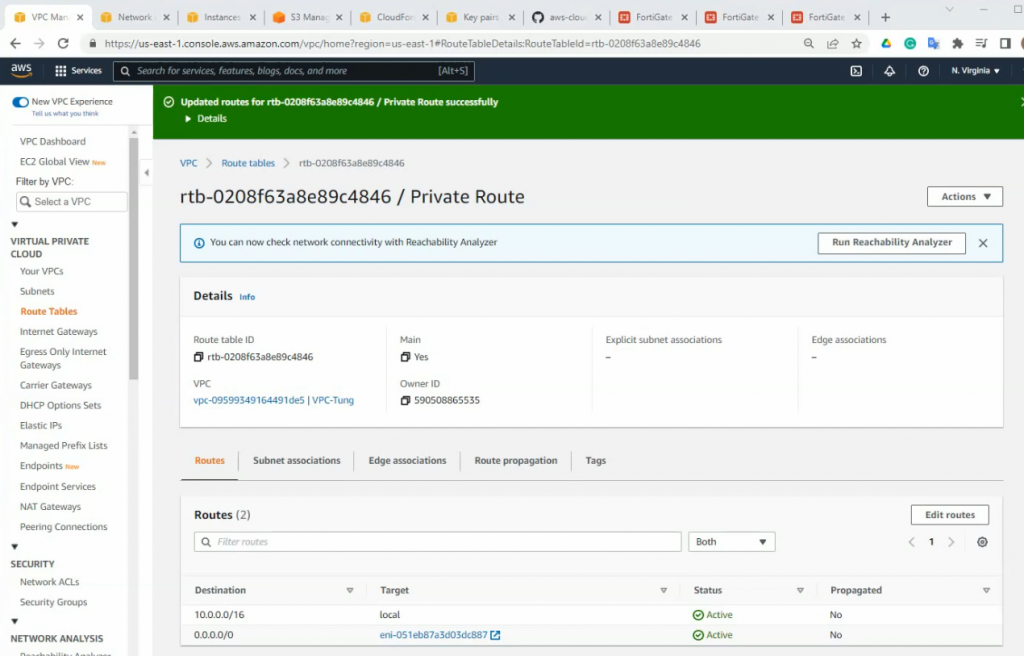
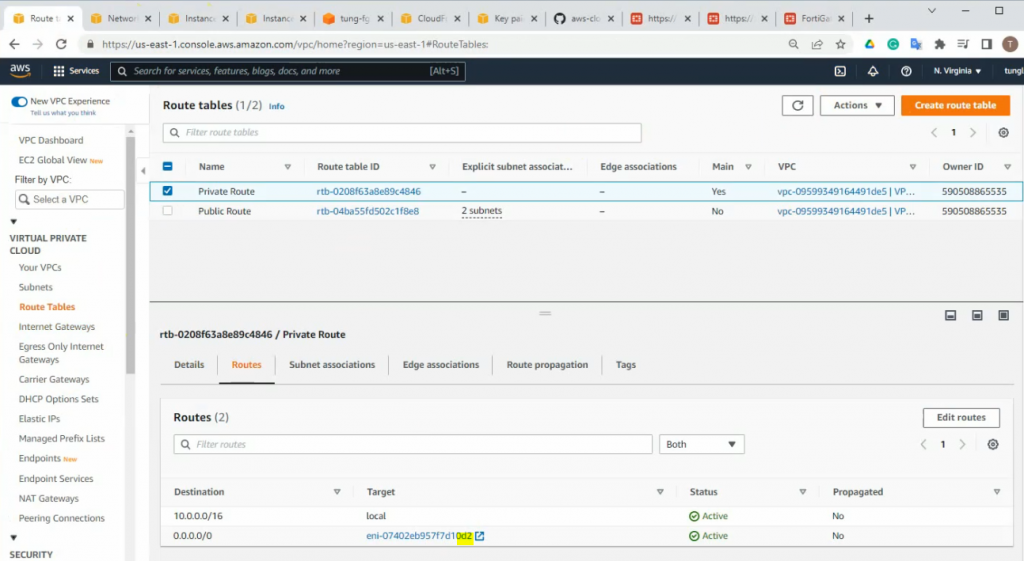
Edit and add a new route on the private subnet route to route all traffic on the subnet to network interface of the master FG

On FG2, open the console and type the command below.
diagnose debug application awsd -1
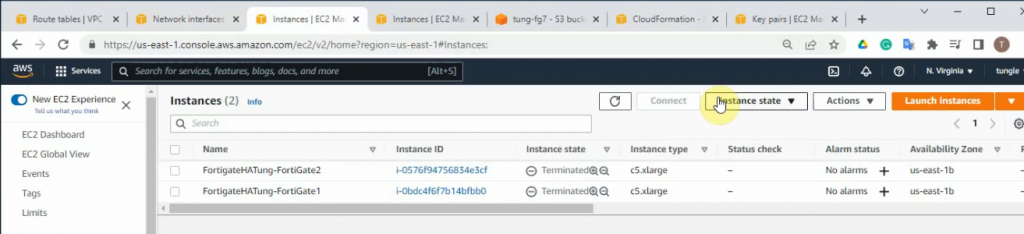
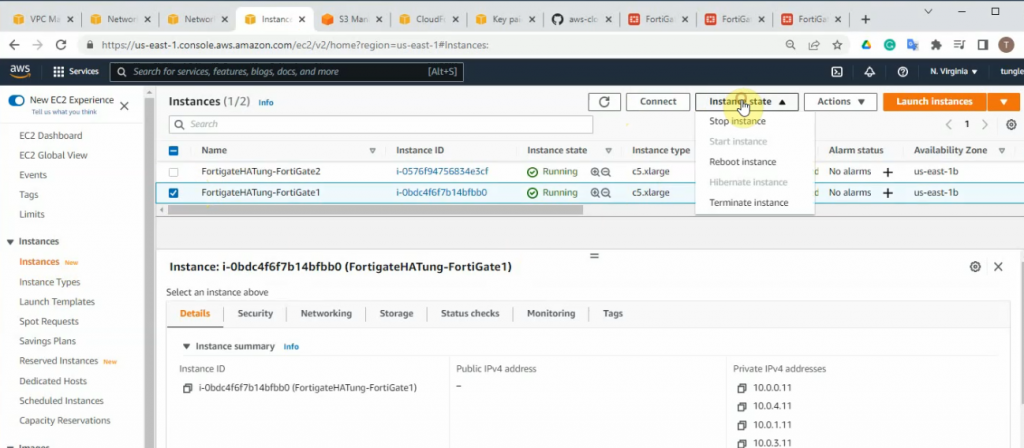
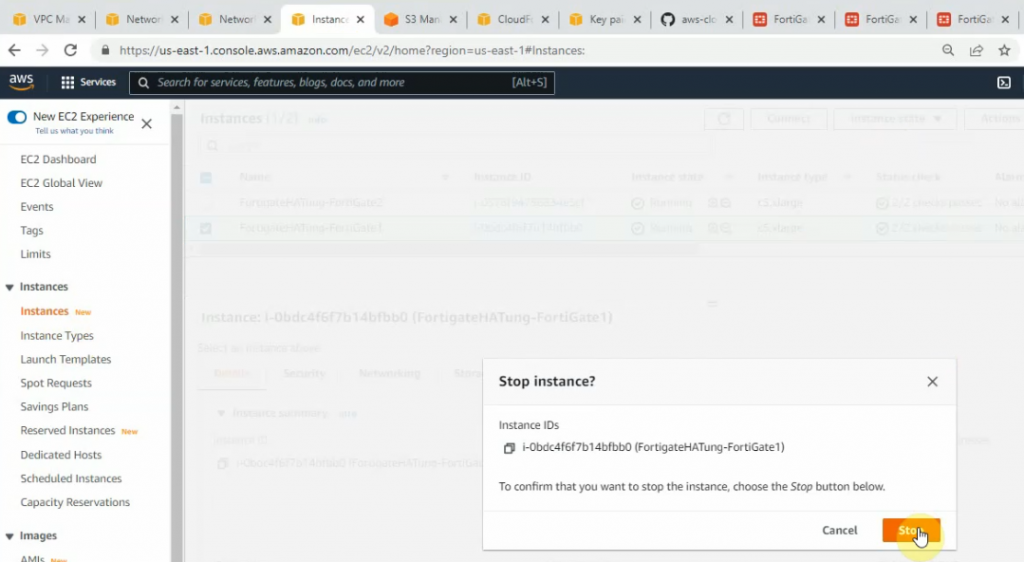
diagnose debug enableOn FG1, click instance state and stop the instance.
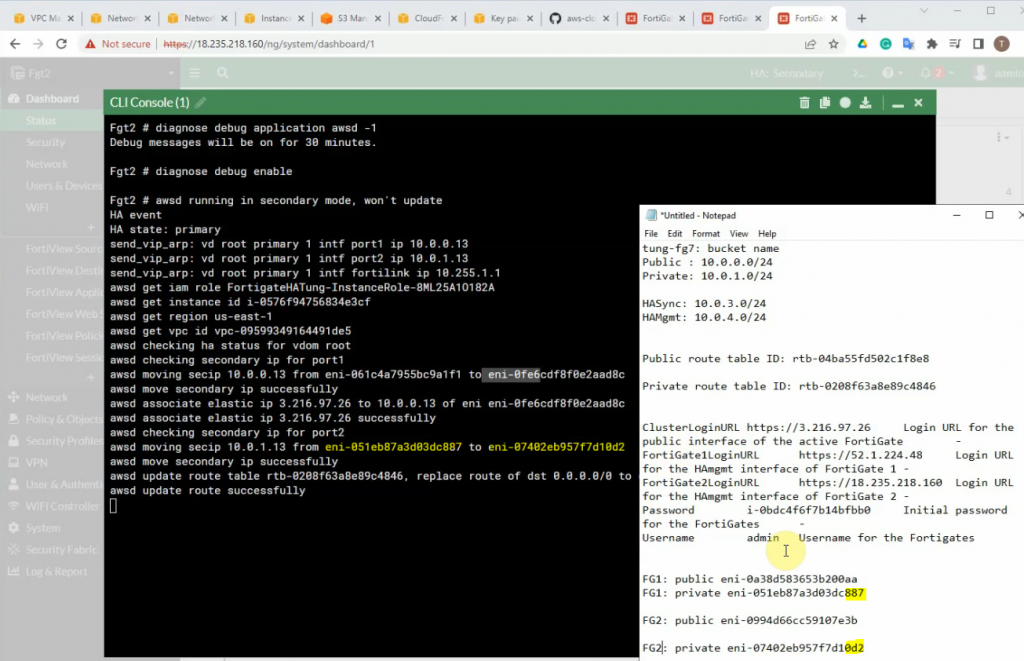
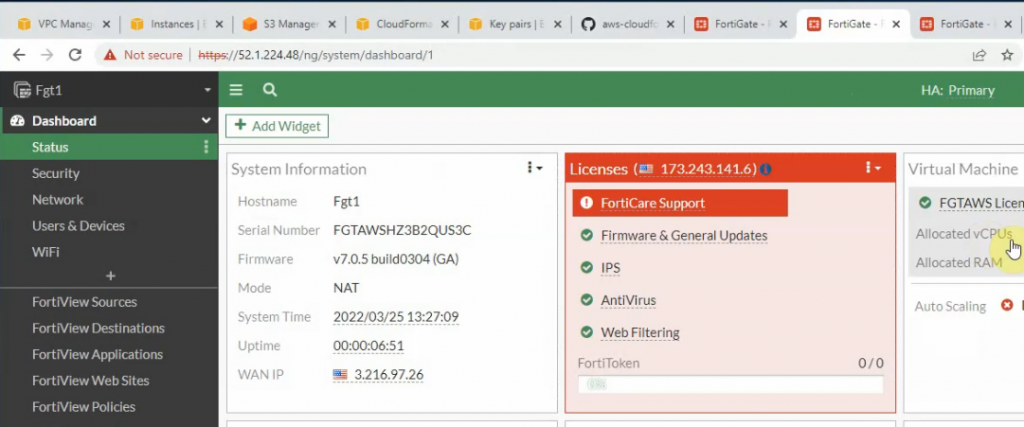
The Cluster IP address has been successfully moved to FG2.
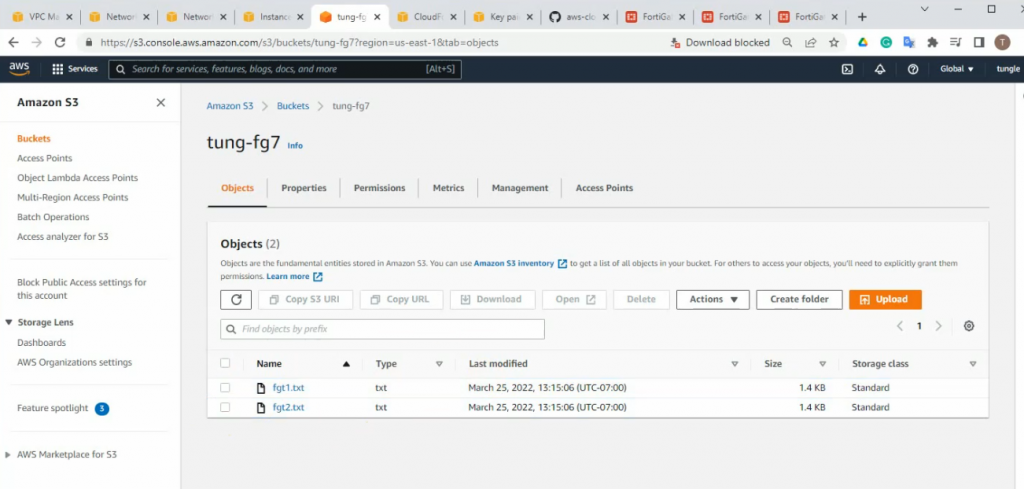
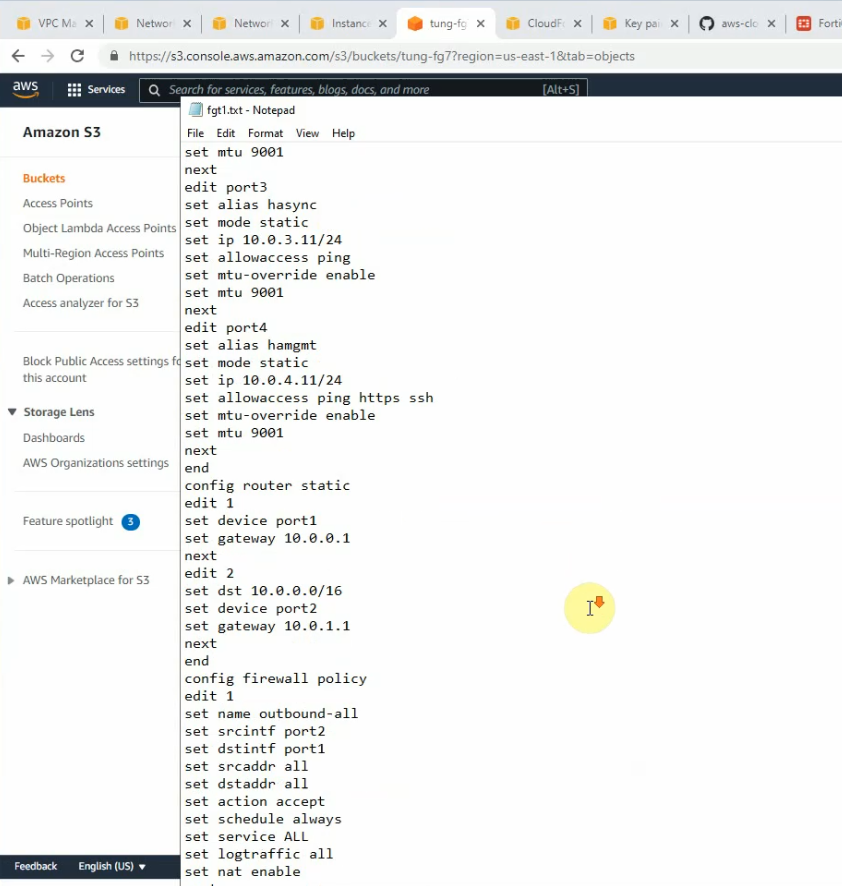
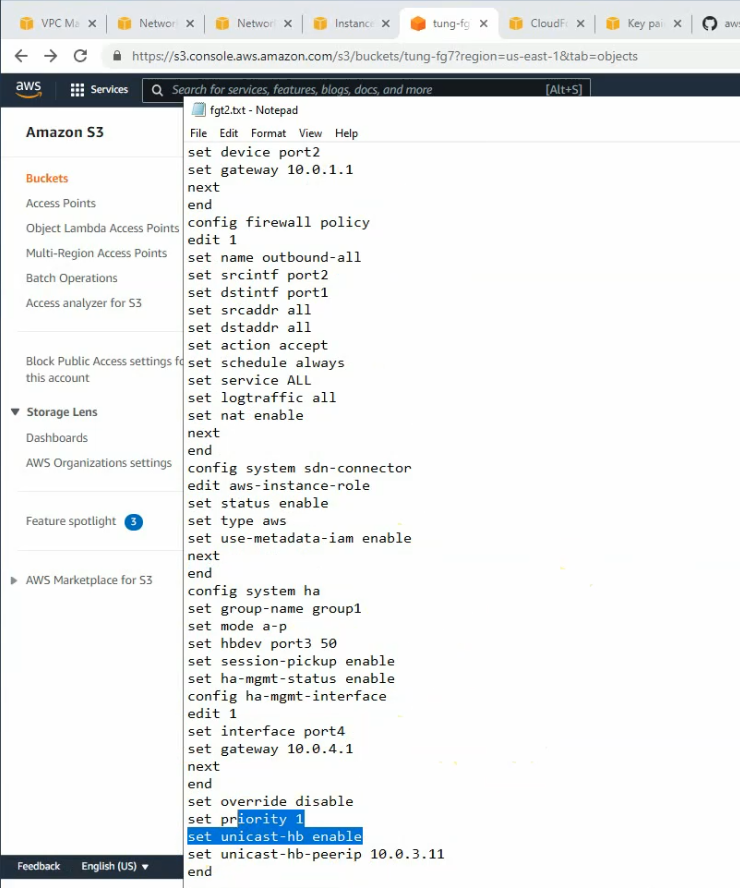
On S3 bucket, we can see there are two config files for FG1 and FG2 have been created when installing a stack.
It only supports unicast for a heartbeat on AWS.
Refresh the cluster IP management access.
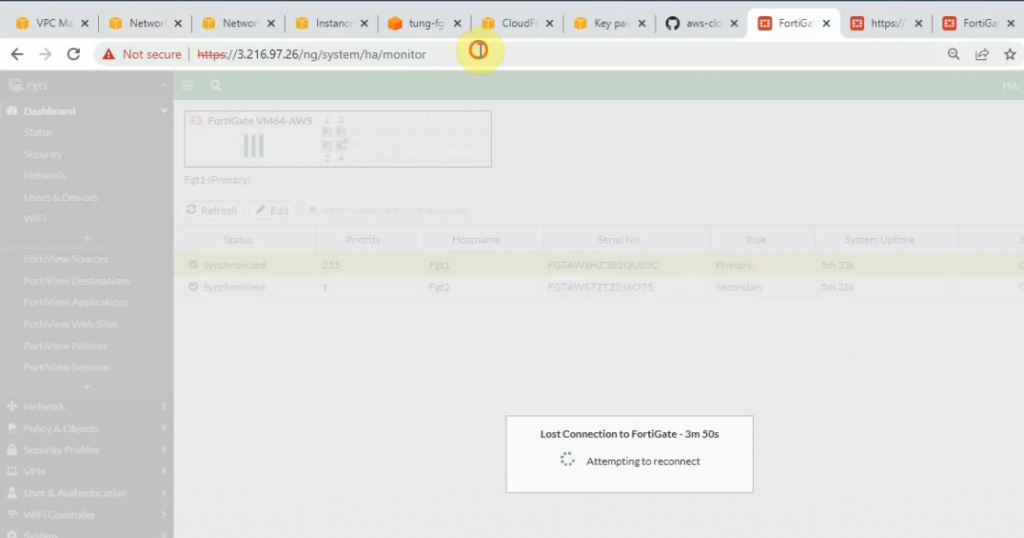
FG2 has become the Primary for HA.

The route has been updated to use a private network instance on FG2.
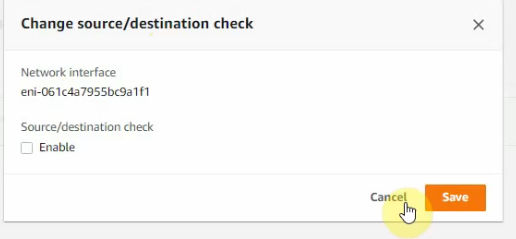
Also, we can see all interfaces have been disabled for “Change source/destination check”.
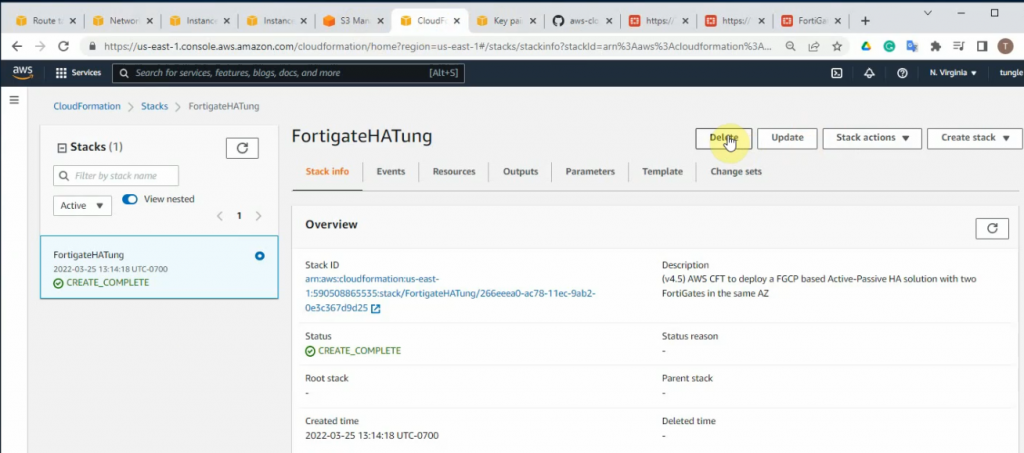
To terminate the lab, go to stack and delete the stack that has been created for the lab.